First, THANK YOU and congratulations on purchasing our presets! We’ve put an incredible amount of time and effort in to these, and we hope that you absolutely love them!
*Steps may vary between iOS and Android devices. If you have any questions or problems throughout the process, email us at presets@smilkoslens.com or send us a DM on Instagram at @smikos.lens.presets.
FOR MOBILE PRESETS
STEP 1
*Before proceeding, make sure you have both Lightroom and Zip Extractor downloaded on your phone.
Lightroom for iOS: Click here
Lightroom for Android: Click here
Zip Extractor for iOS: Click here
Zip Extractor for Android: Click here
STEP 2
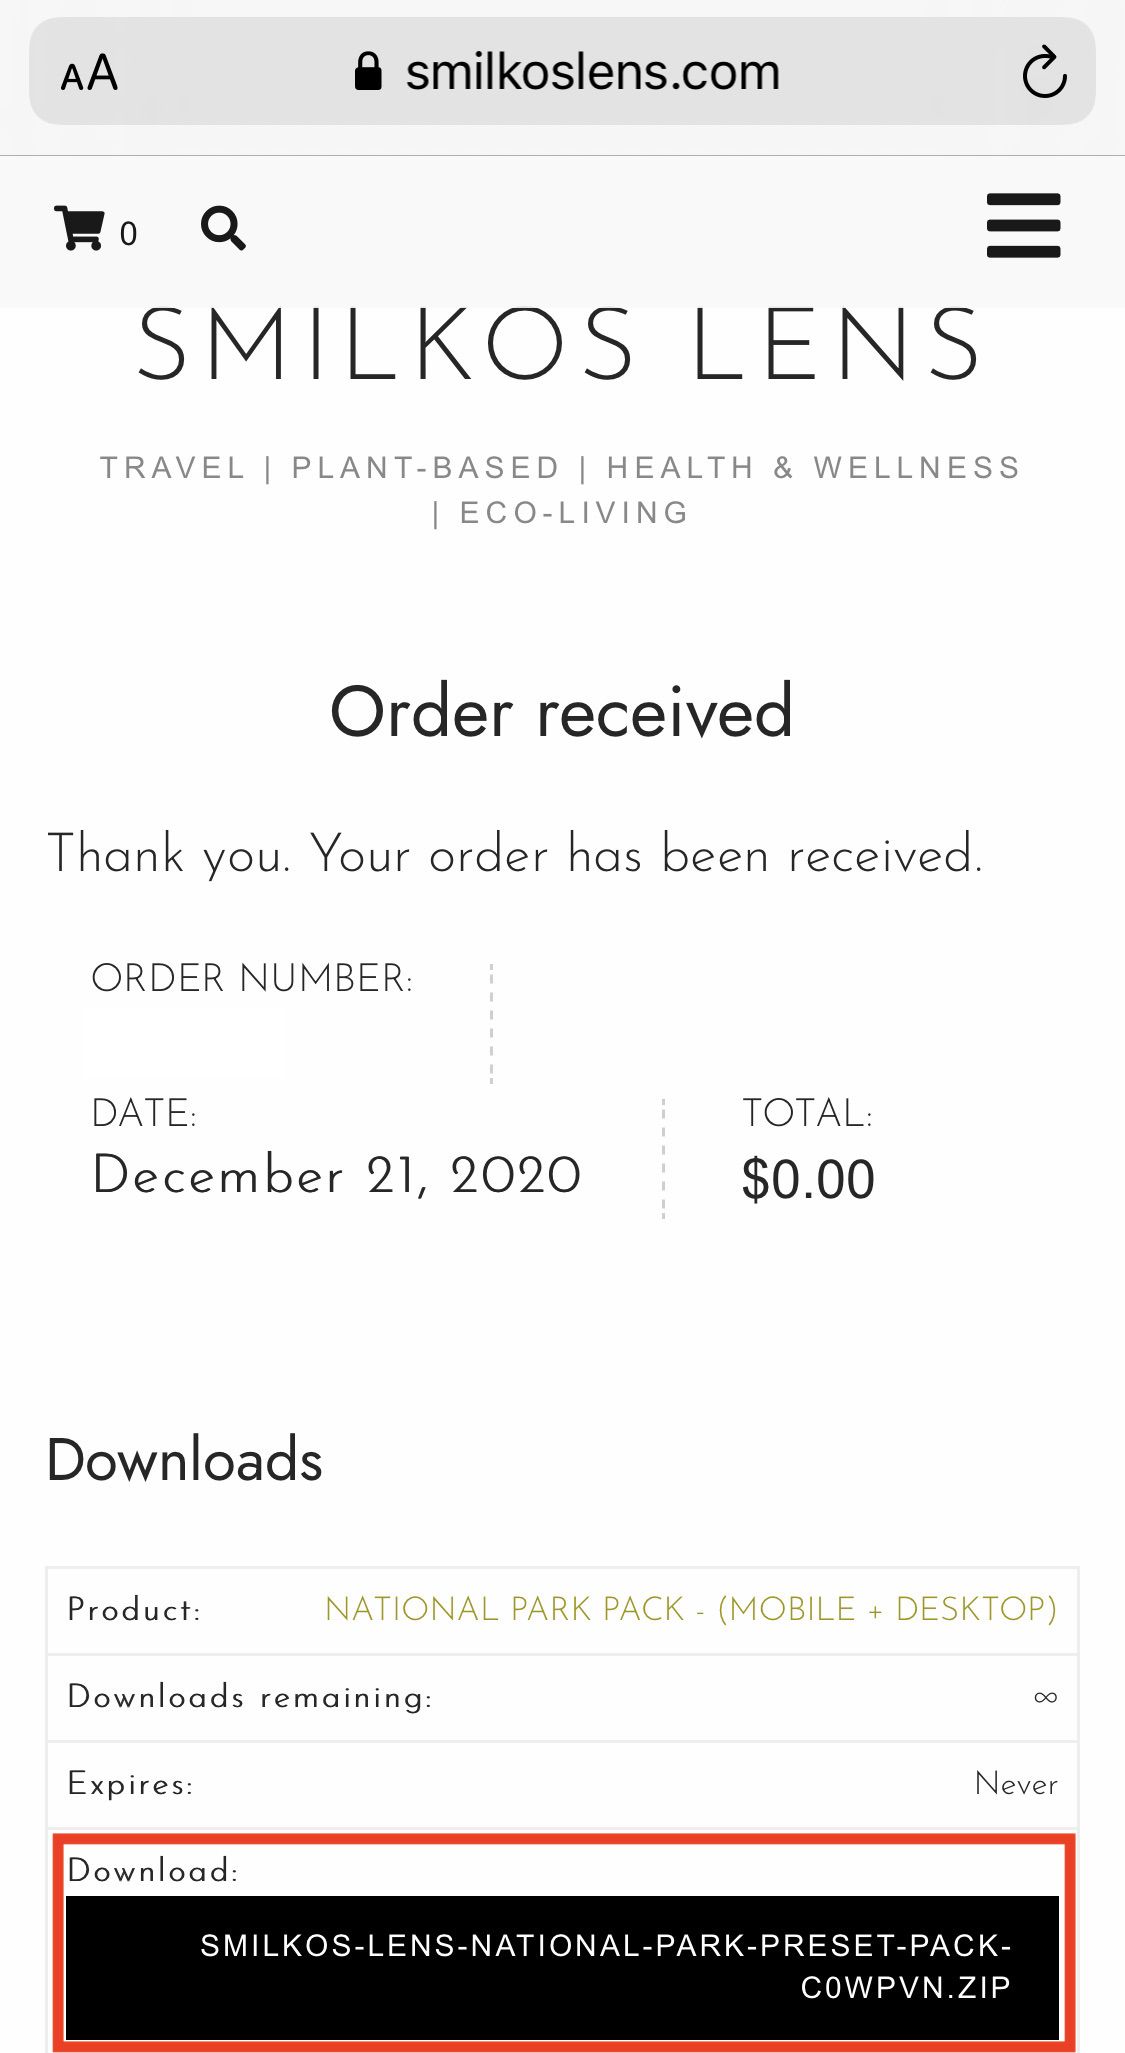
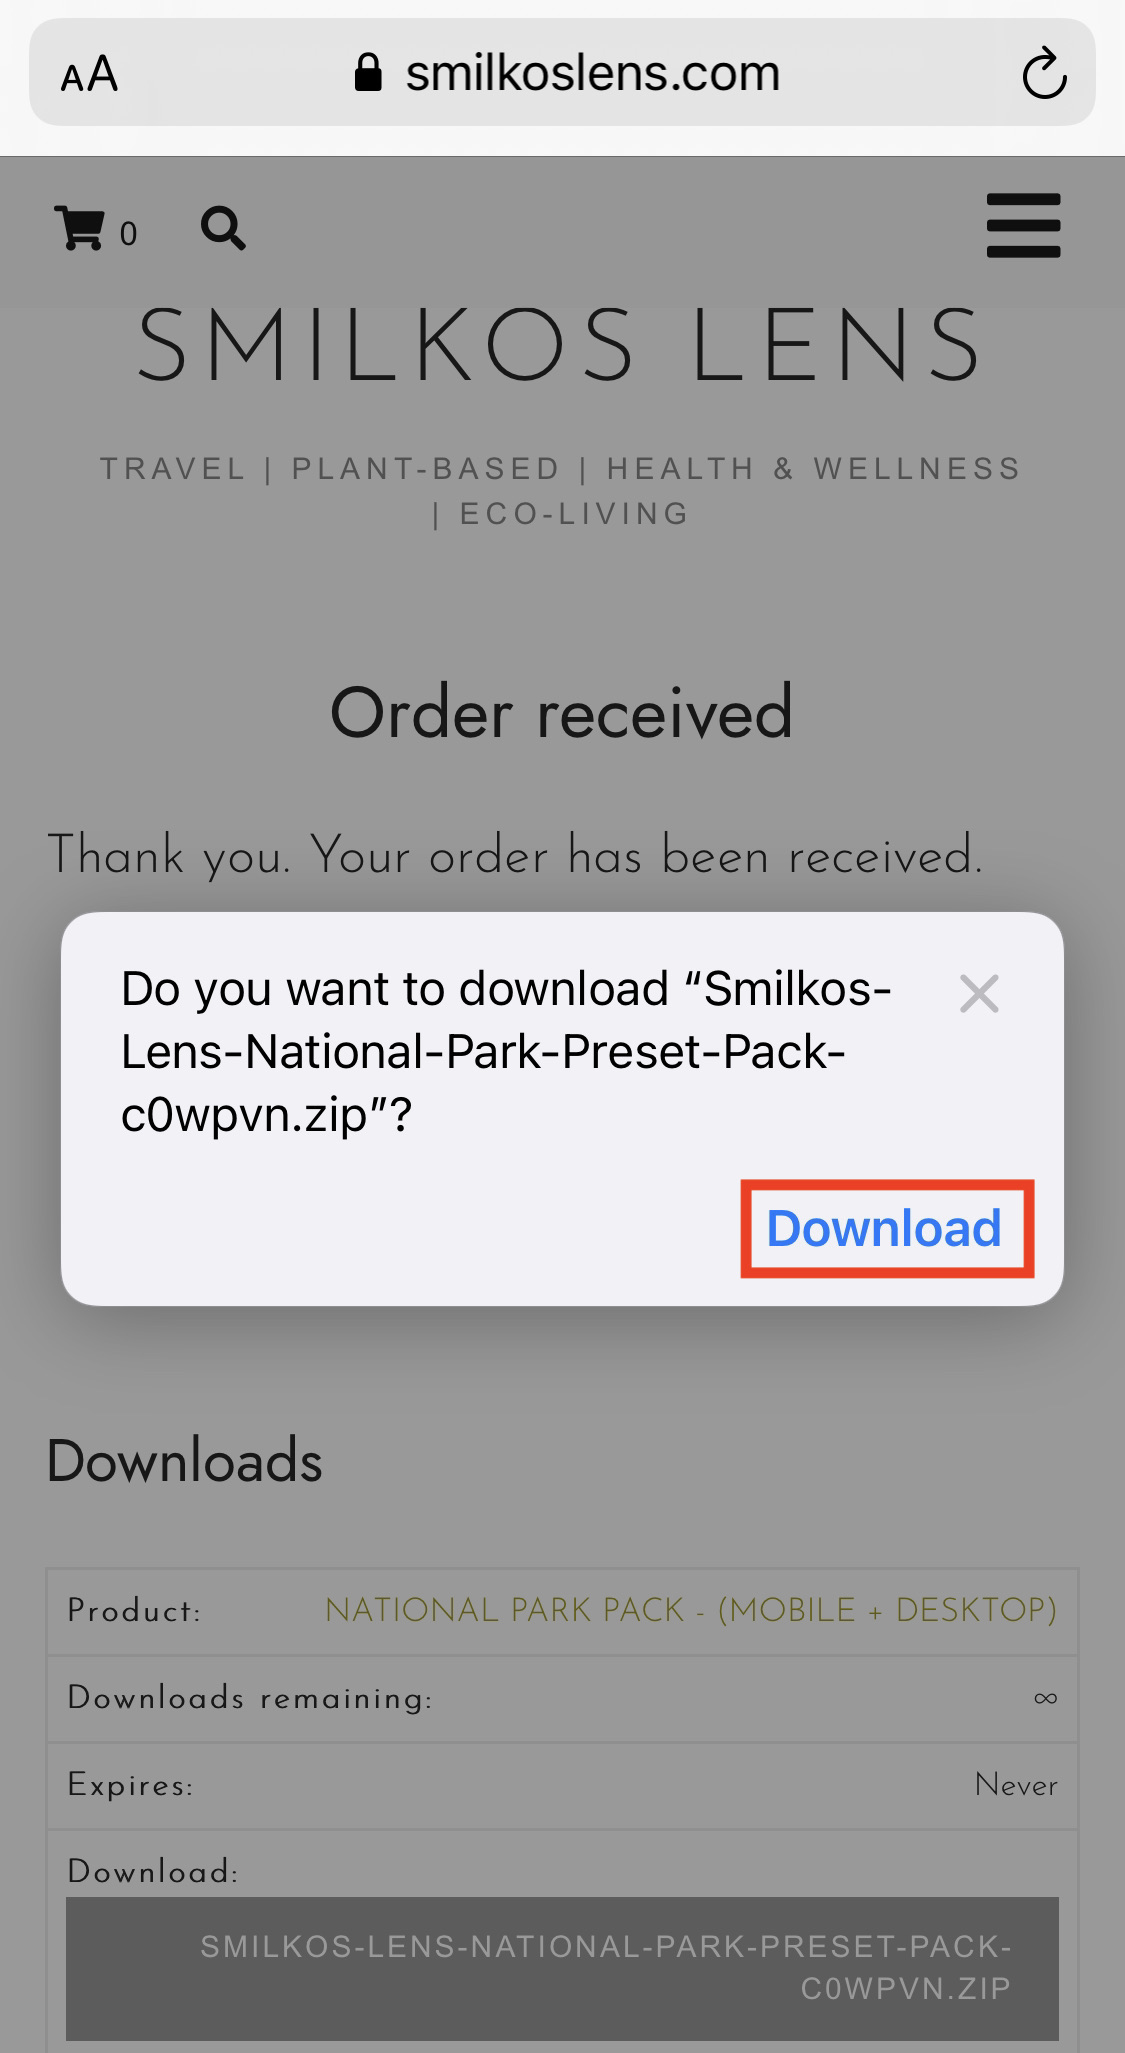
After completing payment, you will receive a confirmation page showing your invoice data, as well as a link to download your presets. If you accidentally close this window, don’t fret, you’ll also receive a link in an email confirmation as well.
STEP 3
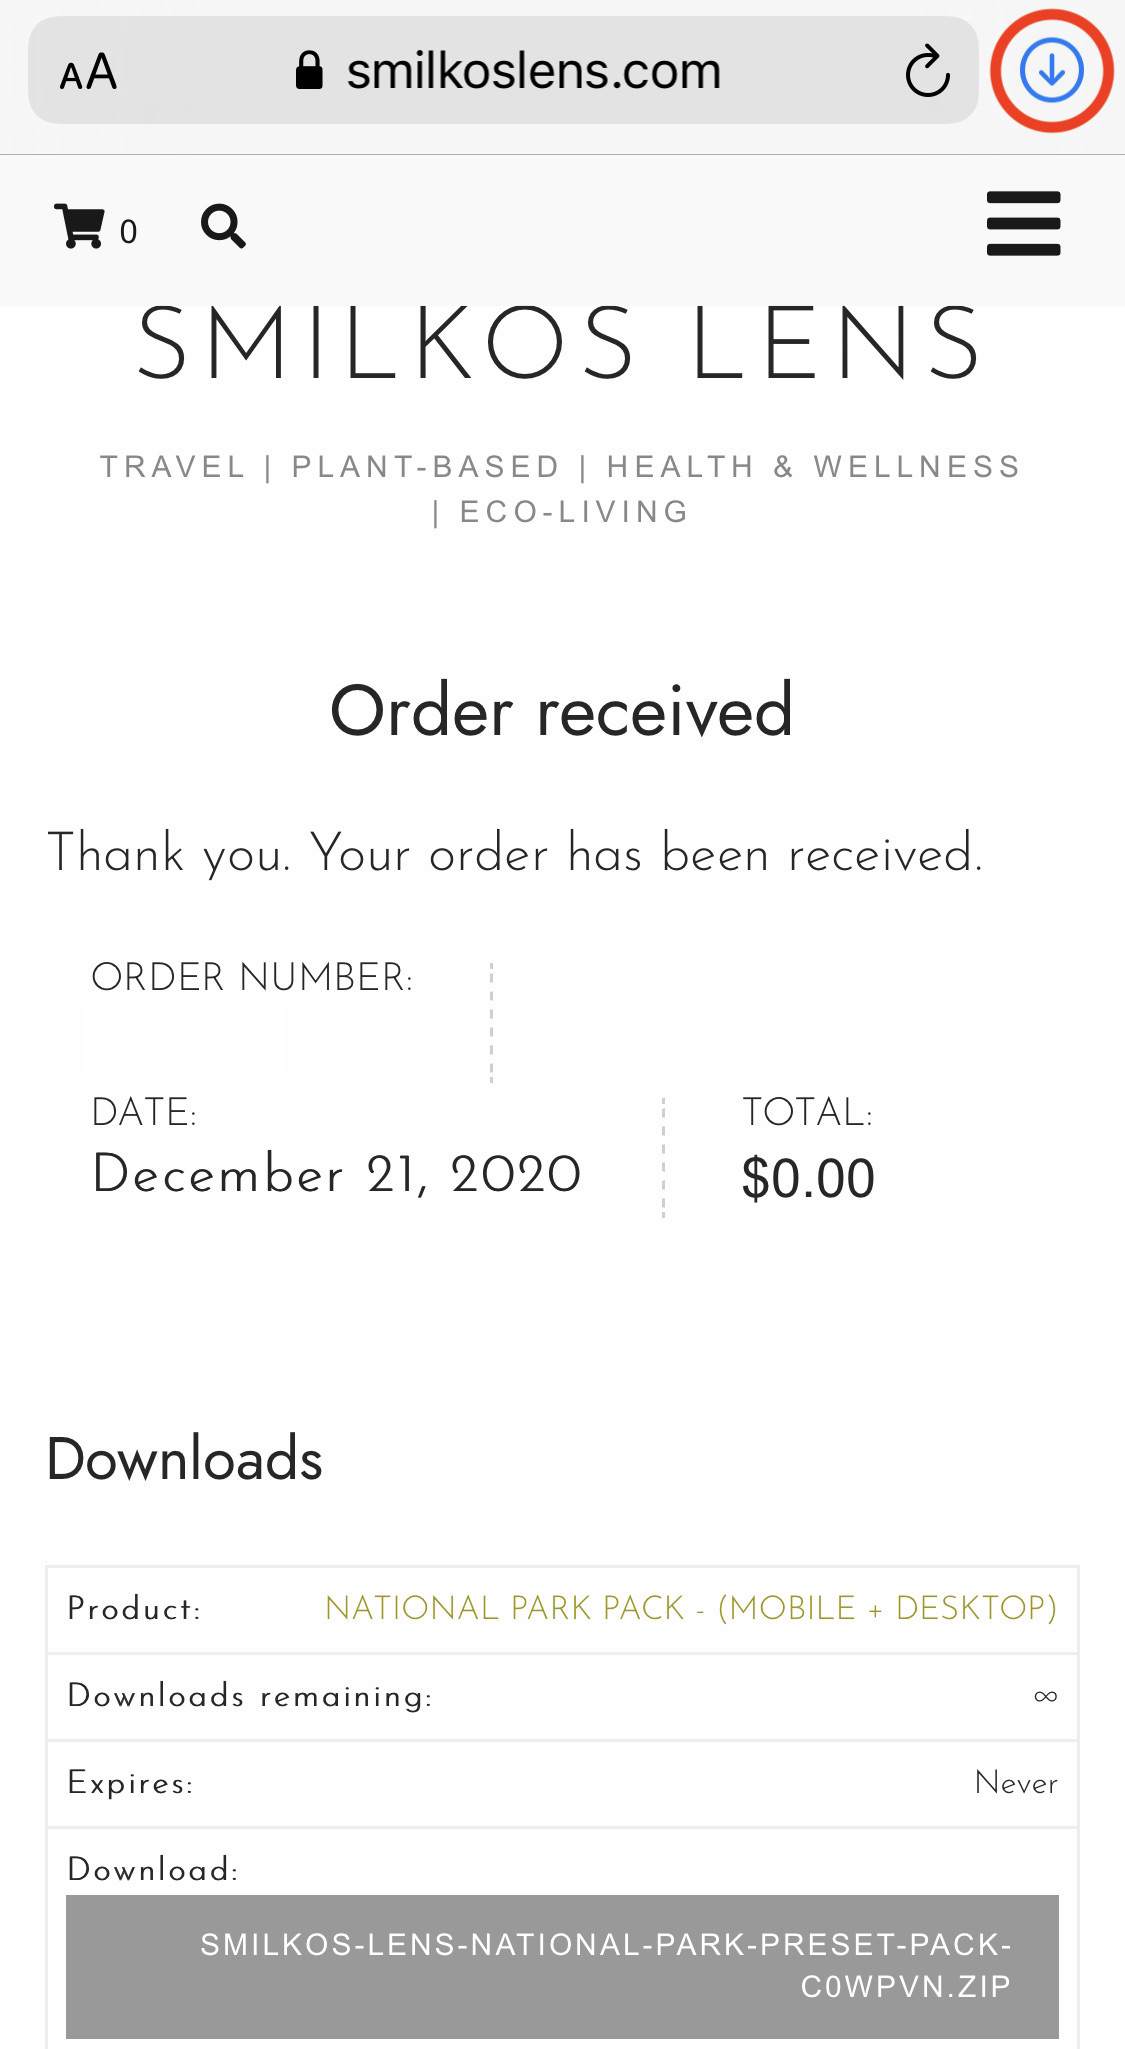
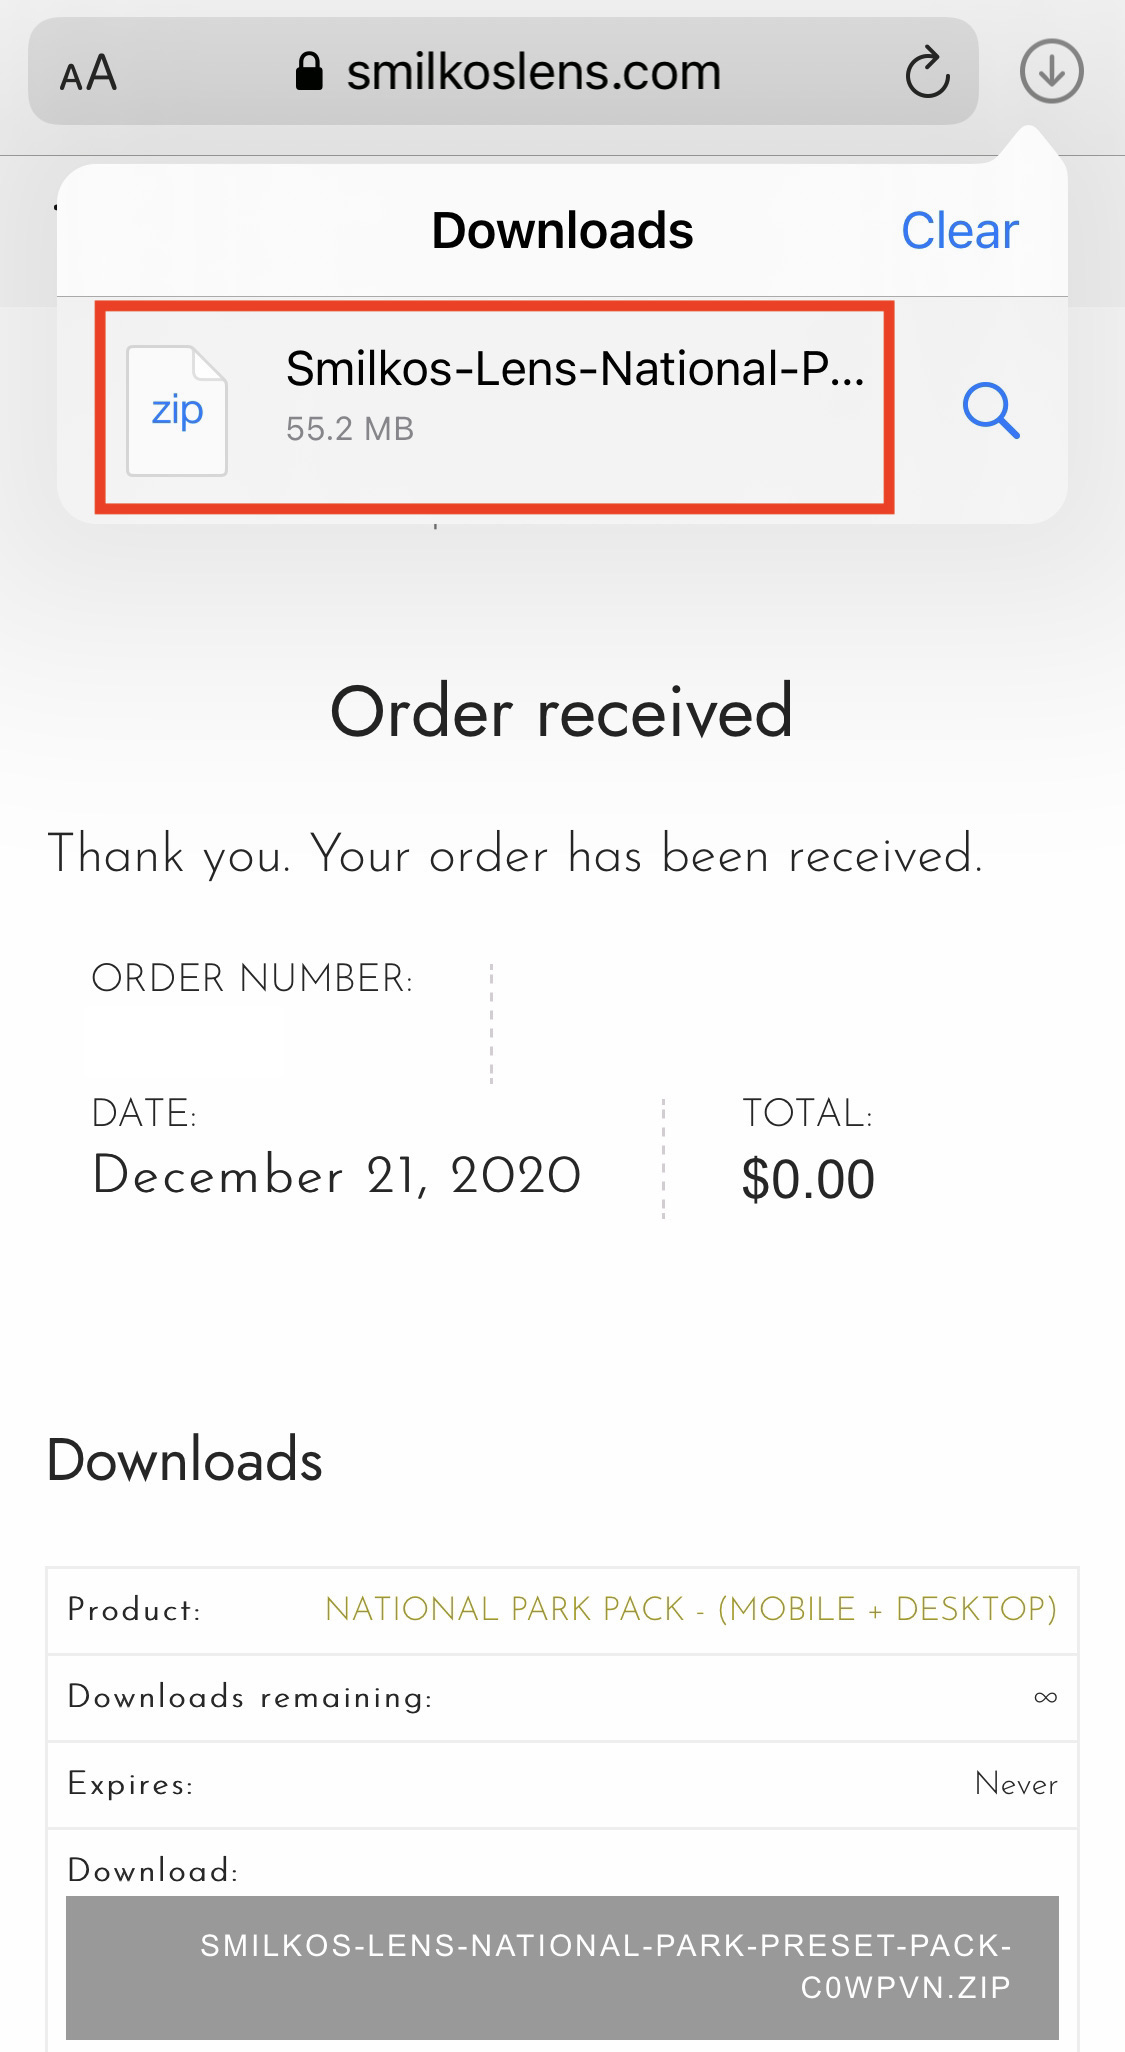
After the download has completed, tap on the download icon in the upper right hand corner of the web browser, and then on the zip link to access the files.

STEP 4
Now that you’ve downloaded the preset files, it’s time to upload them in to Lightroom for use!
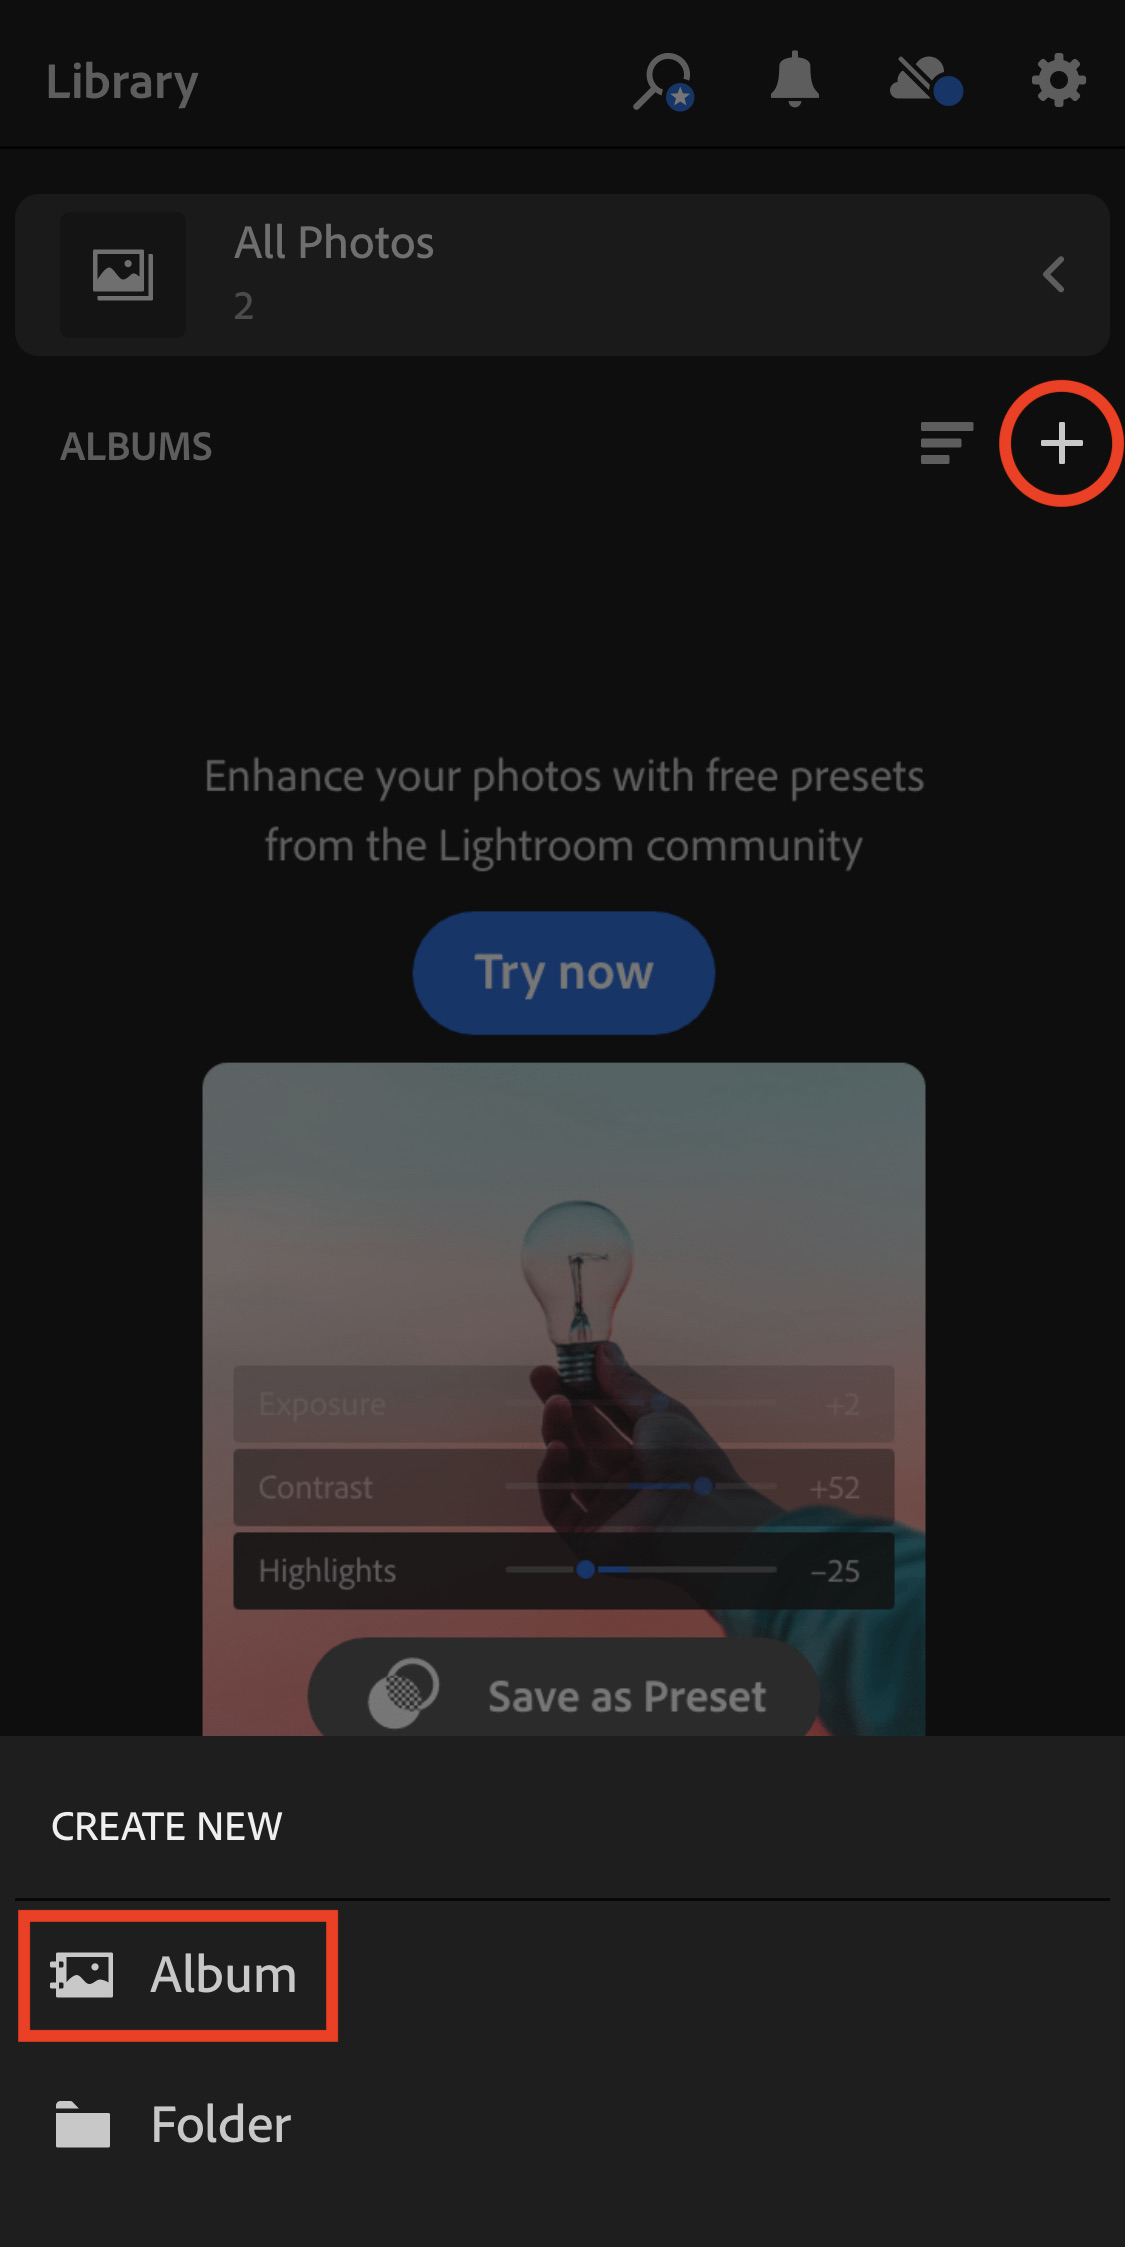
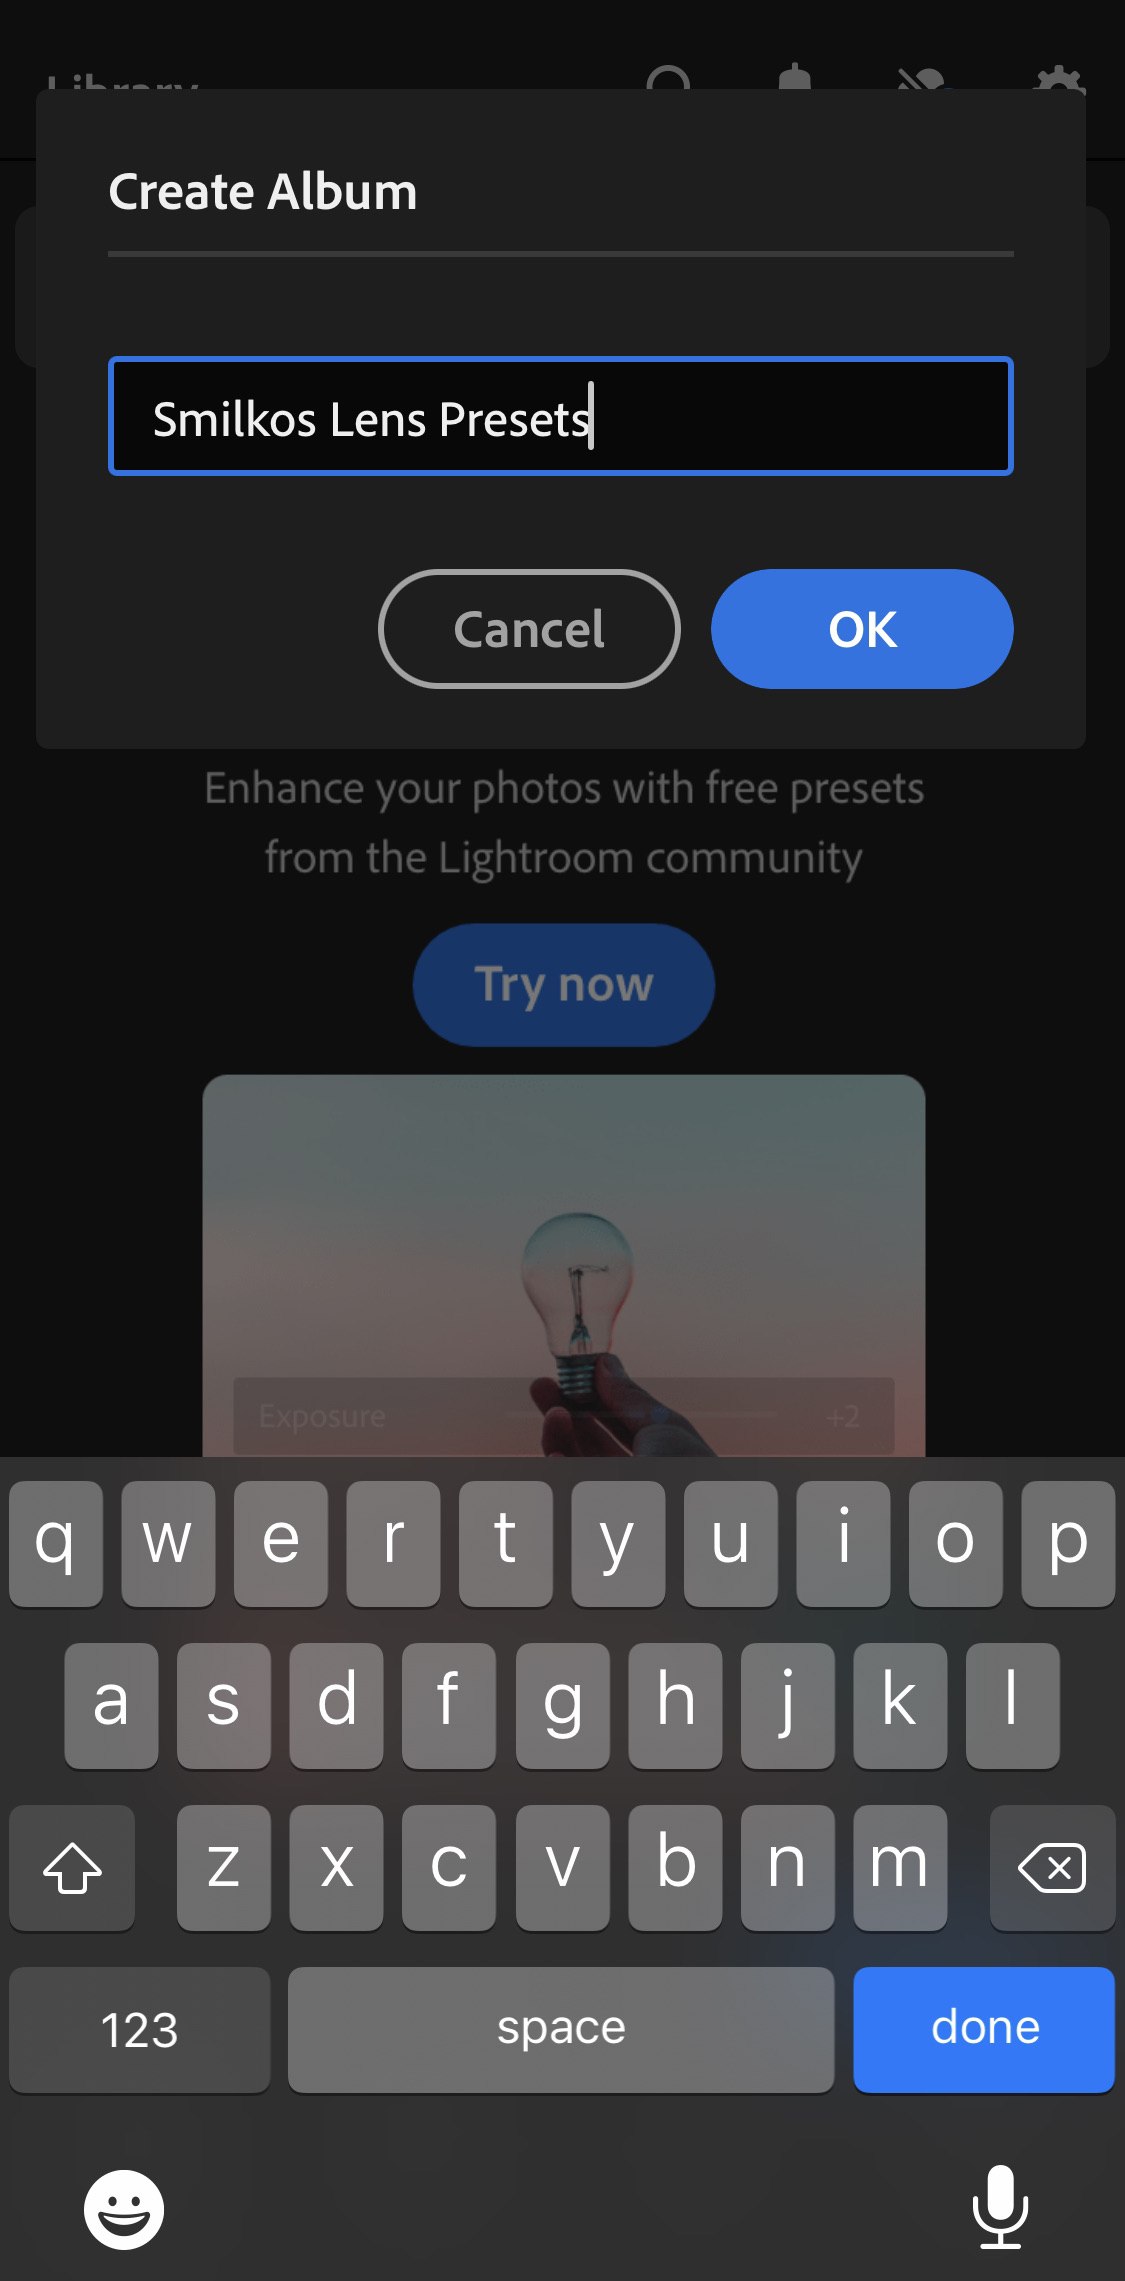
Go ahead and open Lightroom, and tap on the + in the upper right hand corner and select Album. Then give the album a name. The album will be for the presets, so we suggest naming it in a way that will make it quick and easy to find.
STEP 5
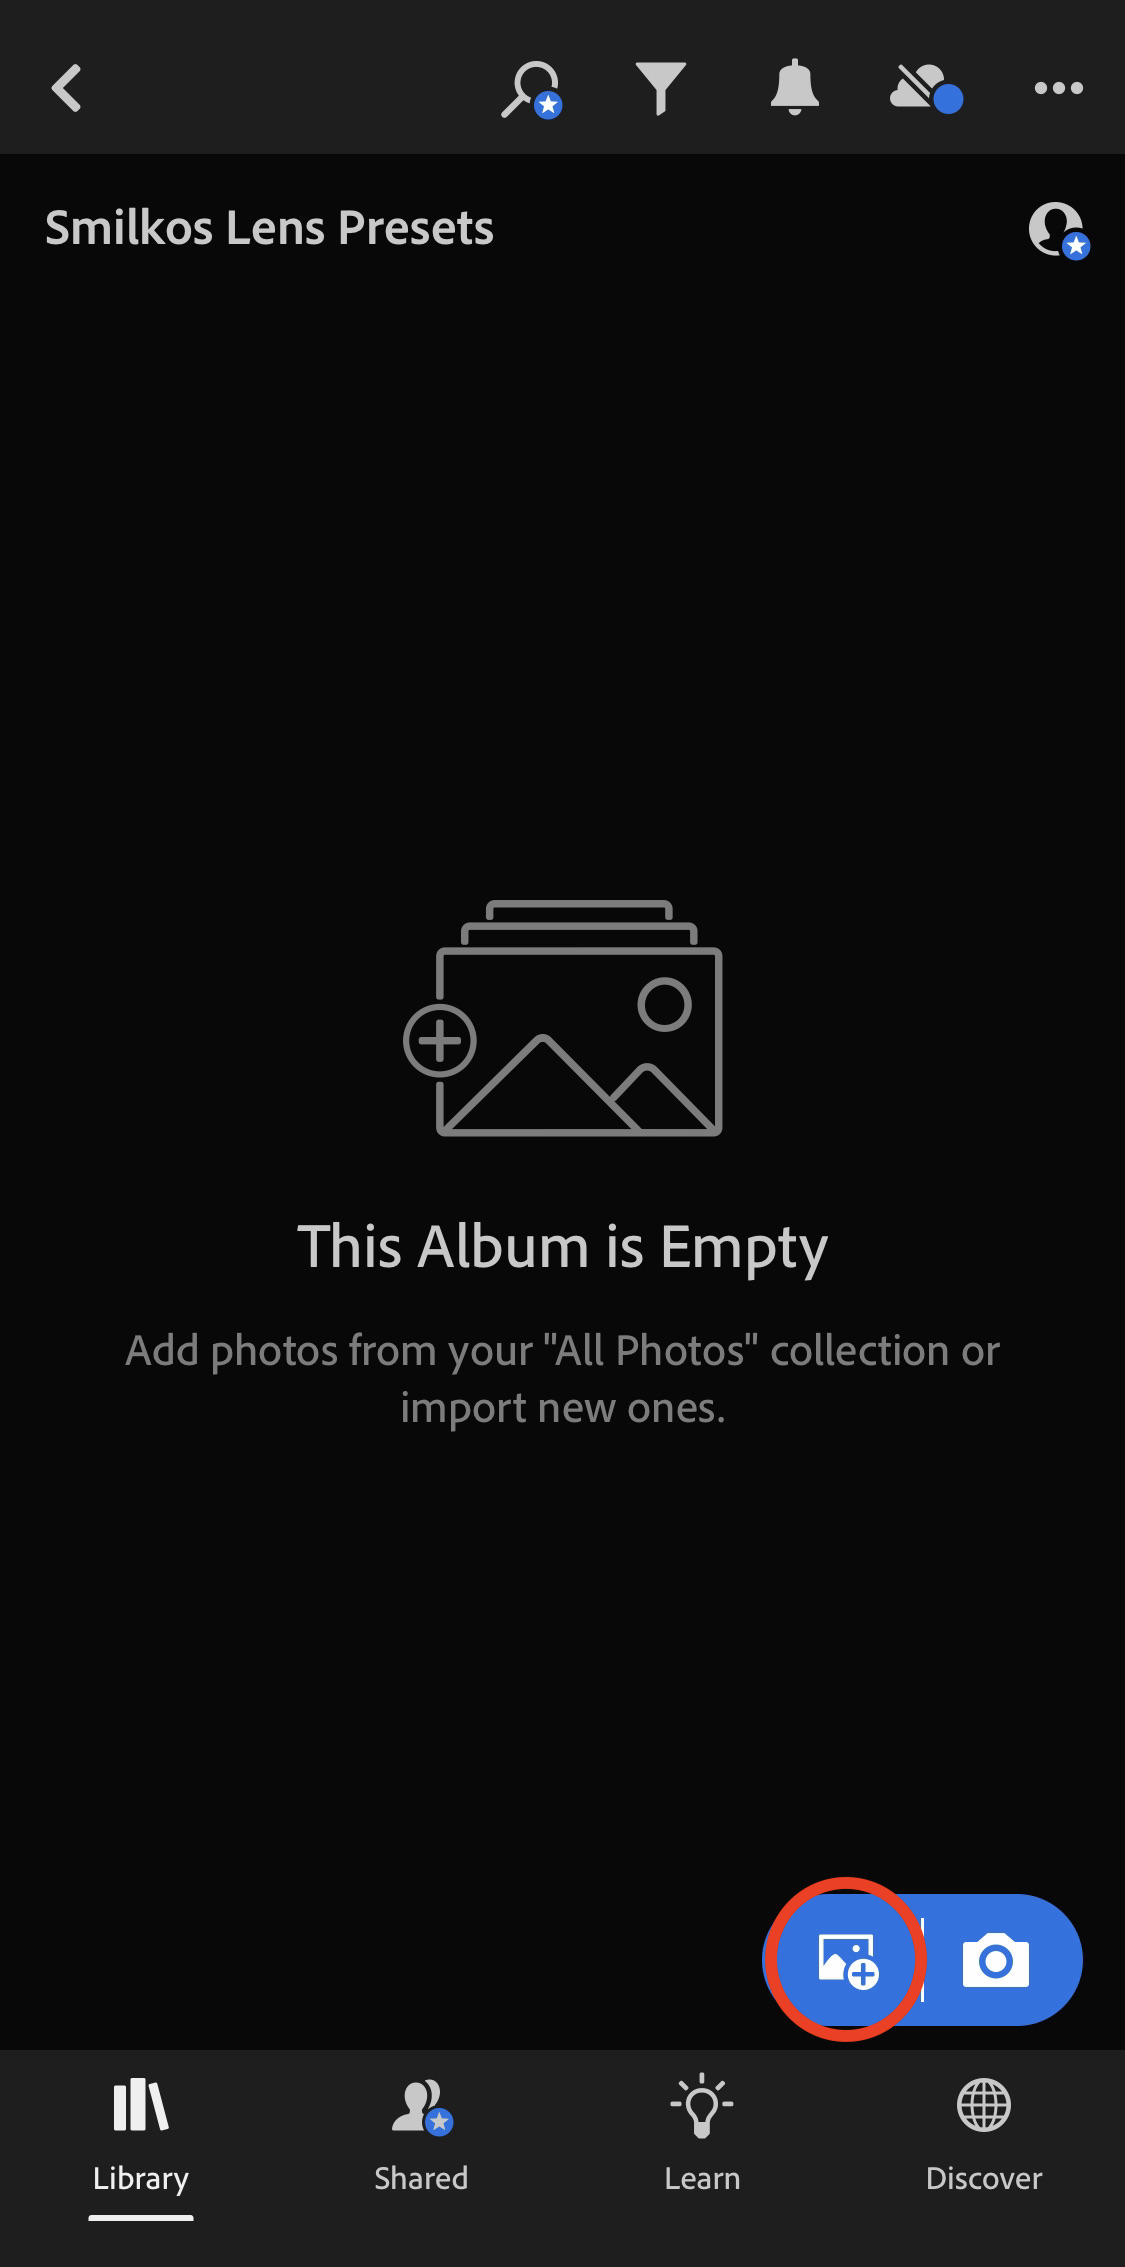
Now tap on the “add photo” button in the bottom right corner to add all of the new preset photos you just downloaded.
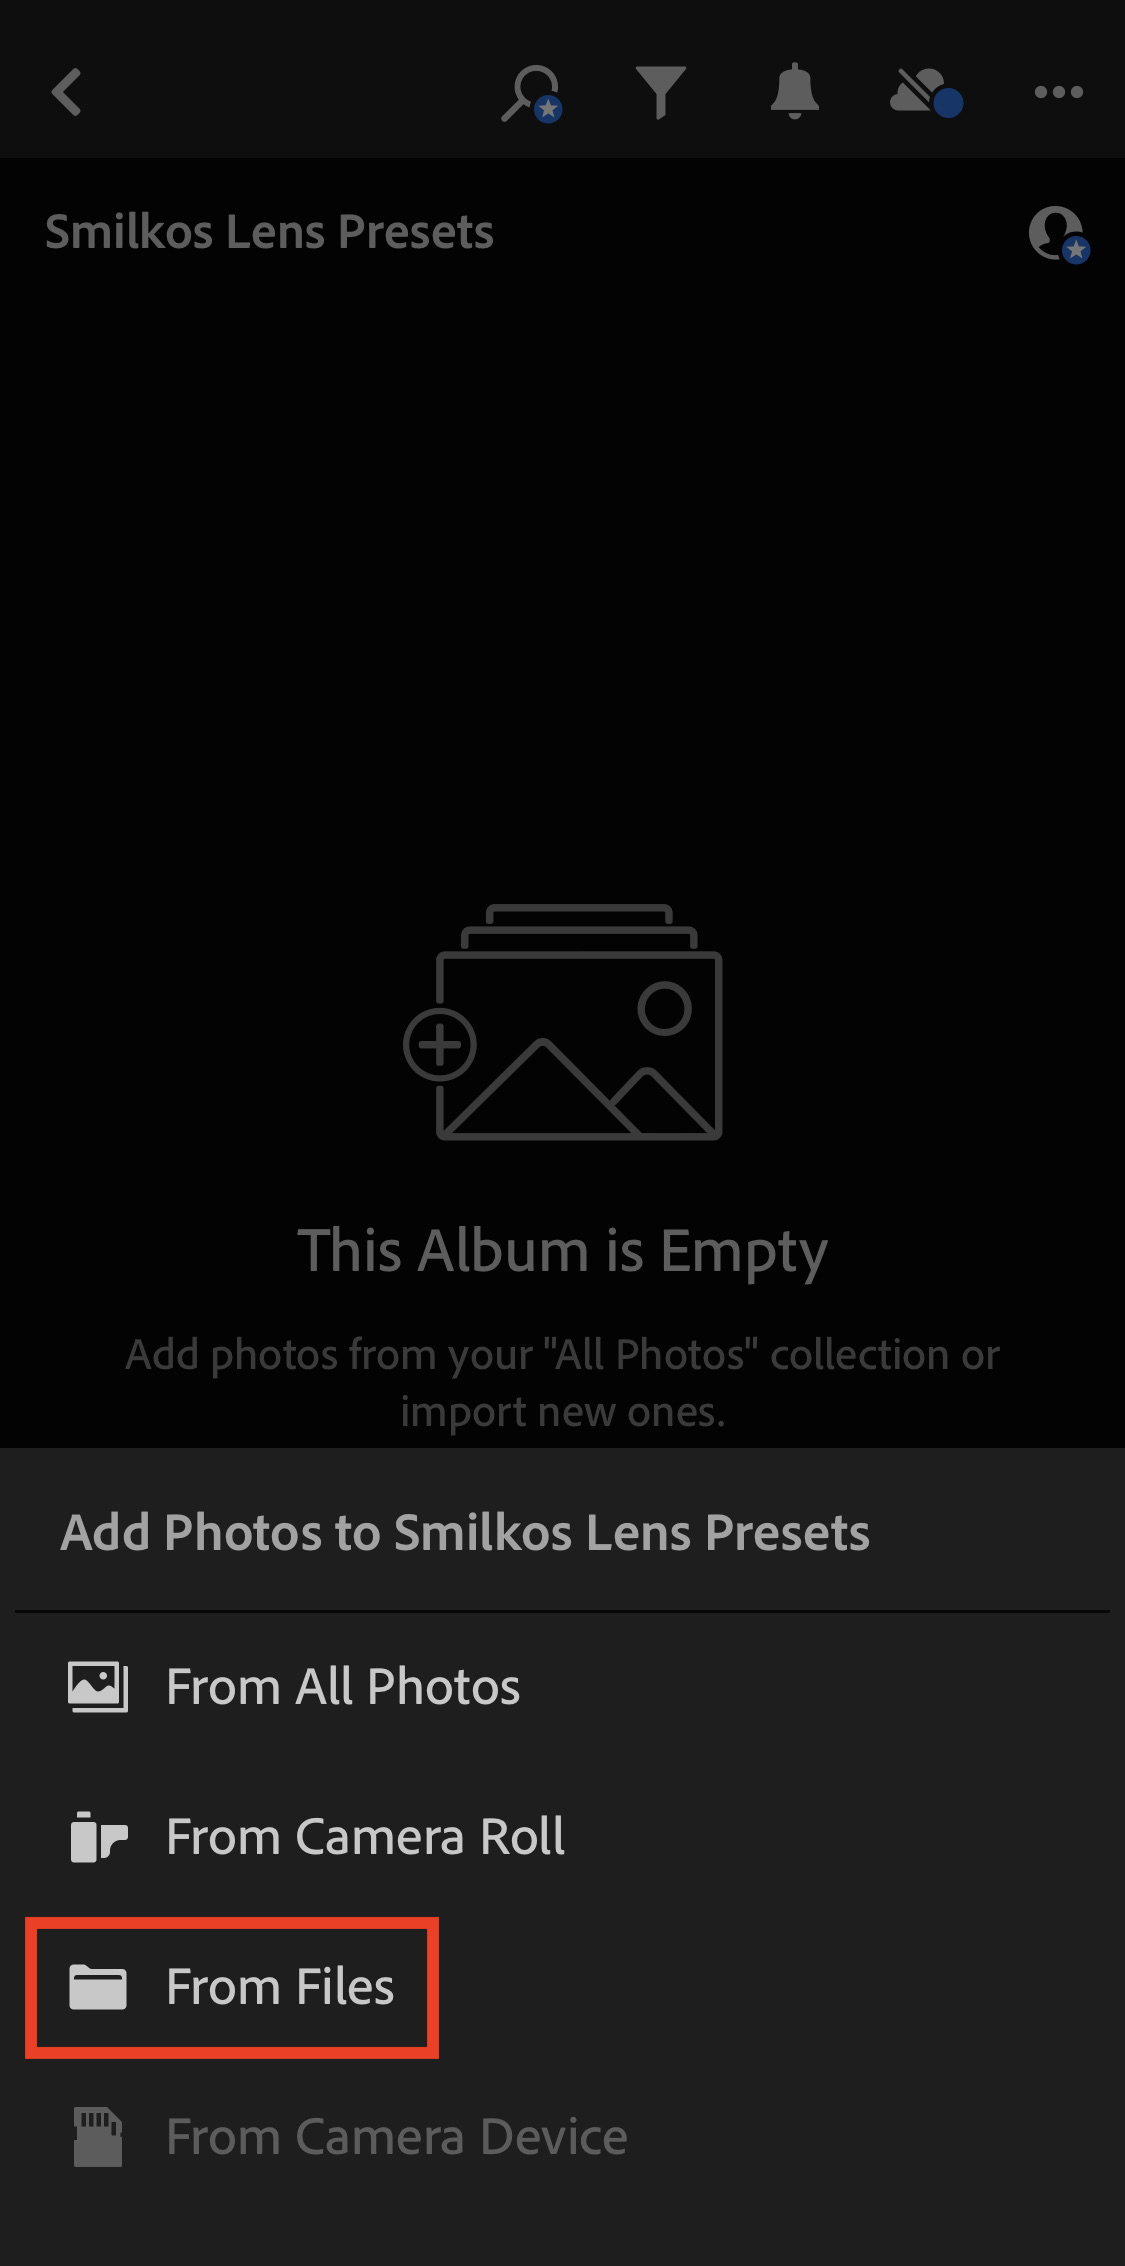
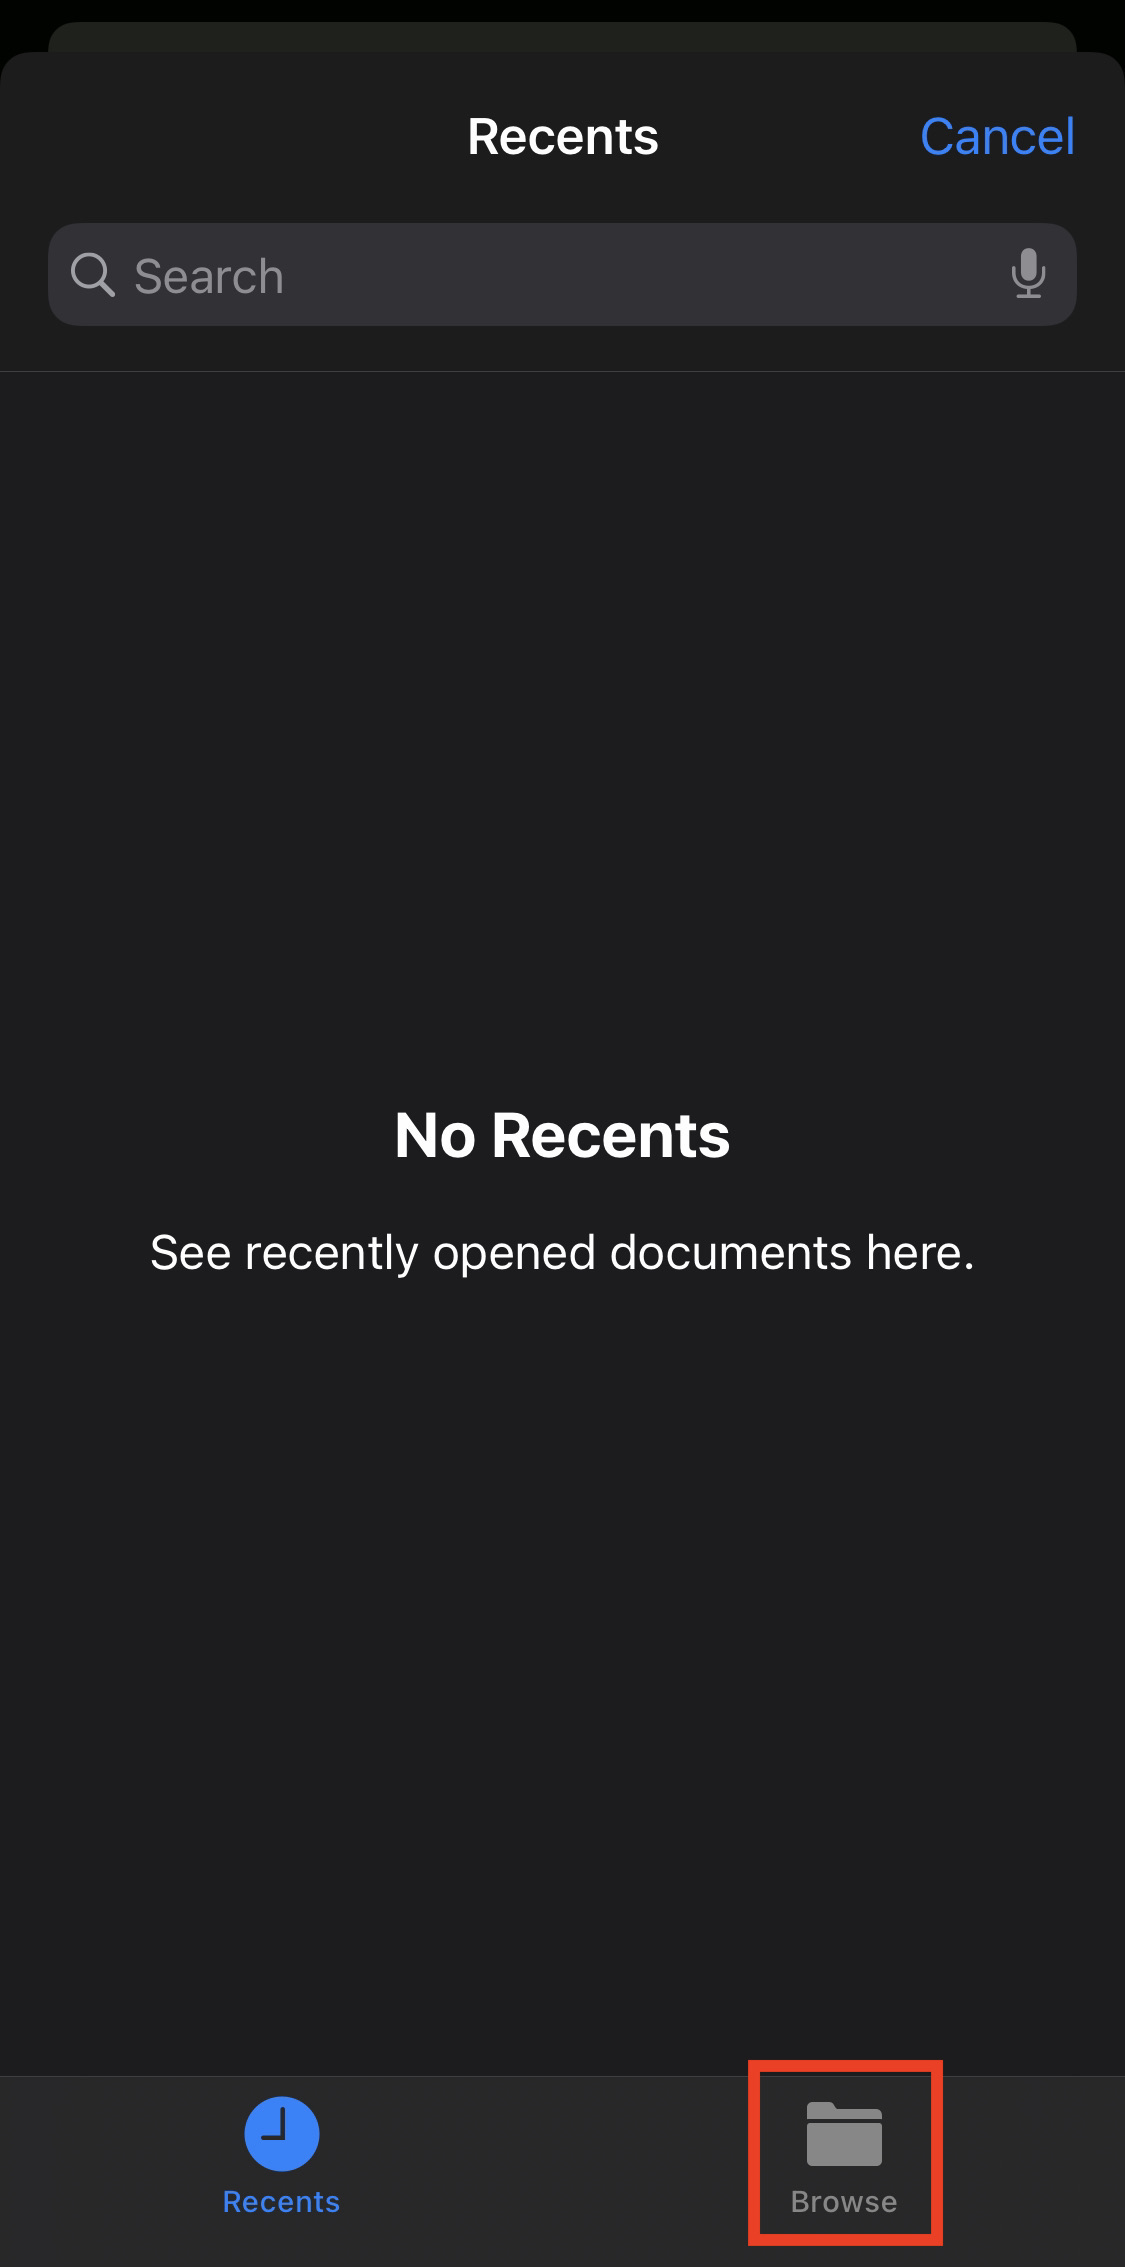
Select “From Files” from the options, and then select “Browse”
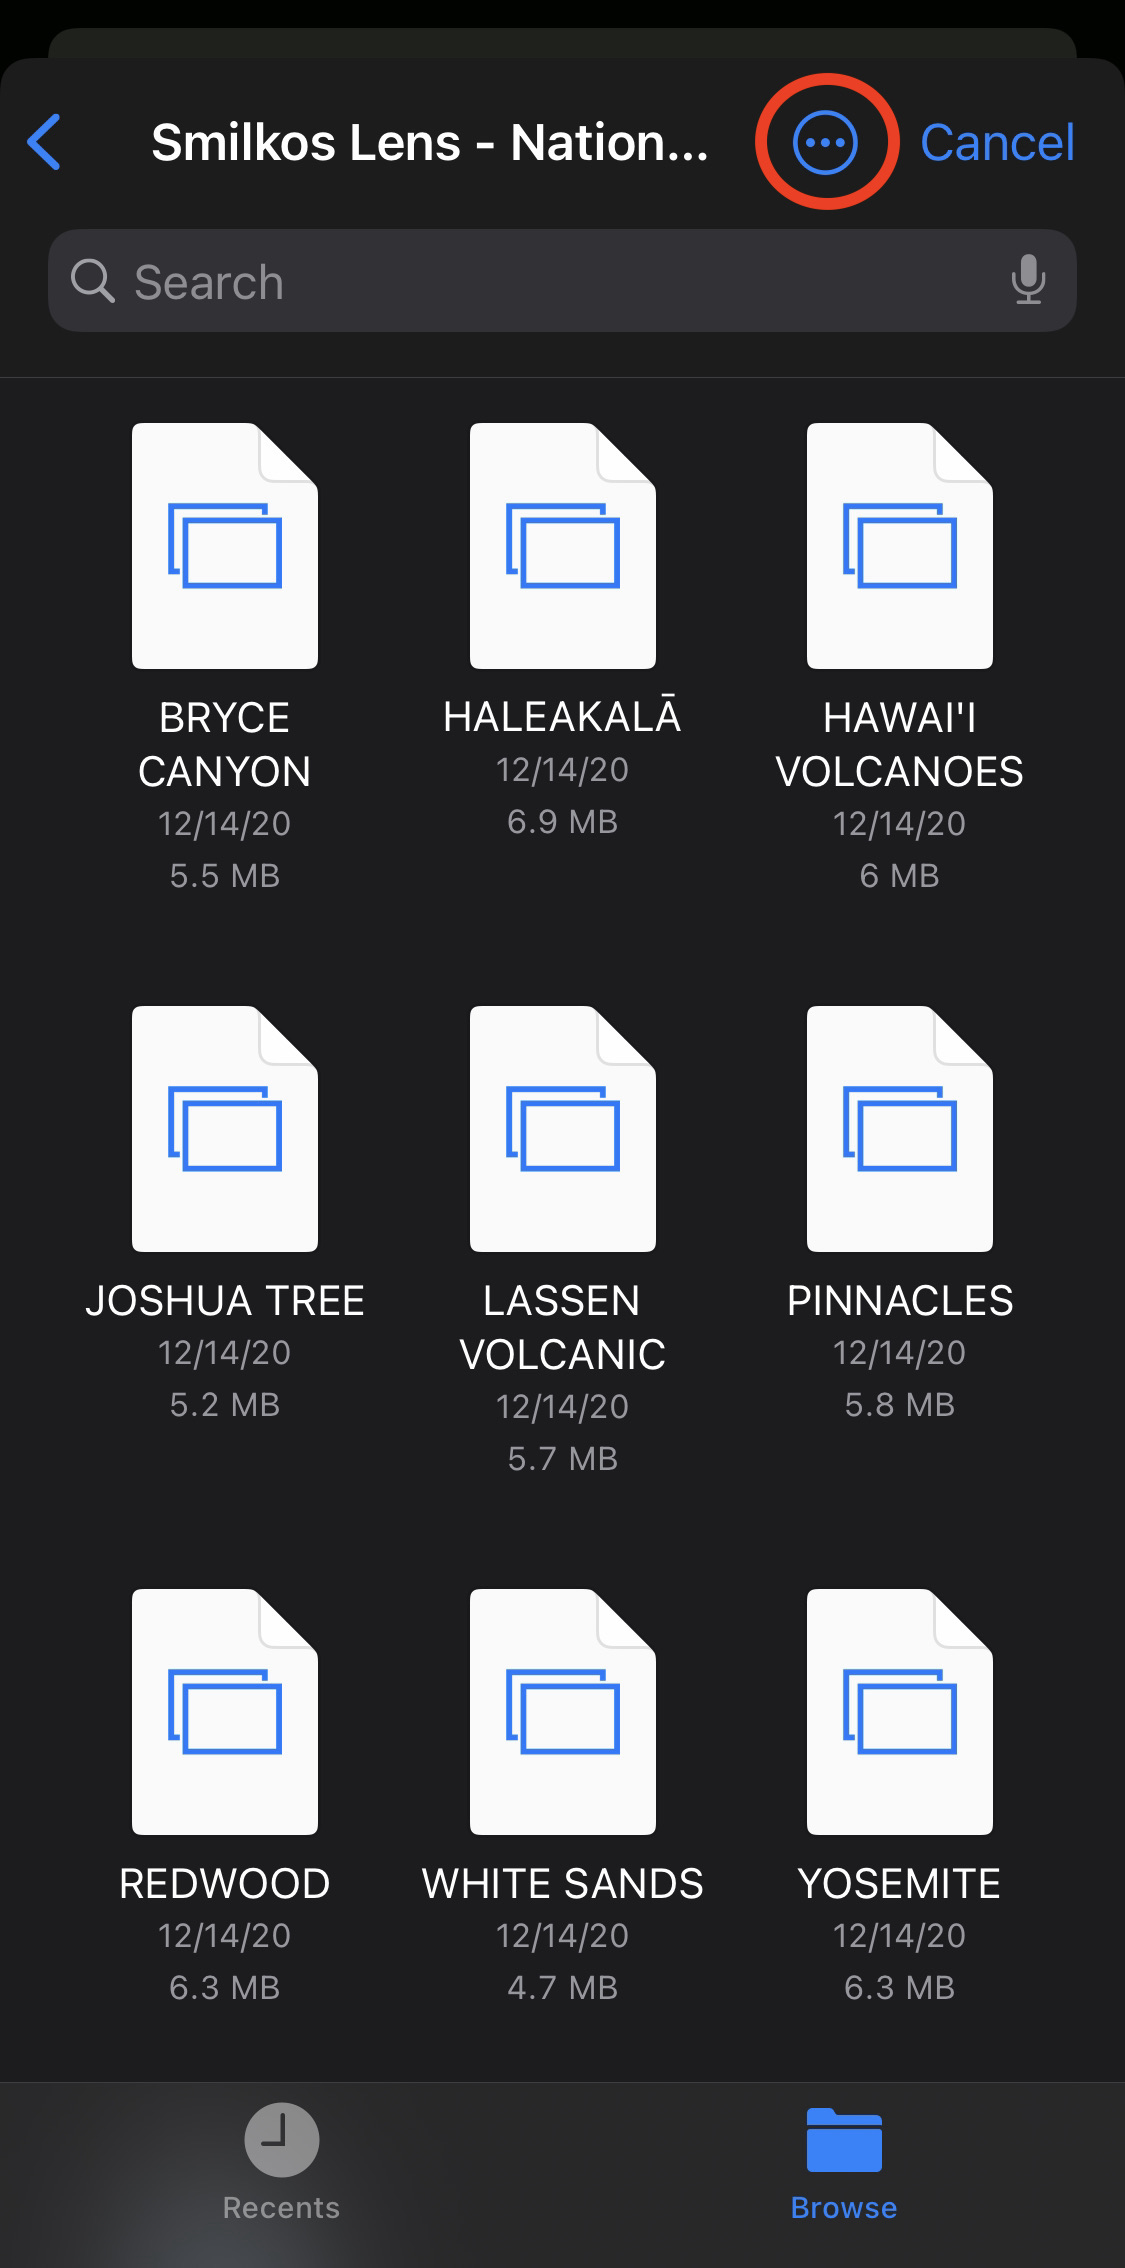
Now tap on the “Downloads” folder.

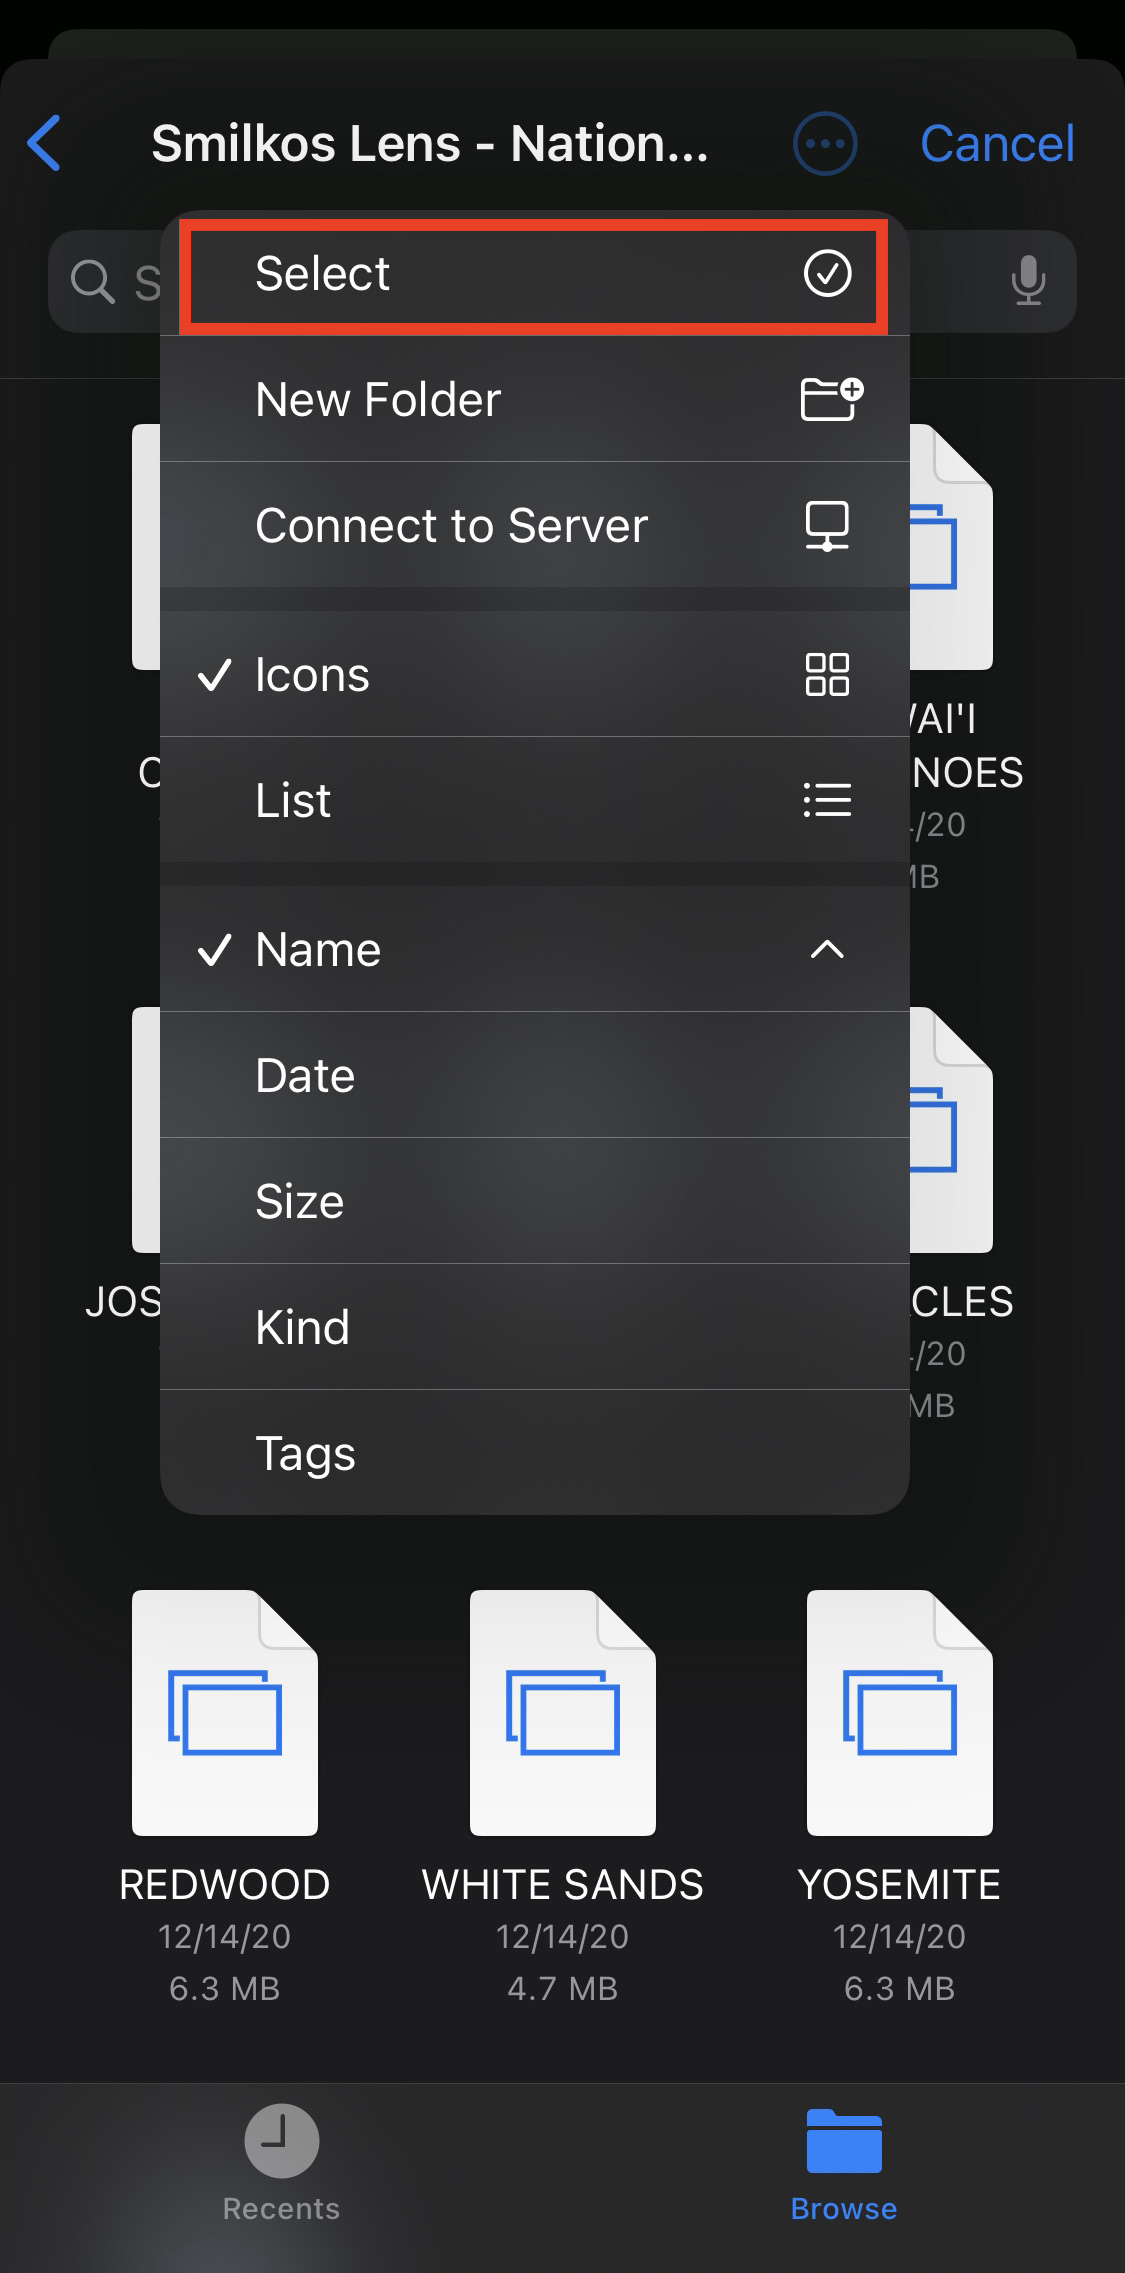
You’ll now see all of the individual preset files. Tap on the (•••) in the upper right corner, and tap on “Select”.
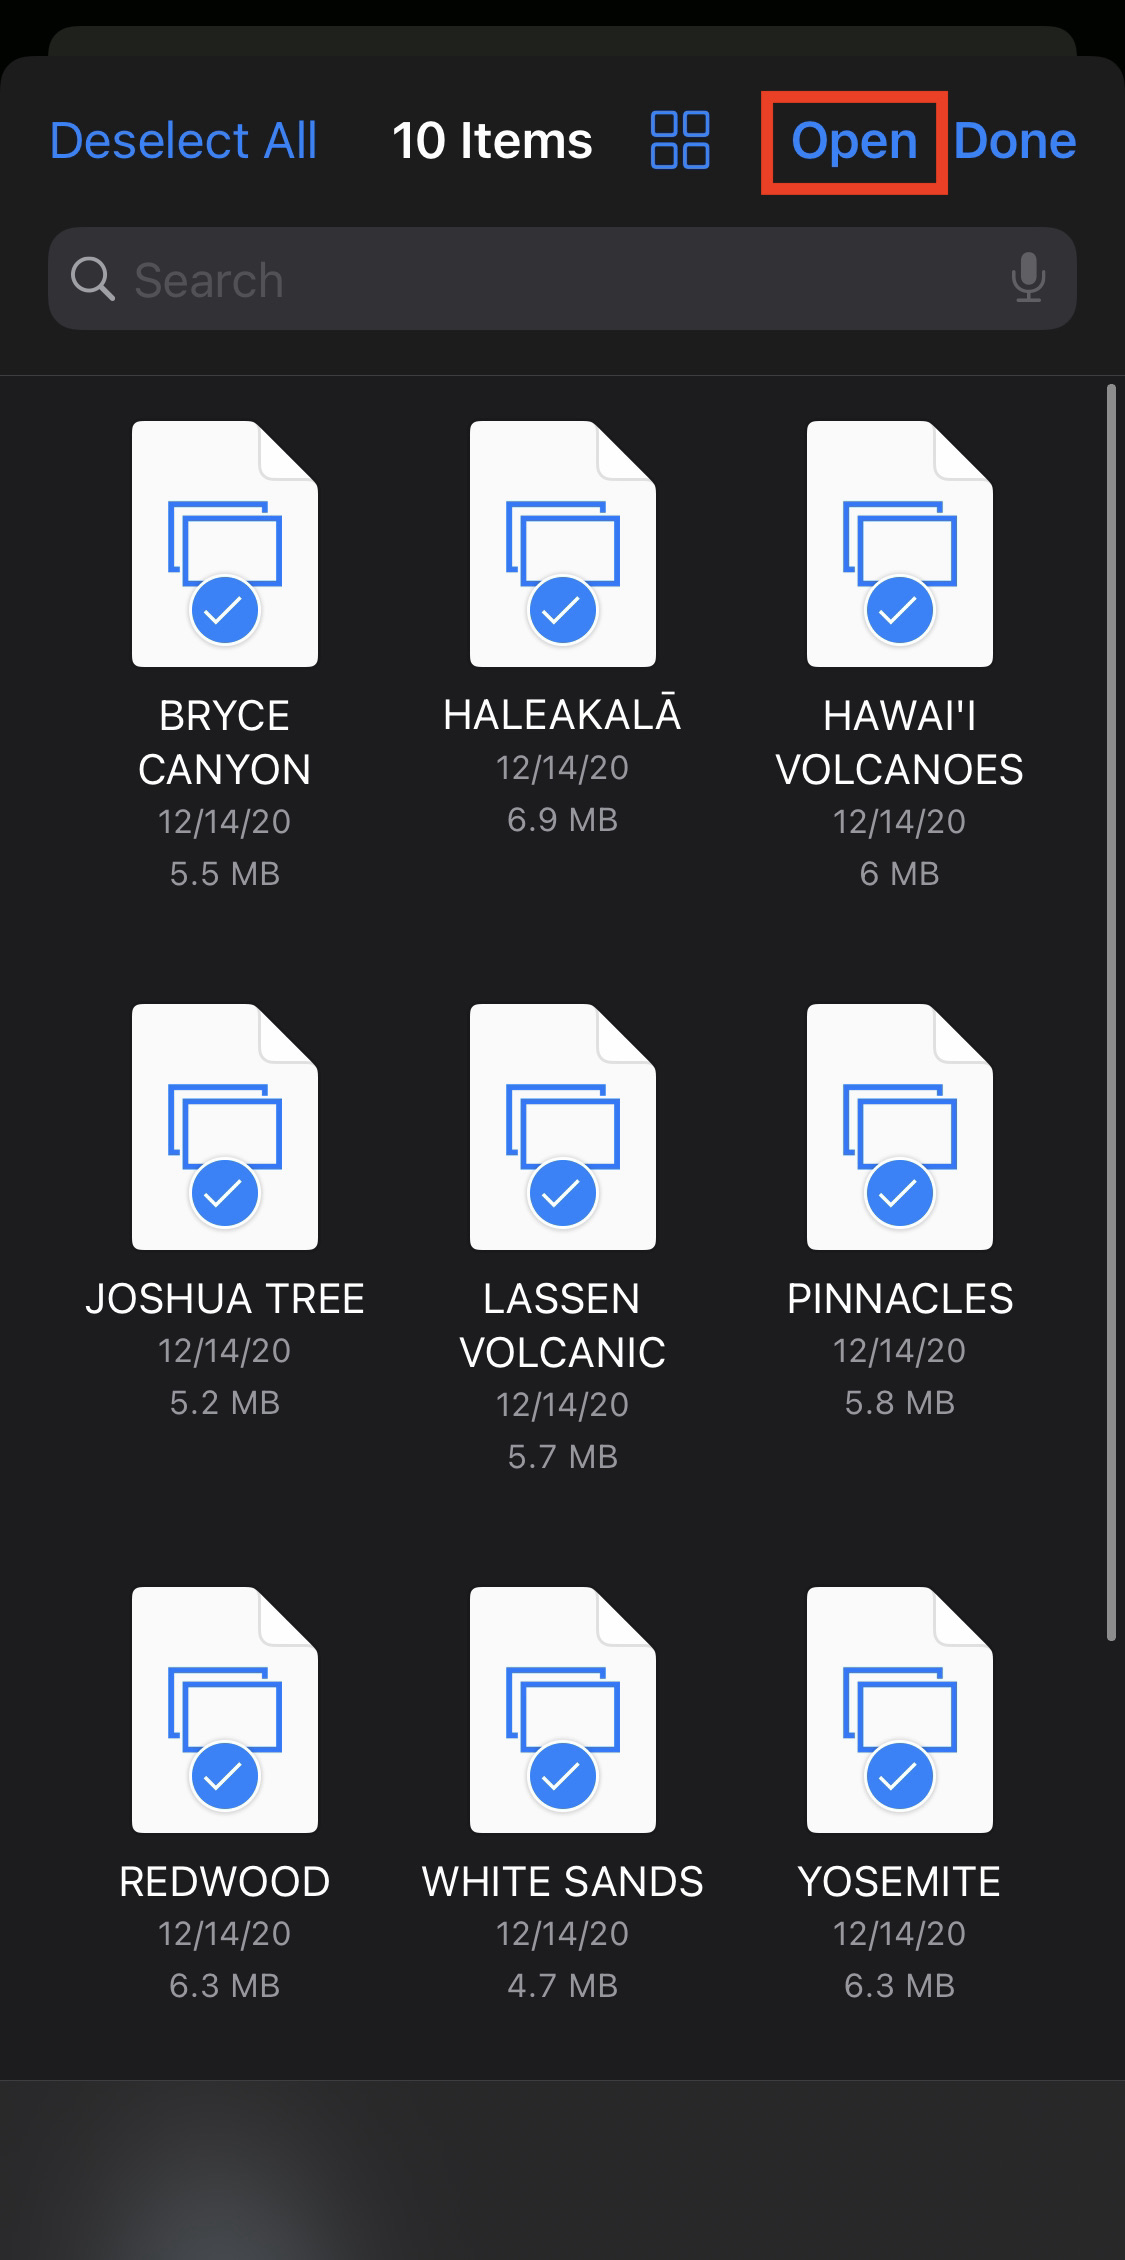
Tap on each of the files so that they all have a (✓) on them and tap “Open”.
STEP 6
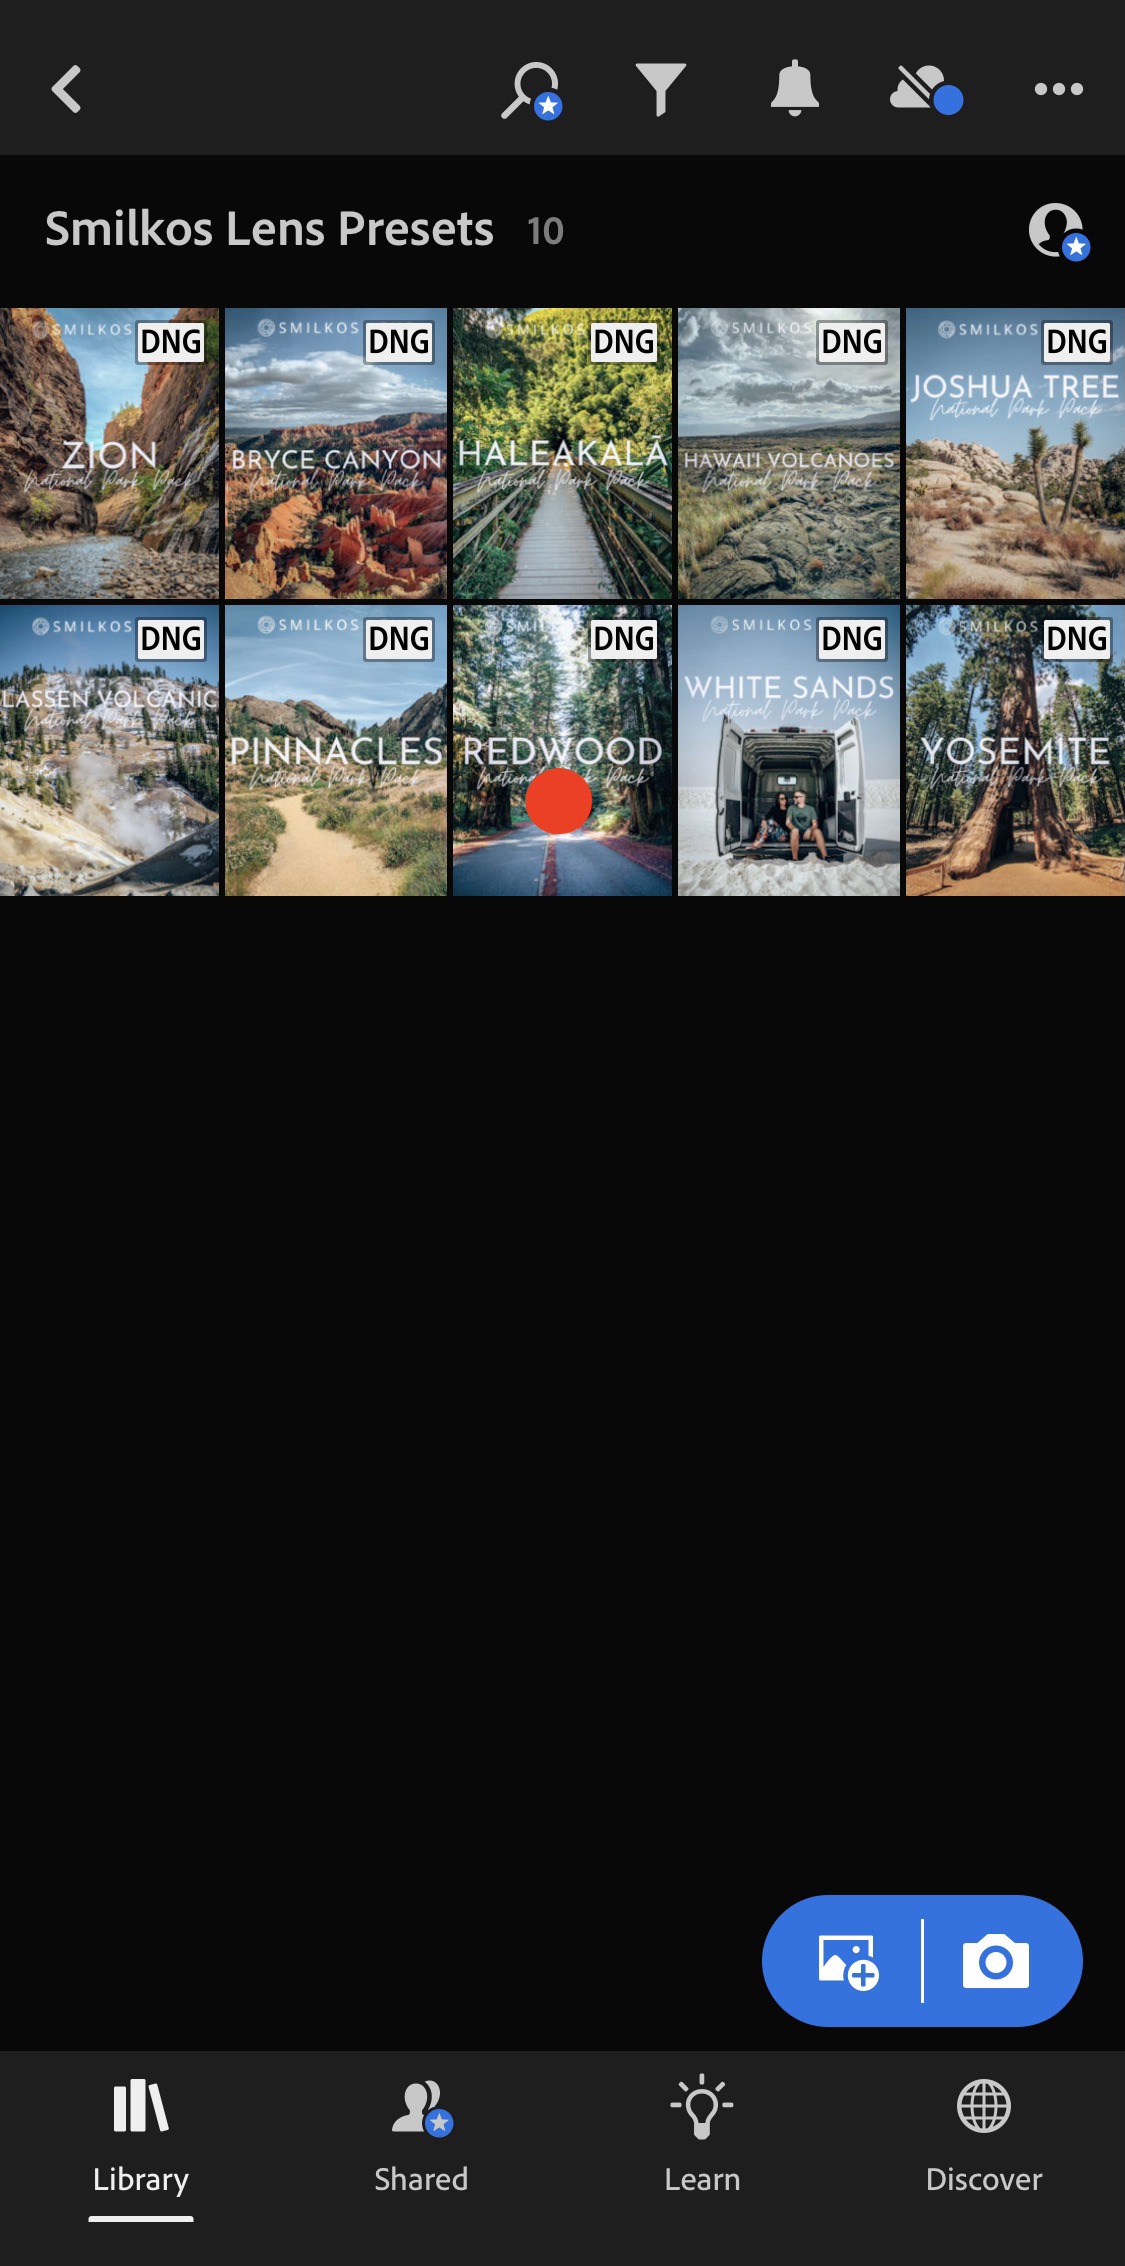
Now that you’ve added all of the preset images to your album, it’s now time to create and save the presets so that you can start using them! We’re in the home stretch, we promise.
Go ahead and tap on a preset to open the image.
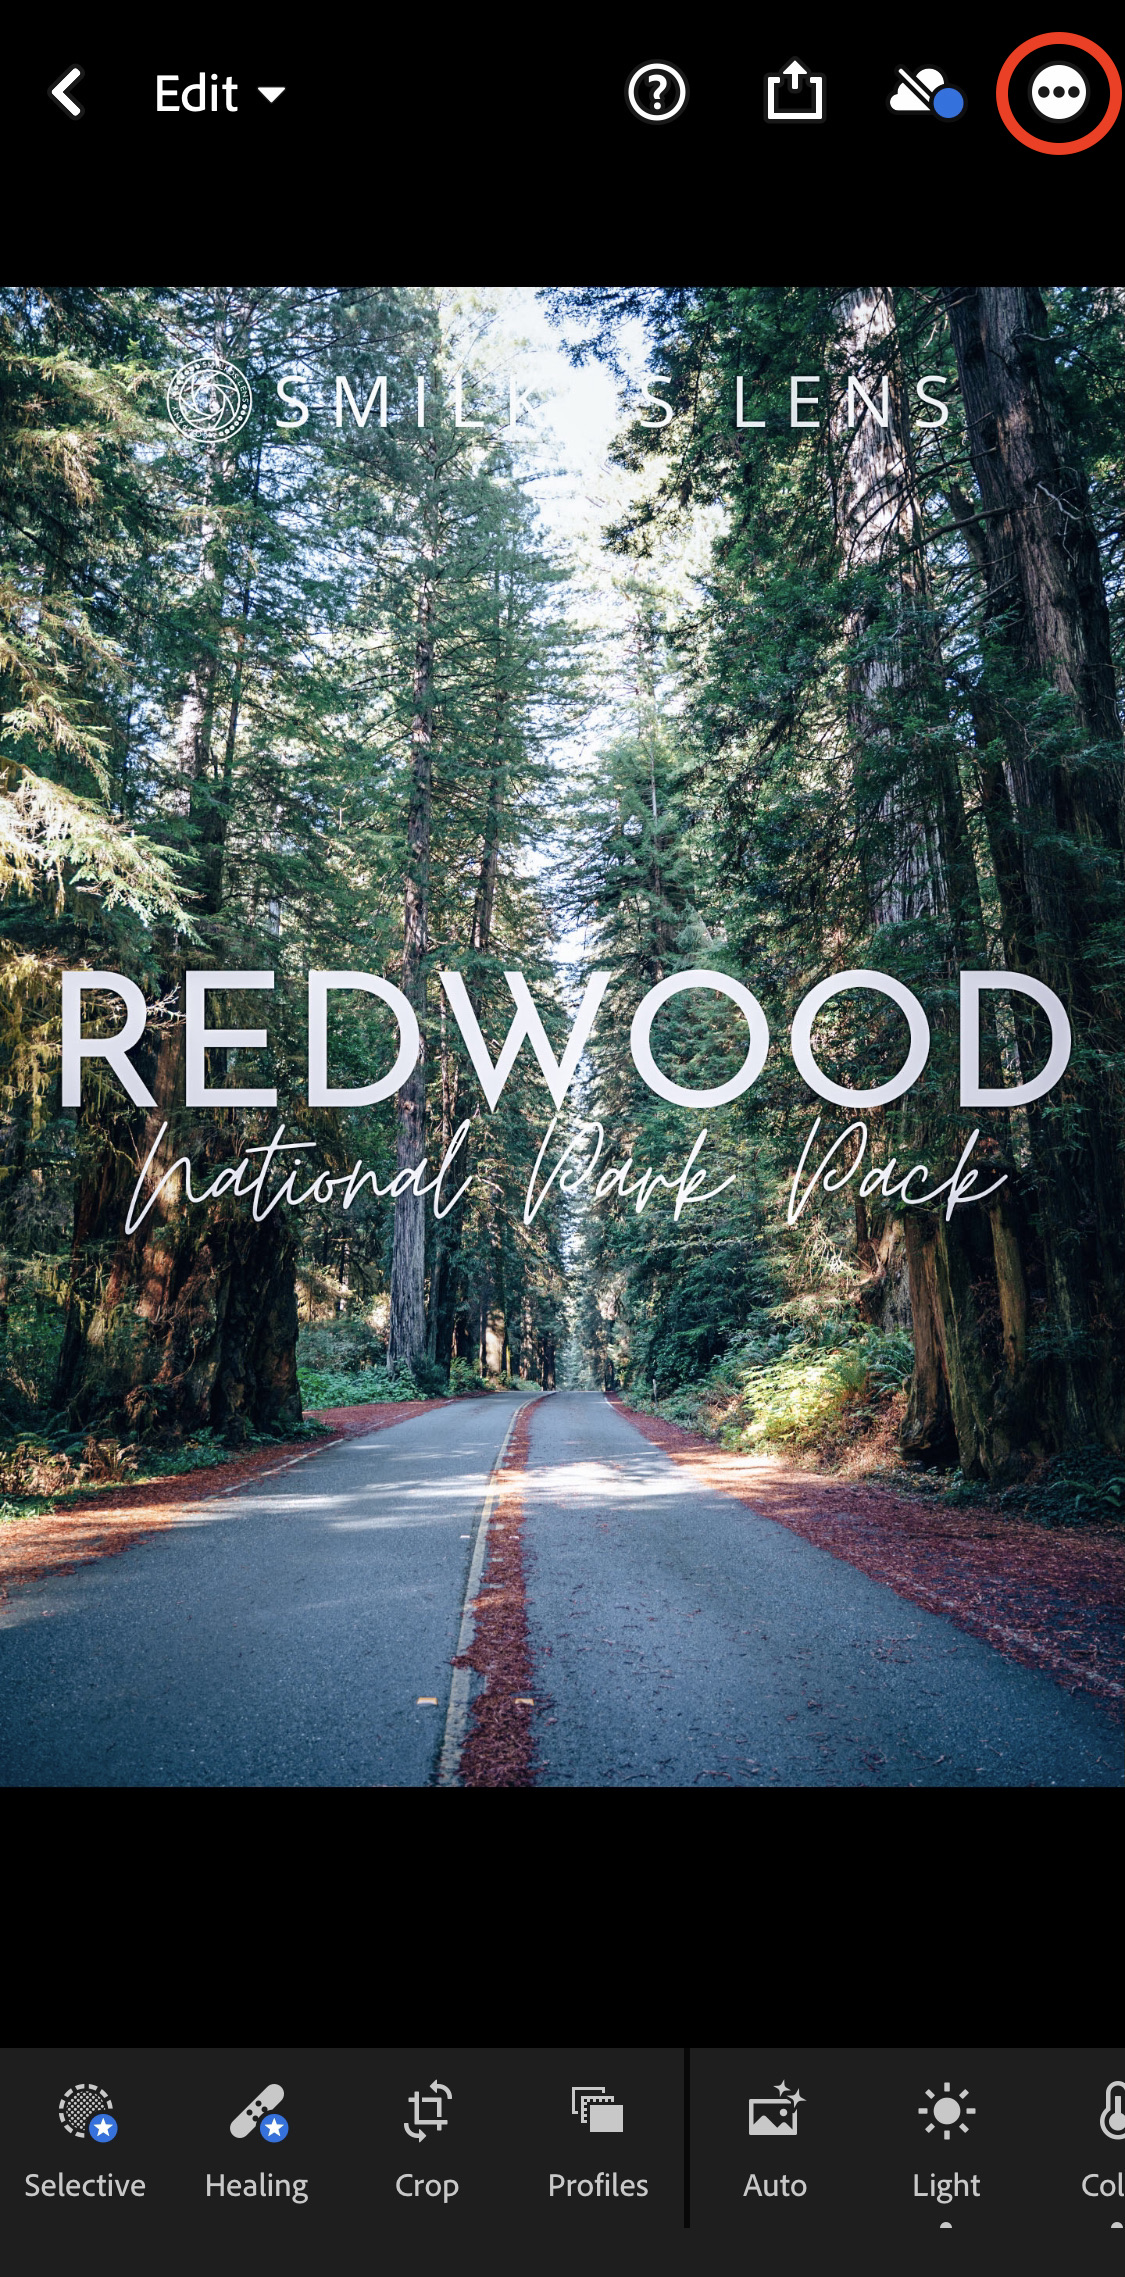
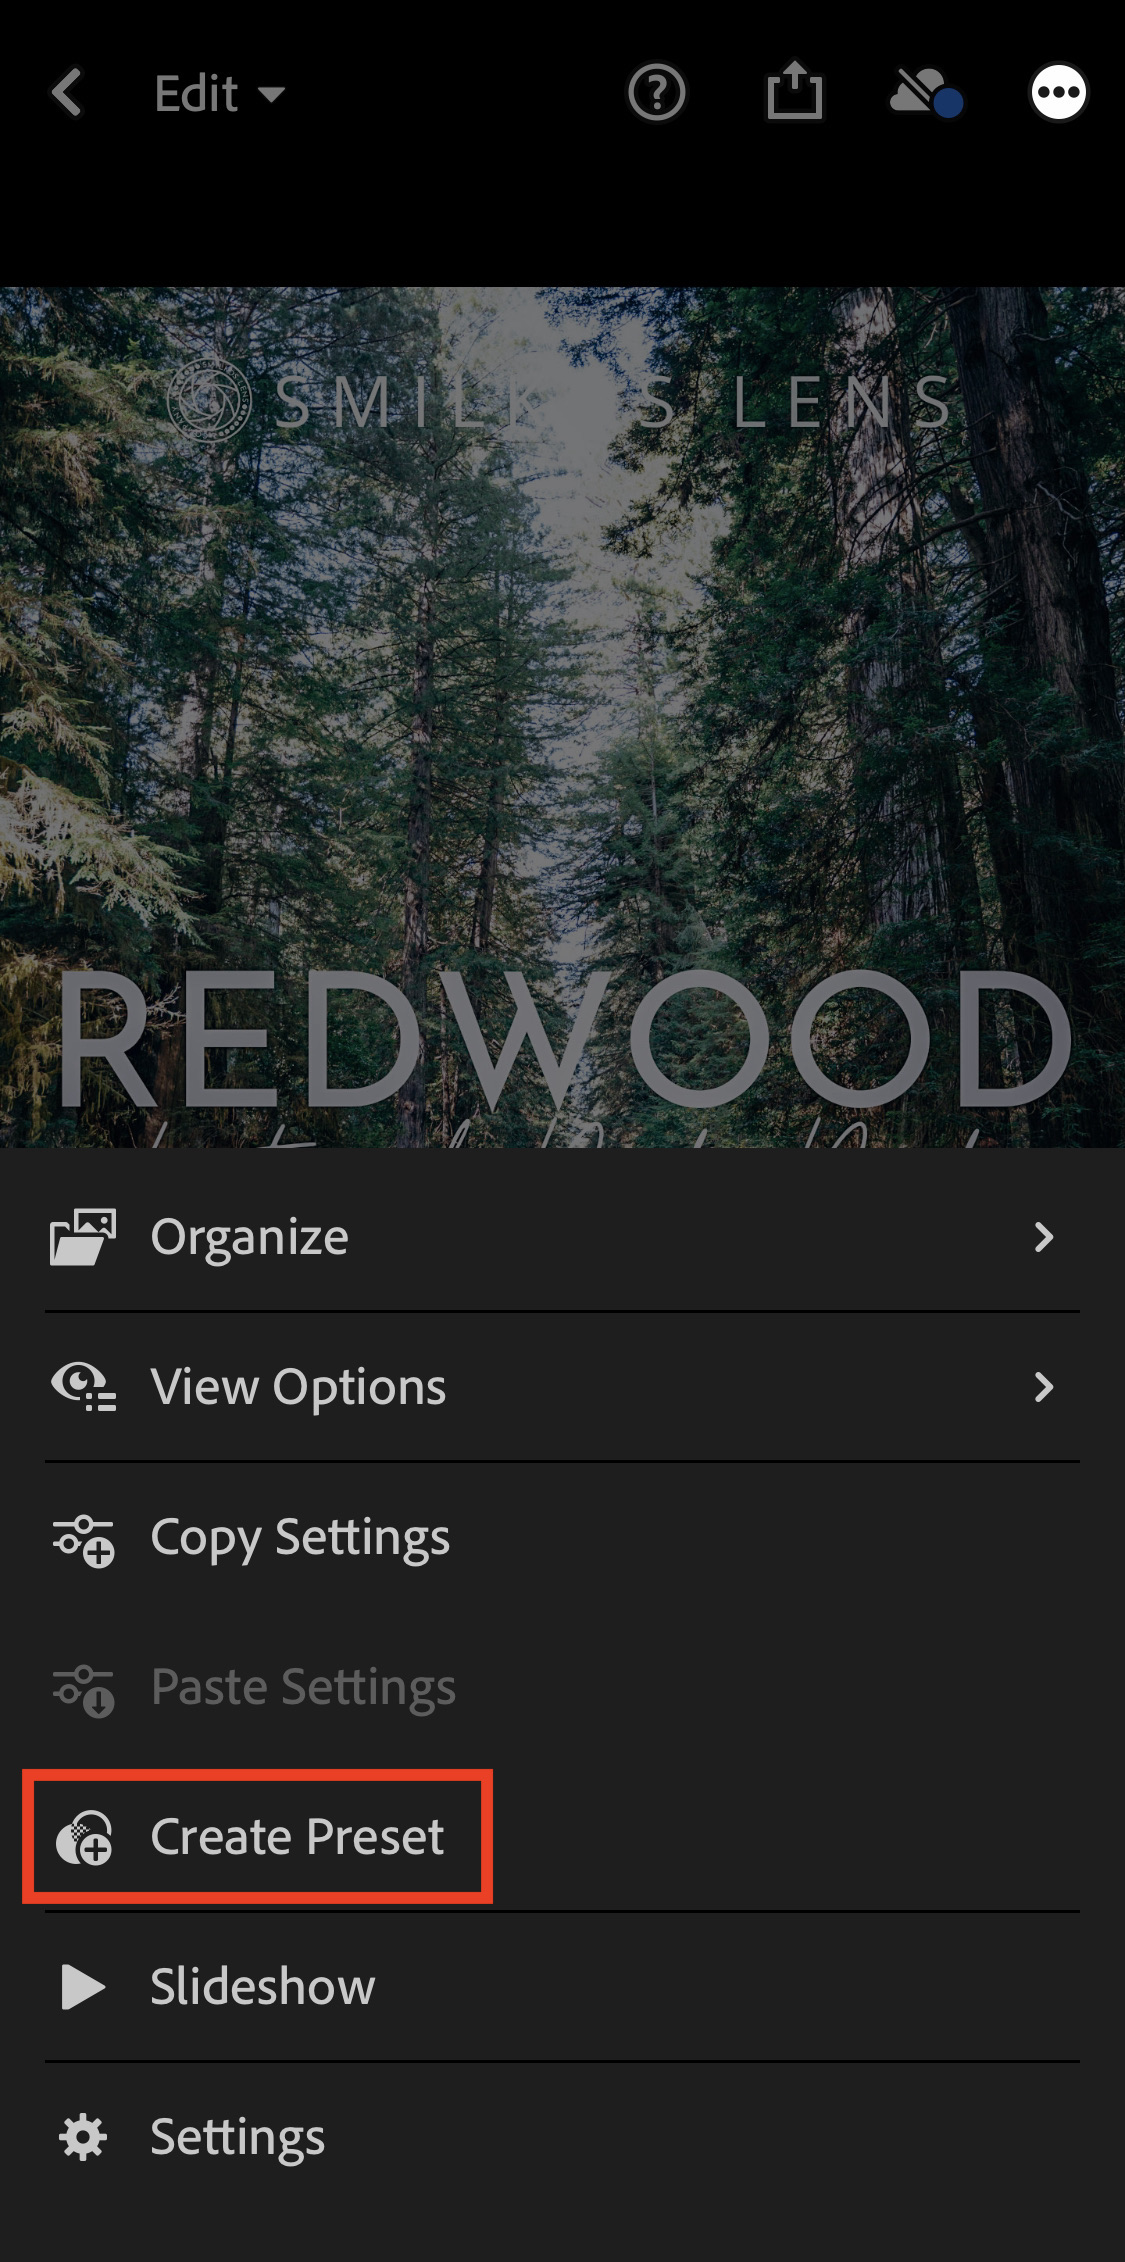
Tap on the (•••) in the upper right corner, and select “Create Preset”.
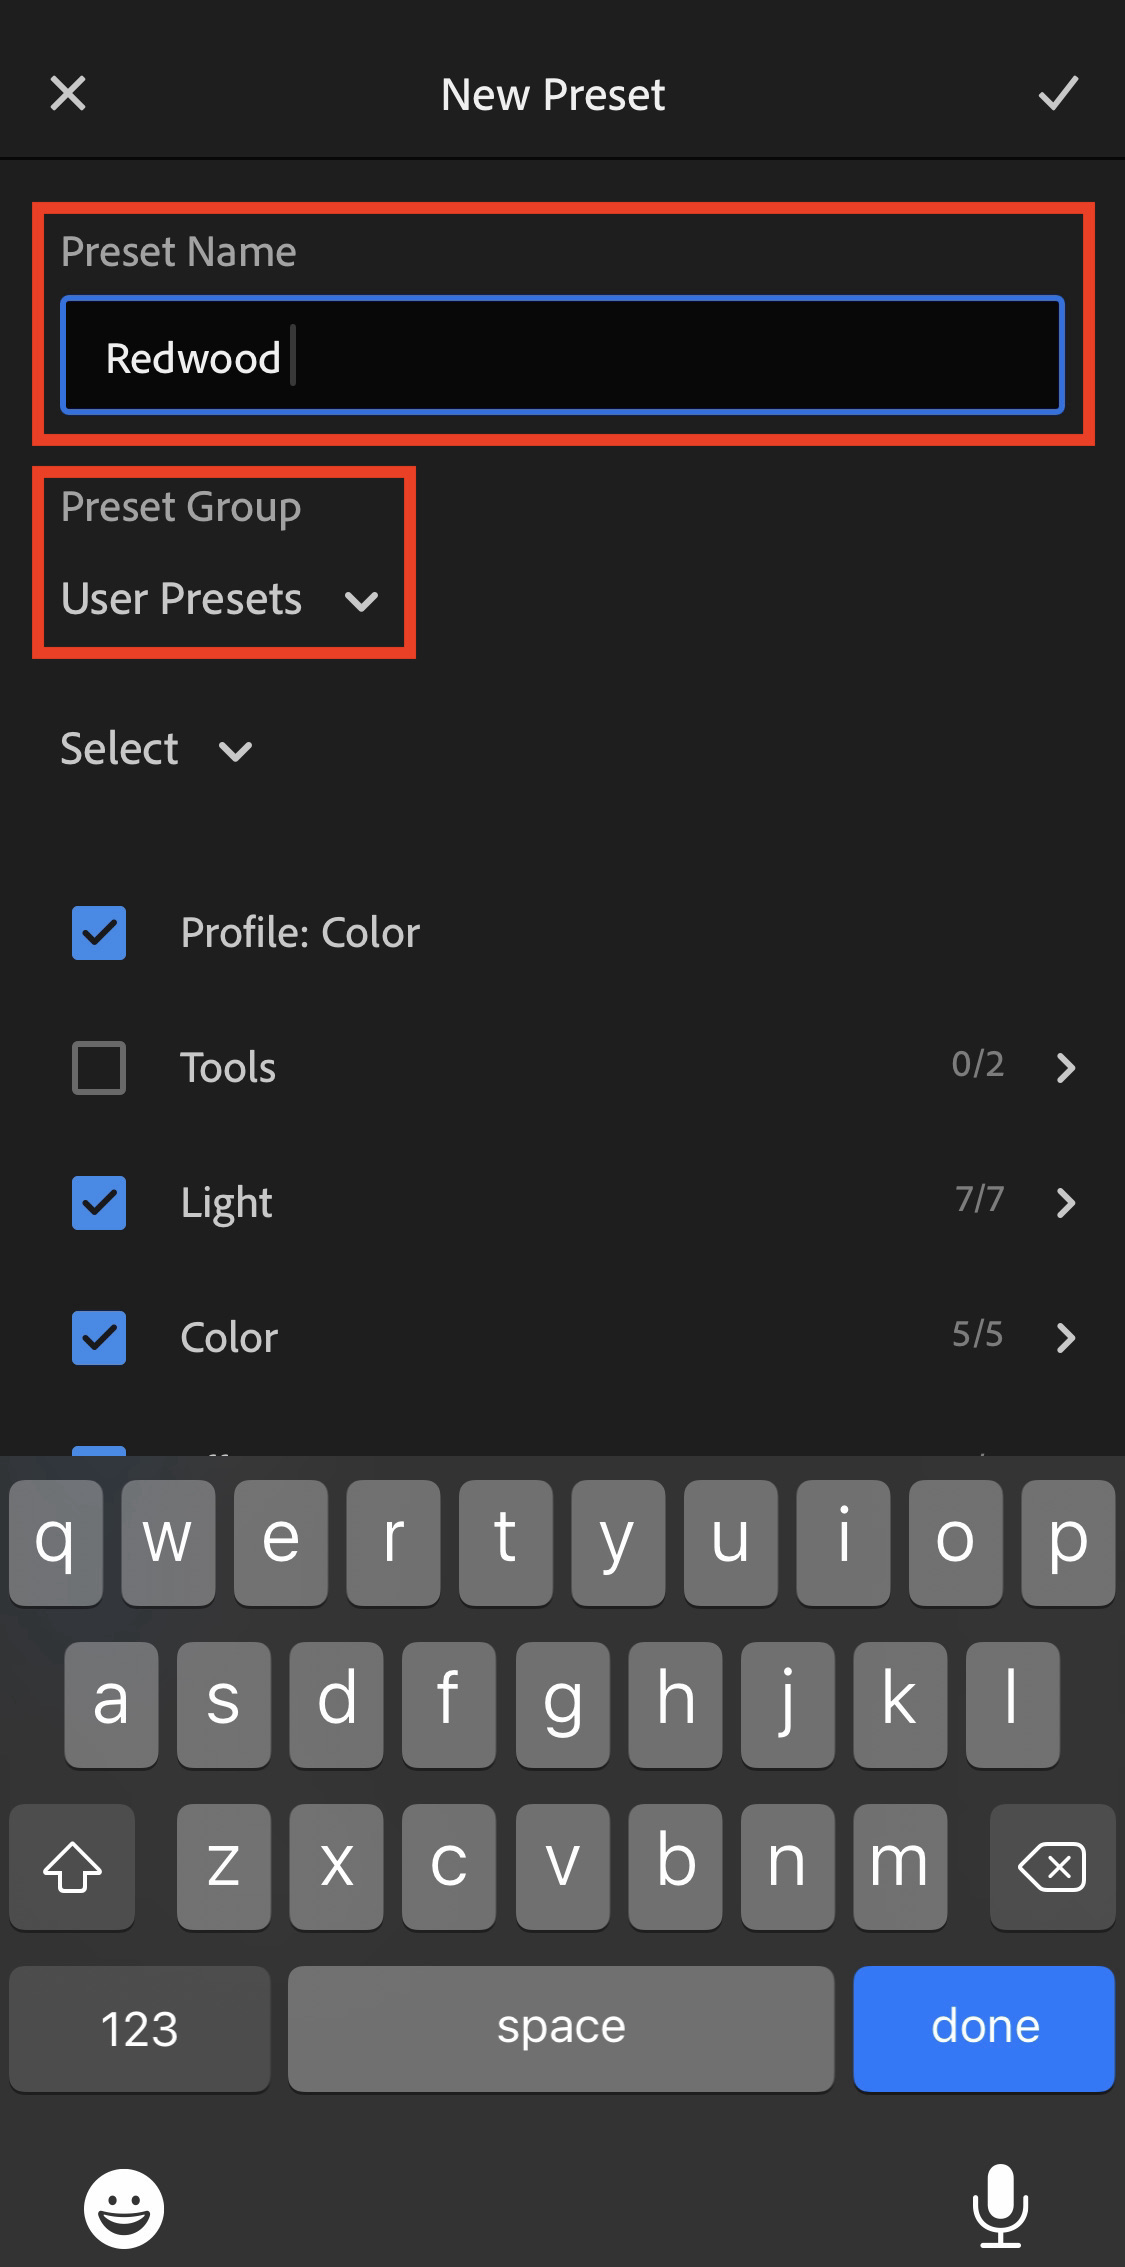
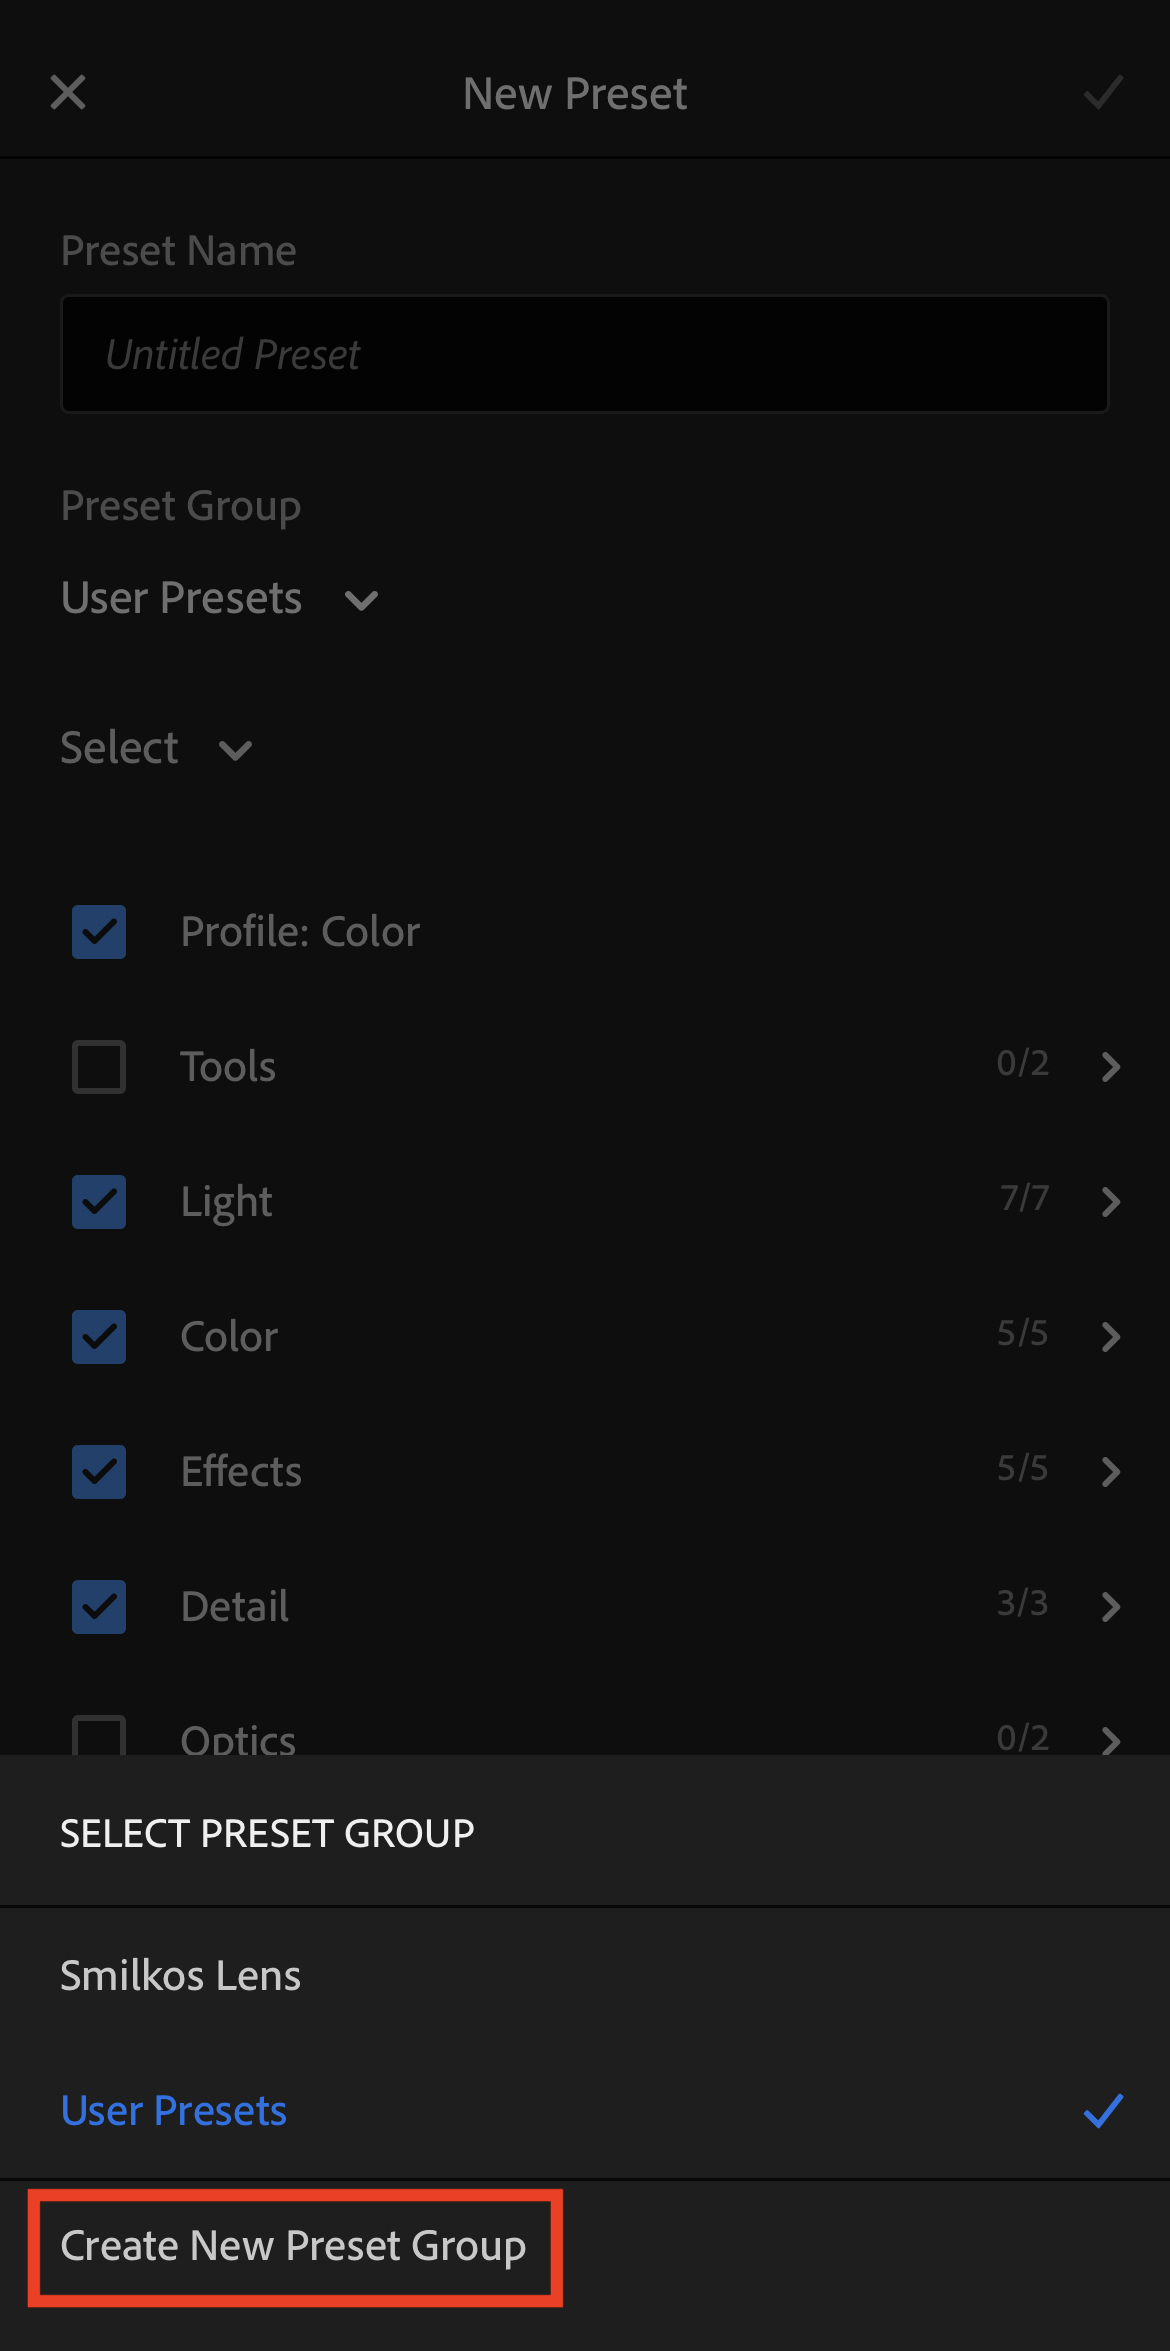
Now name the preset based on the name in the image. By default, Lightroom has some of its own generic presets built in, so you will also want to create a new Preset Group to keep your presets organized. Tap on “User Presets” under “Preset Group” and “Create New Preset Group”. Once you’ve created your group, tap on the ✓ in the upper right corner.
STEP 7
That’s it! Sort of. Now repeat step 6 for all of the other preset images until you’ve created a preset for each one. Once you’ve completed these, you are done and can begin using these to edit your own photos!
Visit our Instagram profile @smikos.lens.presets for a video walk through and tutorial of how to use these presets. But we’ll give ya a crash course here:
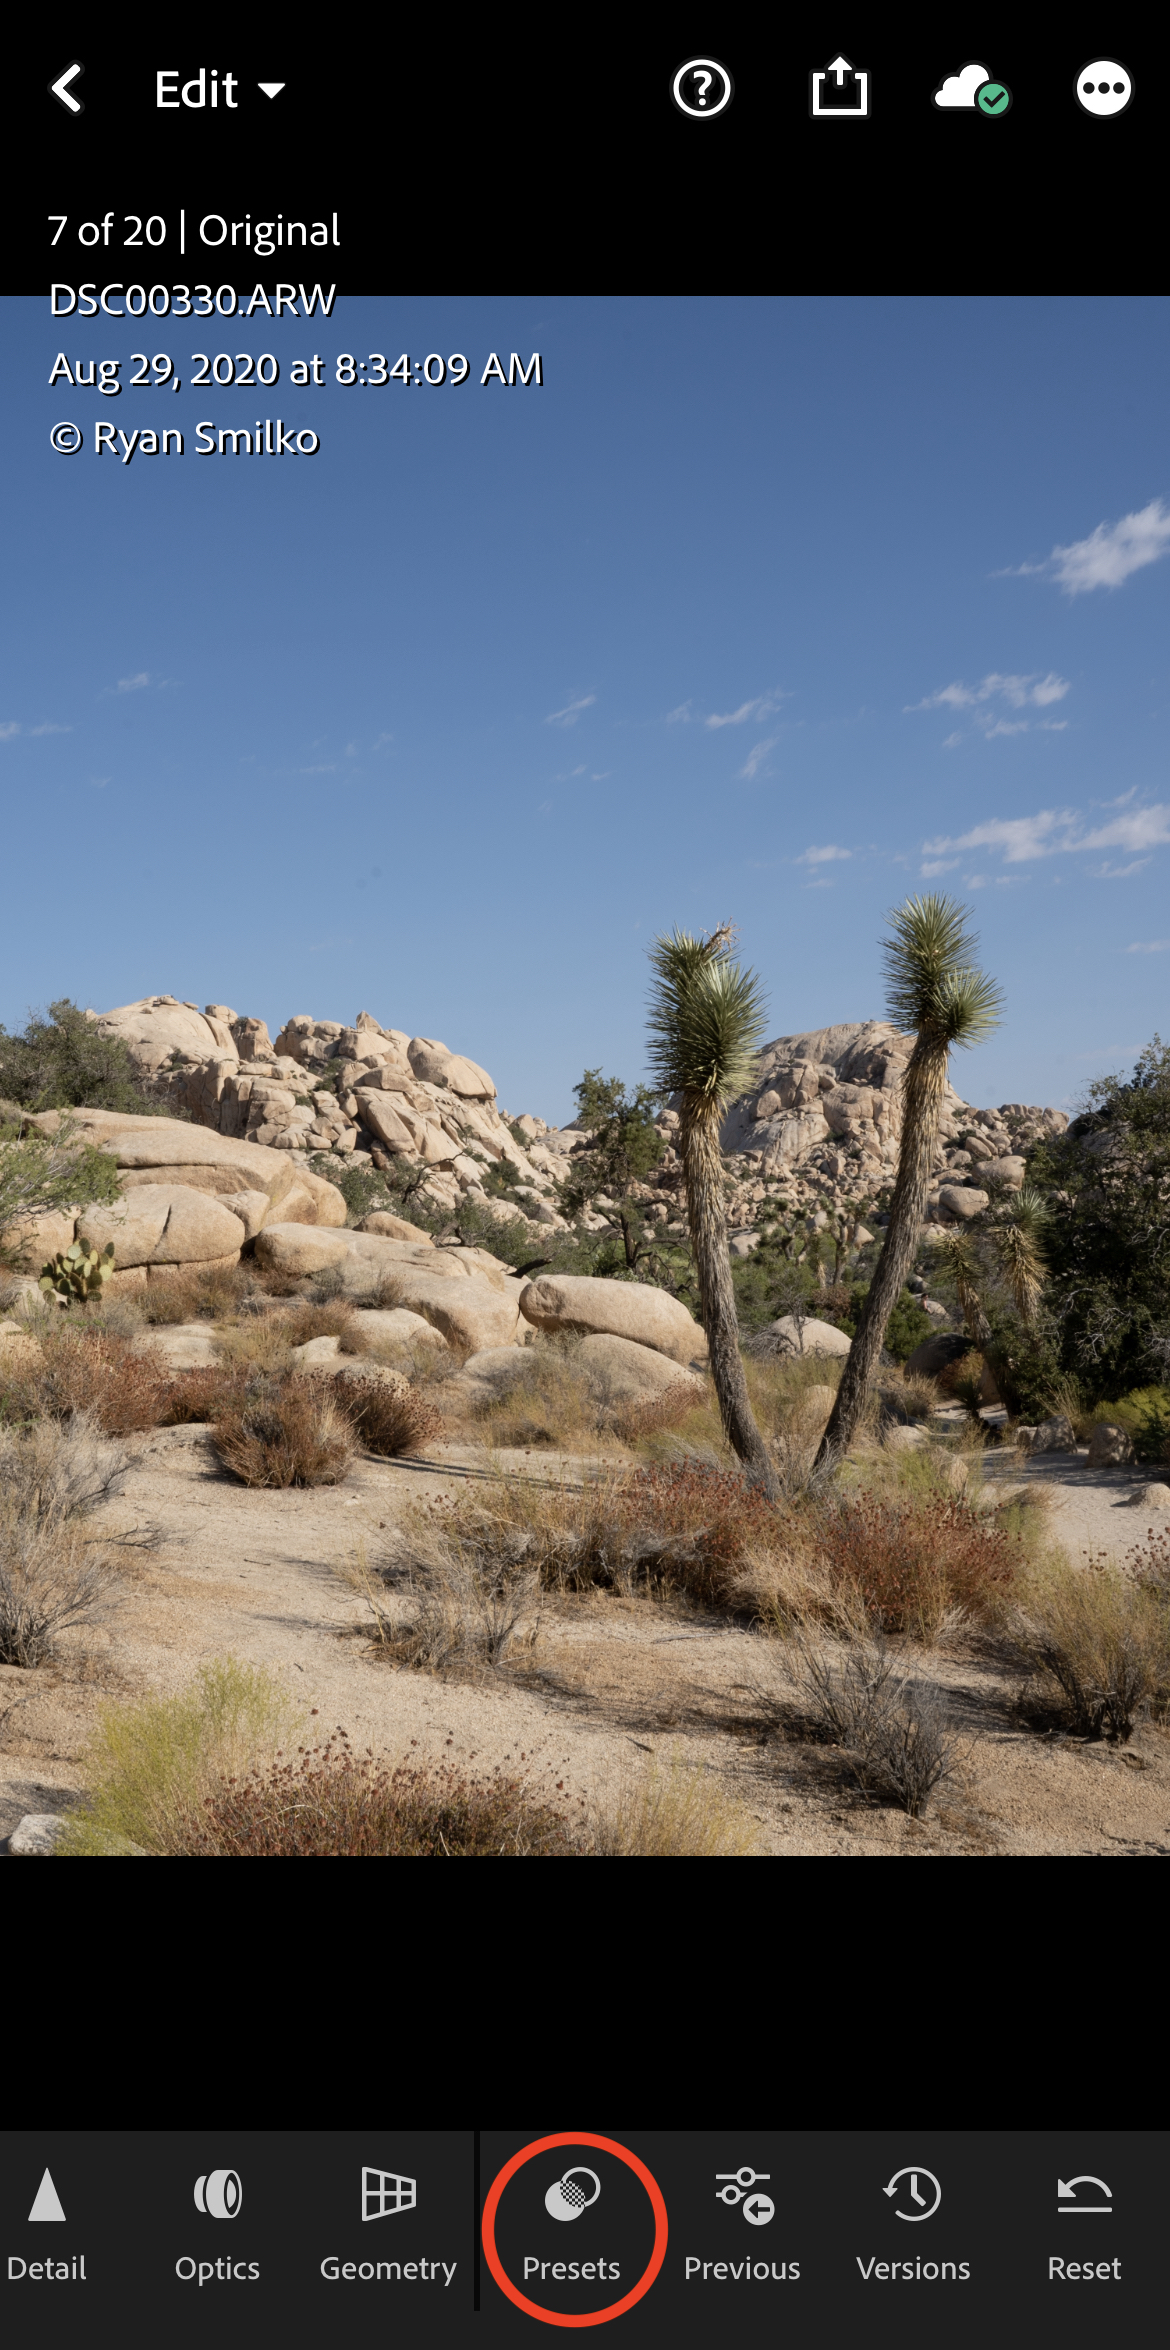
After you’ve added some of your own photos to Lightroom, open them up and scroll all the way to the right of the bottom menu until you see the “Presets” option.
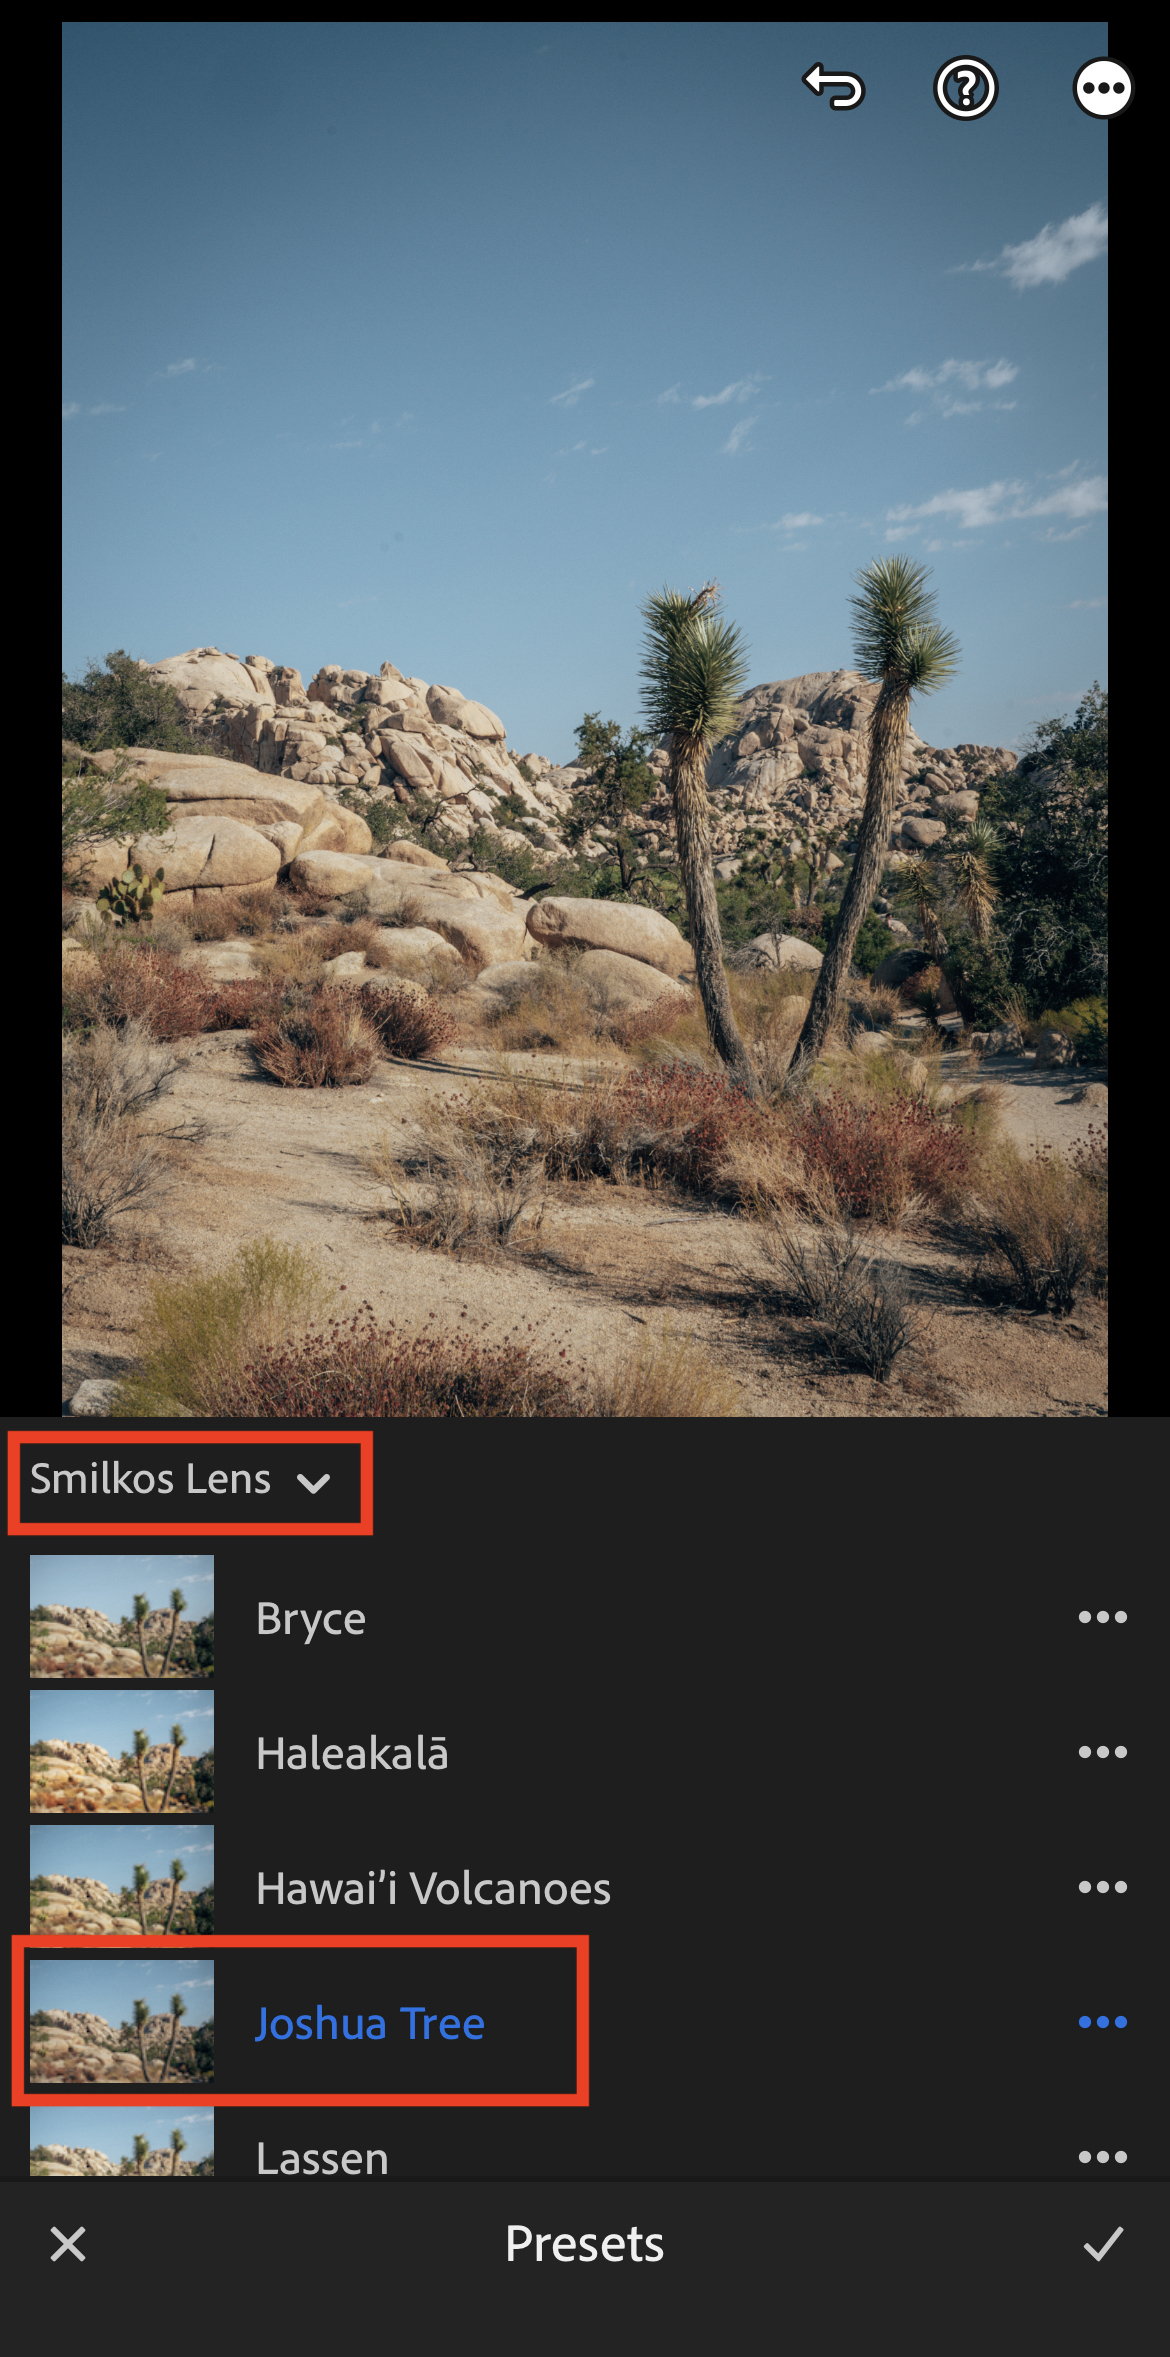
You will likely see one of the default Preset Groups, so you’ll want to make sure you tap on the drop down menu and select your new Preset Group. Now tap through each of the different presets until you find one that looks good with your image.
Done!
FOR DESKTOP PRESETS
STEP 1
*Before proceeding, you will need to have Lightroom Classic which requires a paid subscription with Adobe.
Lightroom Classic: Click here
STEP 2
After completing payment, you will receive a confirmation page showing your invoice data, as well as a link to download your presets. If you accidentally close this window, don’t fret, you’ll also receive a link in an email confirmation as well.
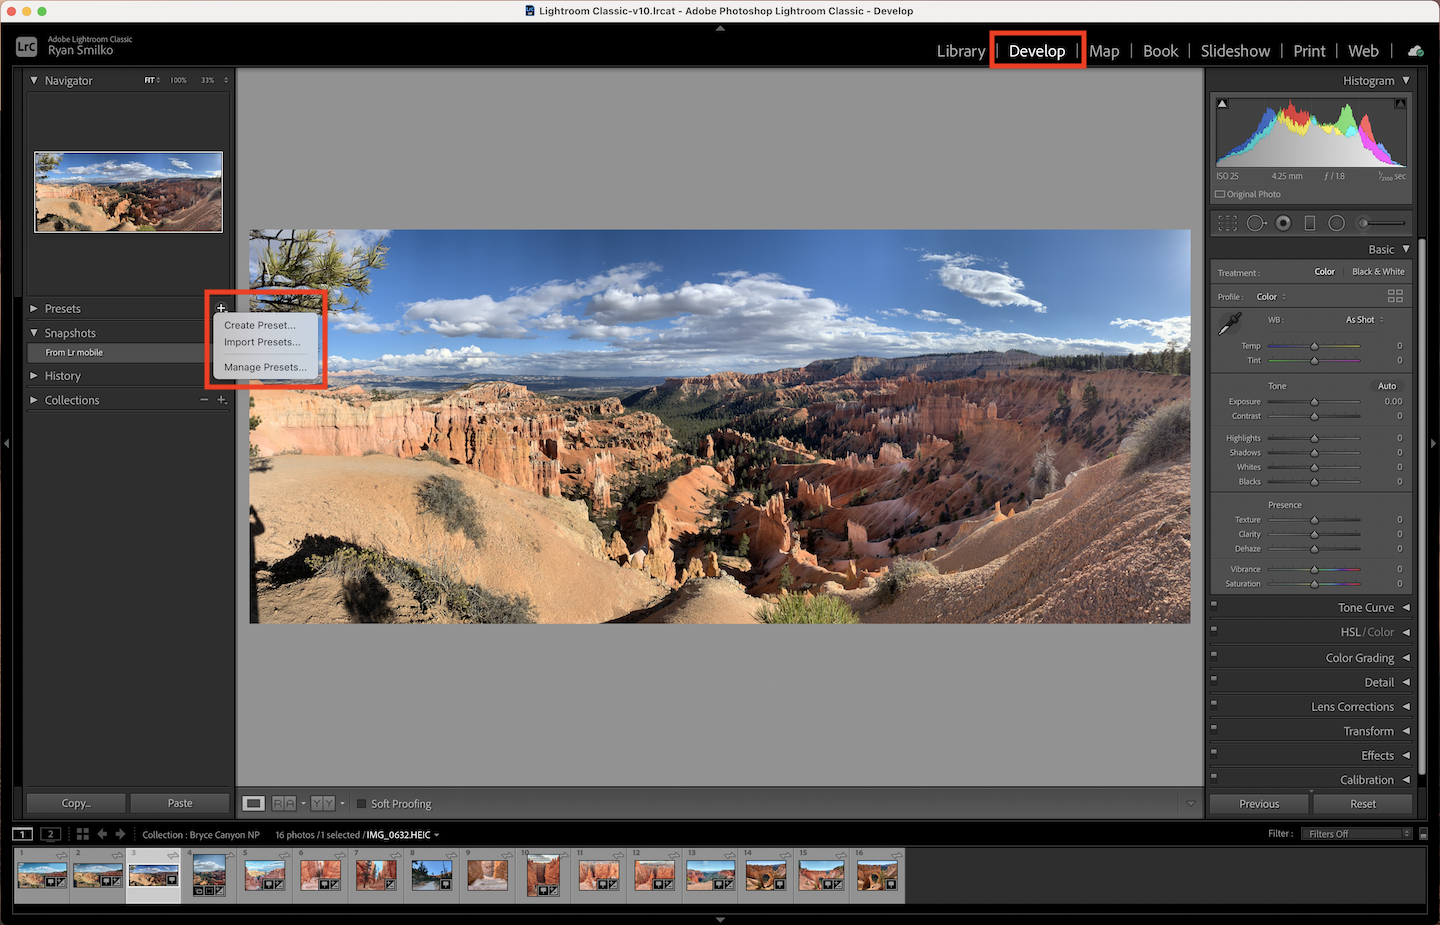
Open Lightroom Classic and click on “Develop” in the upper right corner. Then click on the + next to the Presets menu in the left sidebar, and select “Import Presets”.
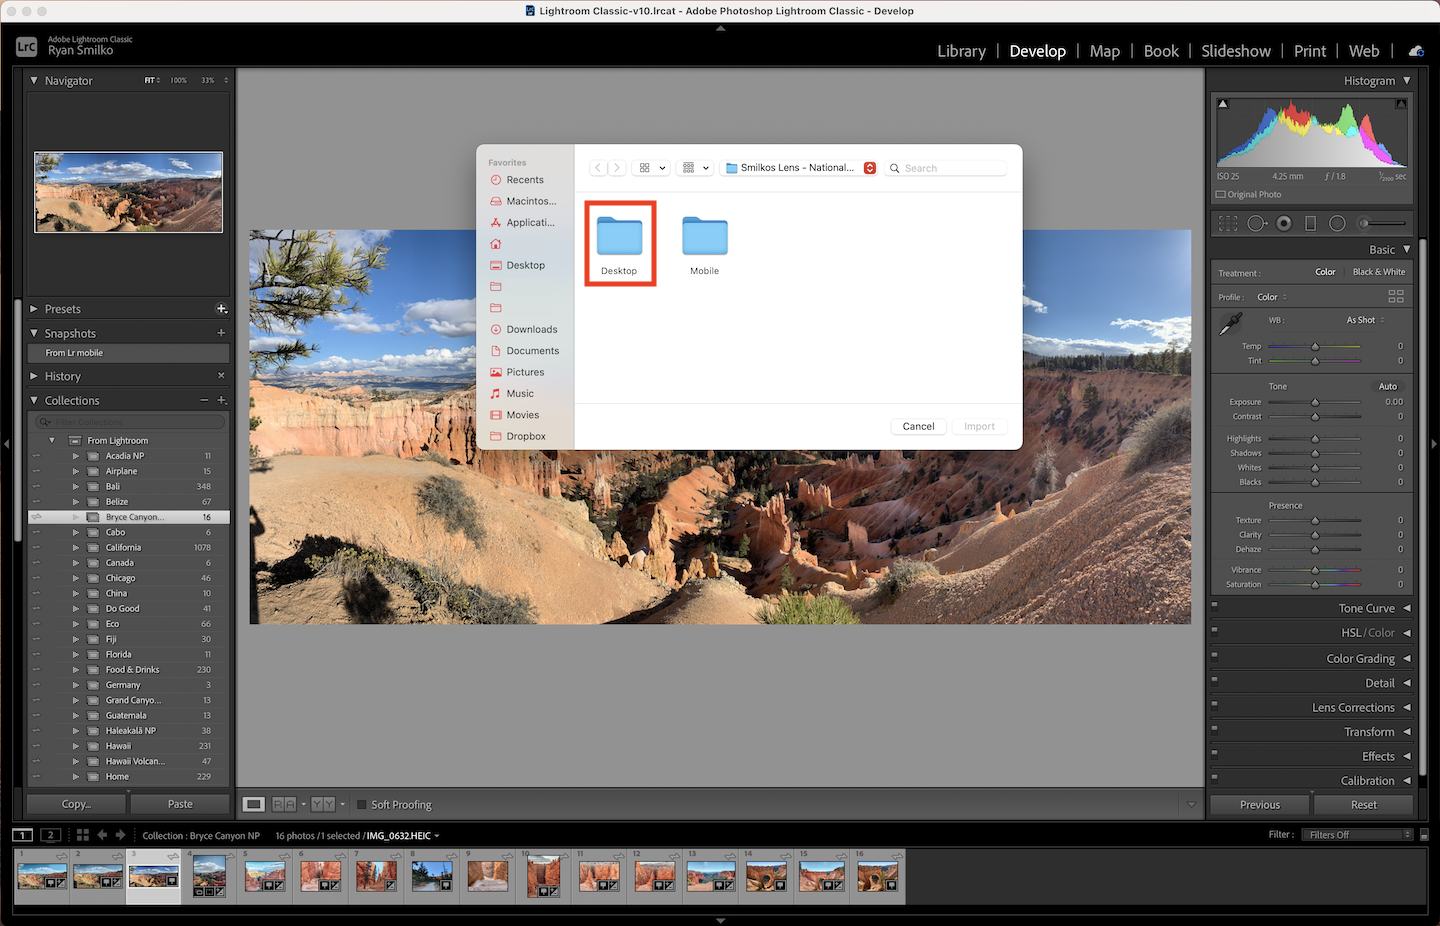
You’ll then be presented with a what should be a window showing your most recent download of the preset files. If it does note, make sure you select your “Downloads” folder from the window and then select the “Desktop” folder.
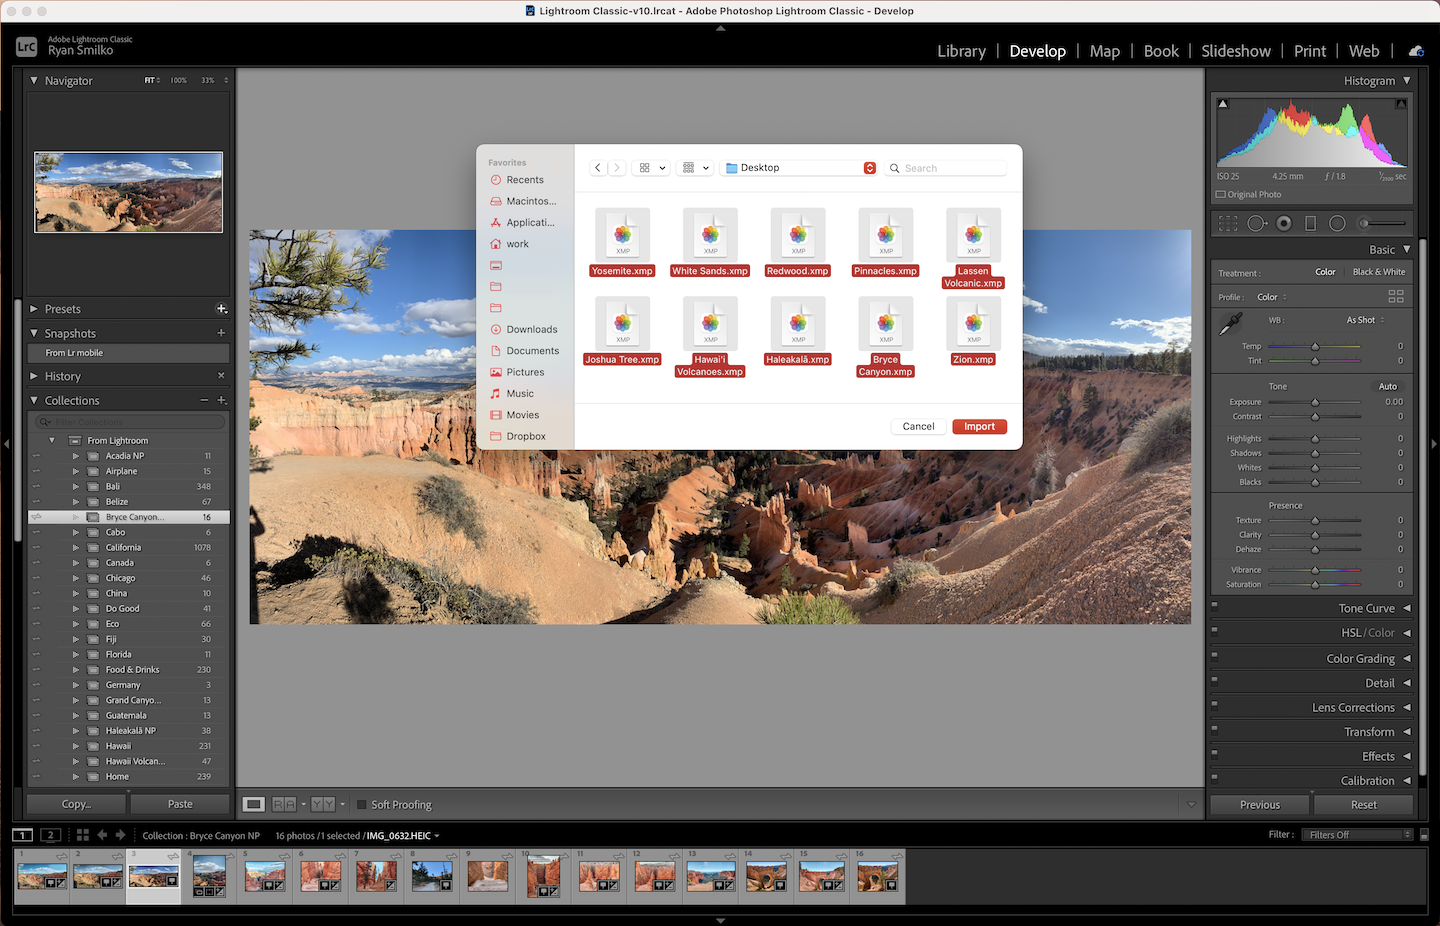
Once the window opens, you will be presented with the 10 preset files. Select all and click on “Import”.
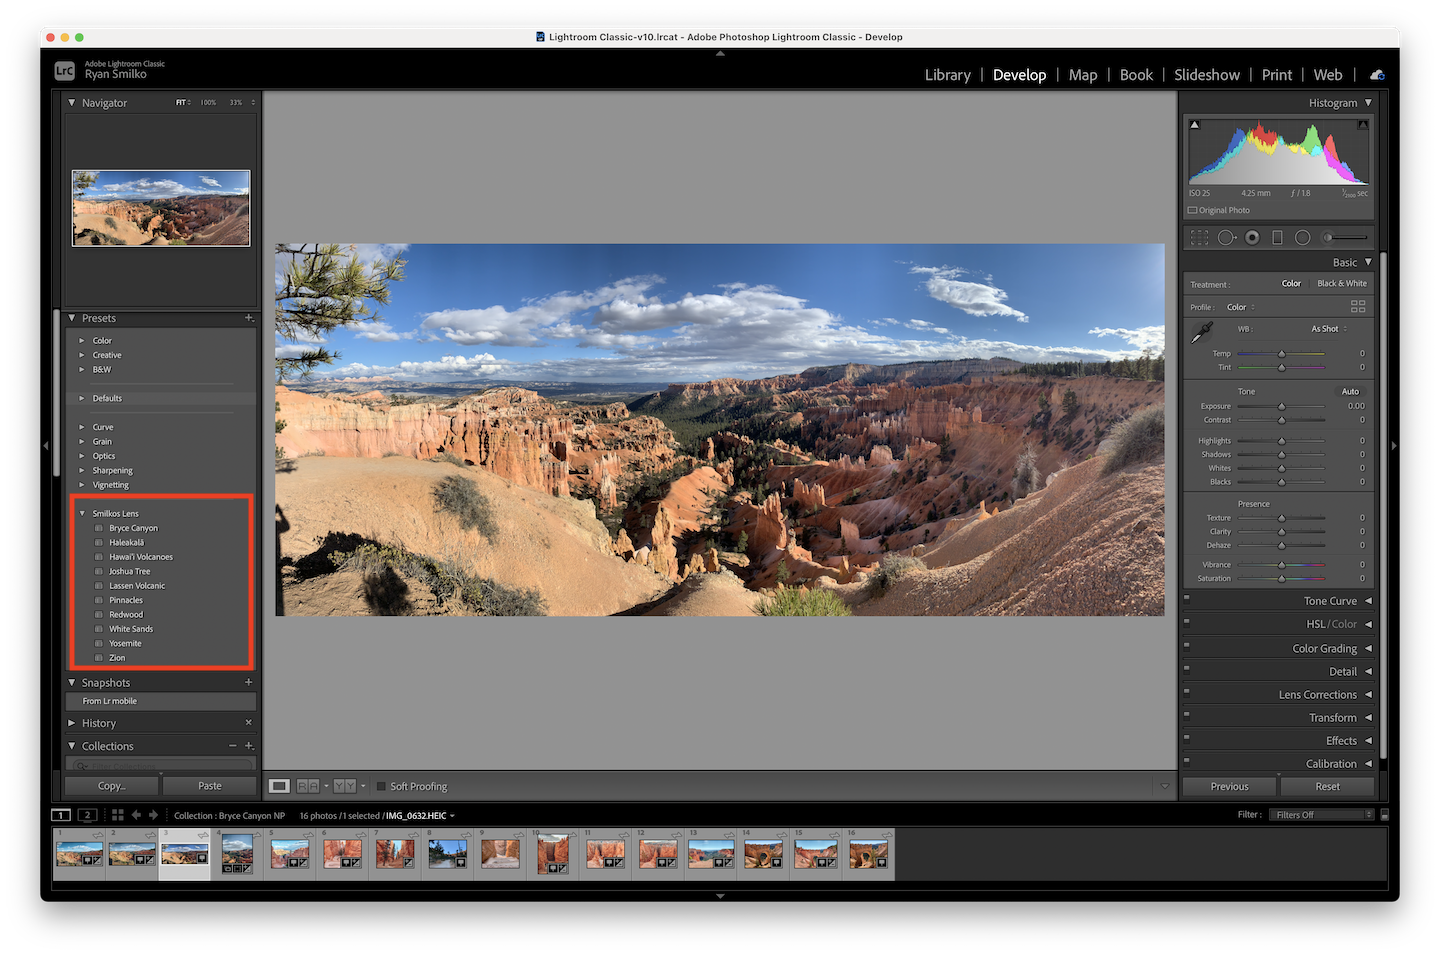
You may be prompted to create or select which Preset Group you’d like to save these in. Once this is done, you will then see all of the new presets listed under the “Presets” menu in the left sidebar.
Done!
If you found this helpful, or had any issues during the process, let us know in the comments below! We want this to be as simple and seamless as possible.
Thanks! – Ryan & Katy