
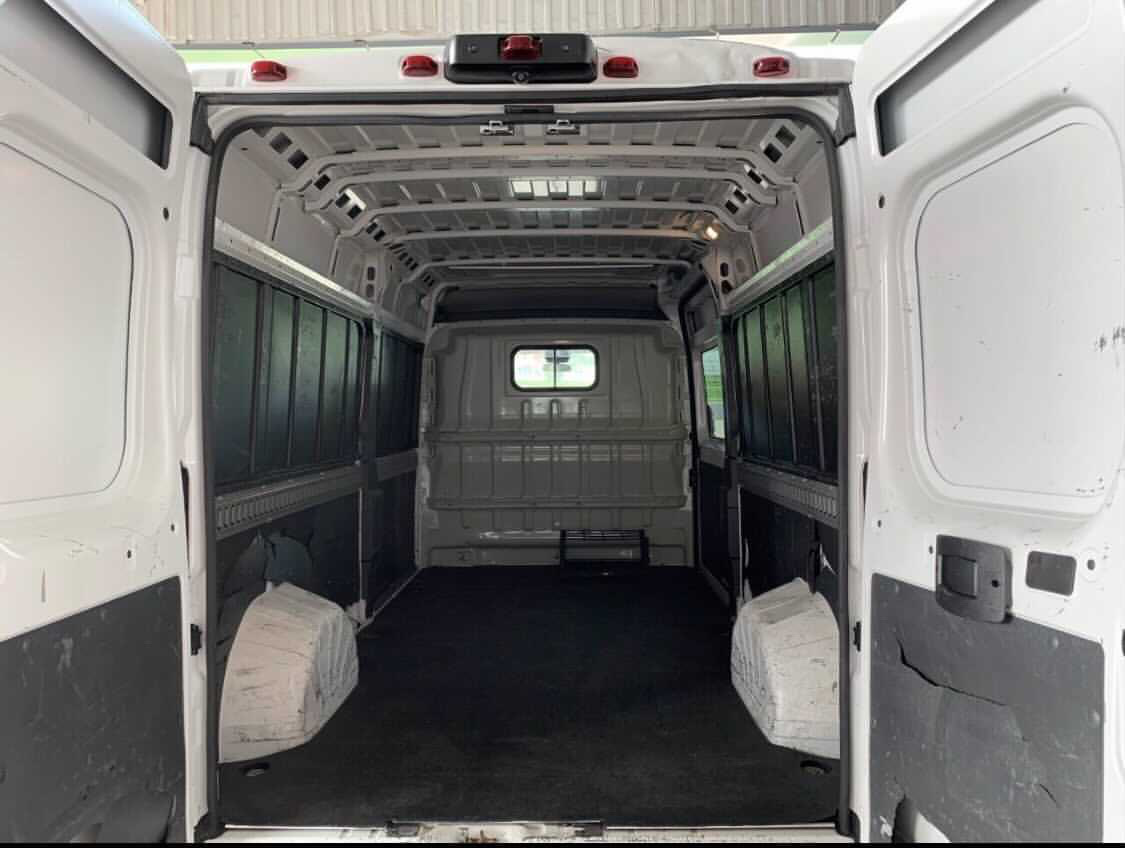
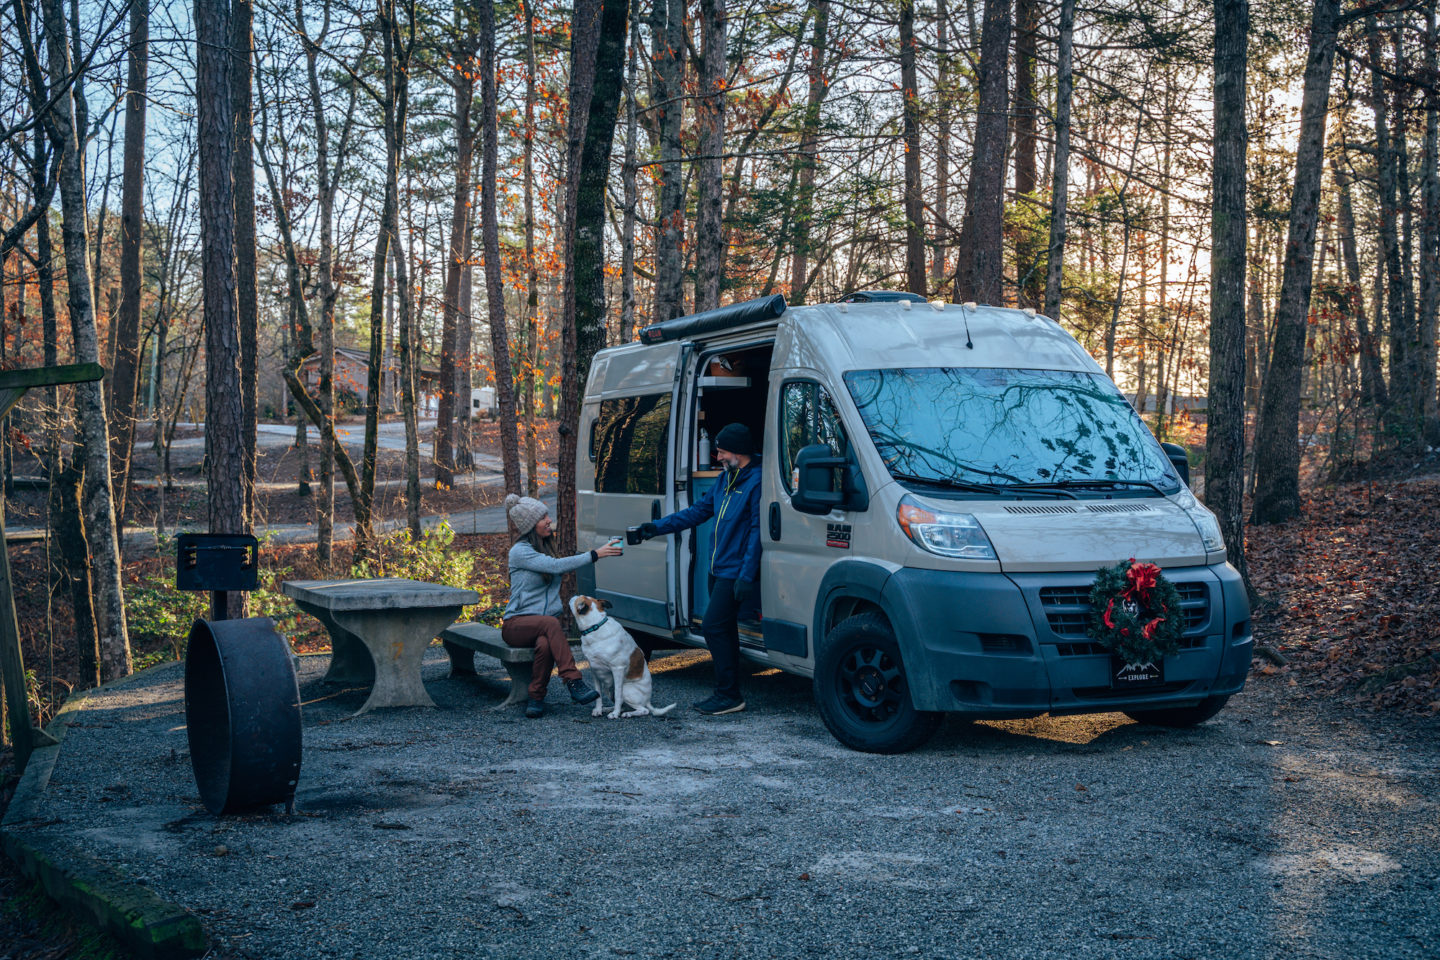
Oh my goodness, we did it! We completed our campervan build! Nearly 15 months after we purchased our empty shell of a van, we officially completed our van build, and set off on our new adventure. And if you aren’t following us yet on Instagram, that is the best place to follow along with the adventure part! But let’s get in to the build!
WHAT VAN MODEL DID WE PICK?
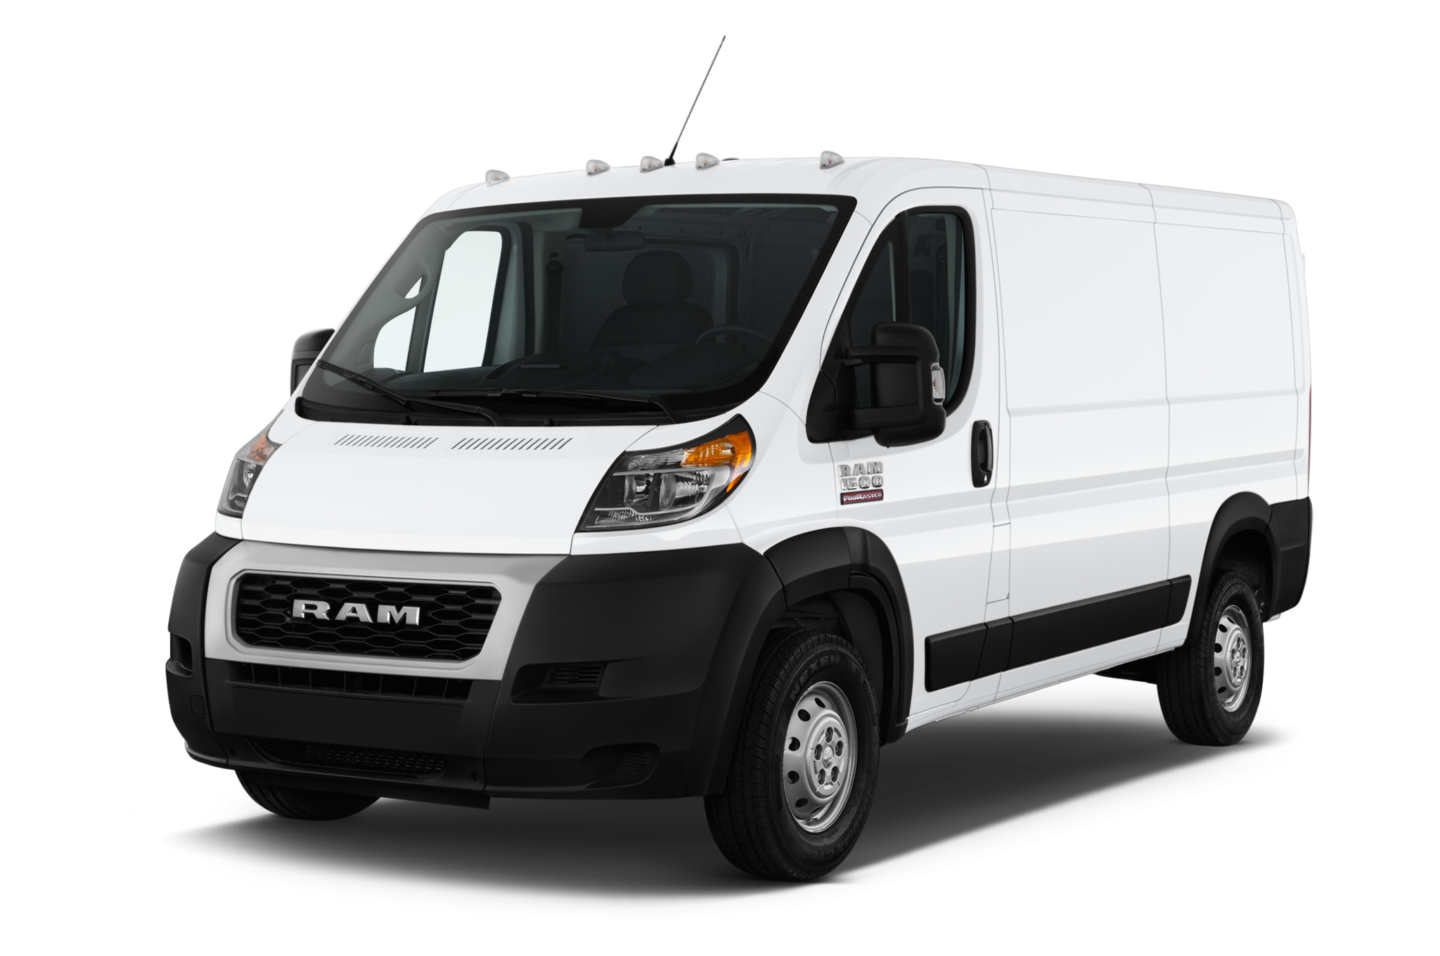
This part took a long time. If you haven’t read our WHY WE’RE BUILDING A CAMPER VAN article, we’d suggest heading over there first. Choosing what type of van or vehicle to use for a campervan can be a challenging thing to determine as there are SO many options! We’ve seen builds for weekend warriors using Subaru Foresters (like this one from Roam Free Rebecca!), Toyota 4Runners and everything in between. We’ve also seen vehicles that could be best described as tanks. It really depends on what you’re looking for out of your build, and the lifestyle you want to live in it. We opted for the Ram ProMaster. It fit our design preferences, and our budget.
HOW DID WE DESIGN OUR VAN LAYOUT?
Deciding on the layout of the van was not a super challenging activity for us, as we both thankfully had similar ideas of how we wanted our tiny home on wheels to be laid out. Deciding on the actual aesthetic and materials of the campervan was a whole different story. This part can be quite challenging, especially if you are not a solo traveler. Choosing what materials you want to use, and what amenities you want in your home, can drastically impact the amount of time spent building, and the cost of the build.
There are a few major factors to consider with van builds though that will impact your layout and design:
BED LAYOUT
In traditional campervan models like ours, you are pretty limited to putting the bed near the rear of the van. There are two main questions to answer though:
Do you build the bed sideways, or front to back?
And, do you build a permanent and stationary bed, or a convertible?
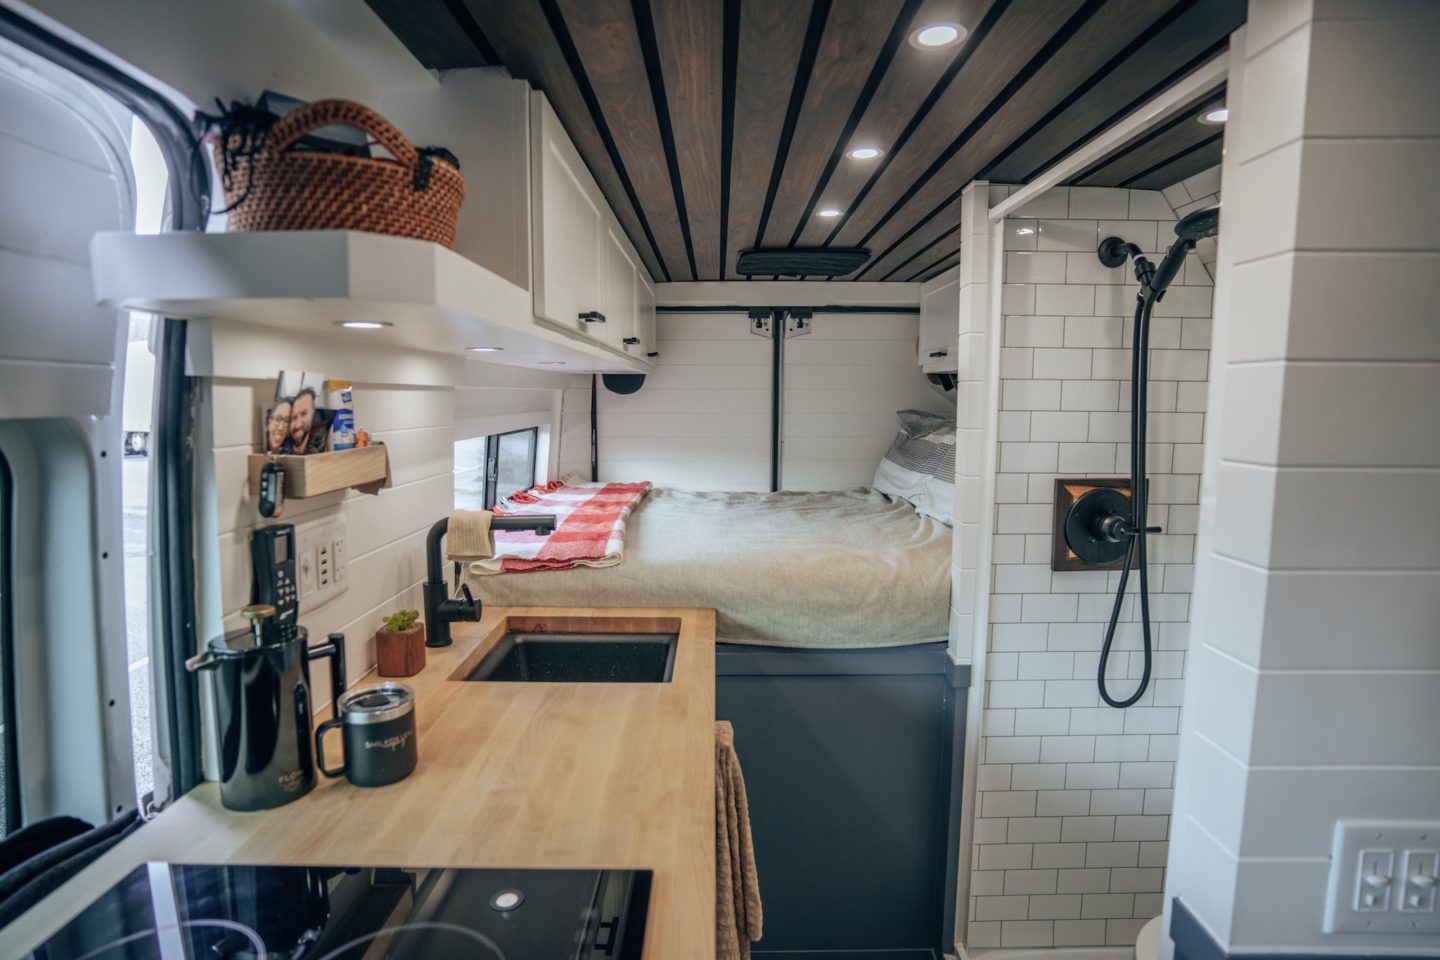
If you read our WHY WE’RE BUILDING A CAMPER VAN article, you know that we bought the ProMaster specifically so that we could build the bed sideways. Of course, your height will help in determining this and since neither of us are over six feet tall, it works for us! This would give us more living space for the hallway, kitchen, bathroom etc. In most of the other models, because of how narrow the vans are, the bed needs to be built from front to back. This takes up a lot more space limiting your options for the rest of the build. The only other option here would be to add wall extensions (or flares) to the side of the van to give you more space.
The second question of stationary versus convertible, this really depends on the amount of STUFF one plans to store in the van. For people who are building for more of a weekend getaway type vehicle, a convertible bed can be much better as this allows you to convert the bed in to a seating area with a table. But for those like us, who were moving in to the van permanently, we knew we would have a lot of personal belongings to store in the van, and we also knew we wouldn’t want to have to convert the bed twice a day. So we opted for permanent!
SHOWER
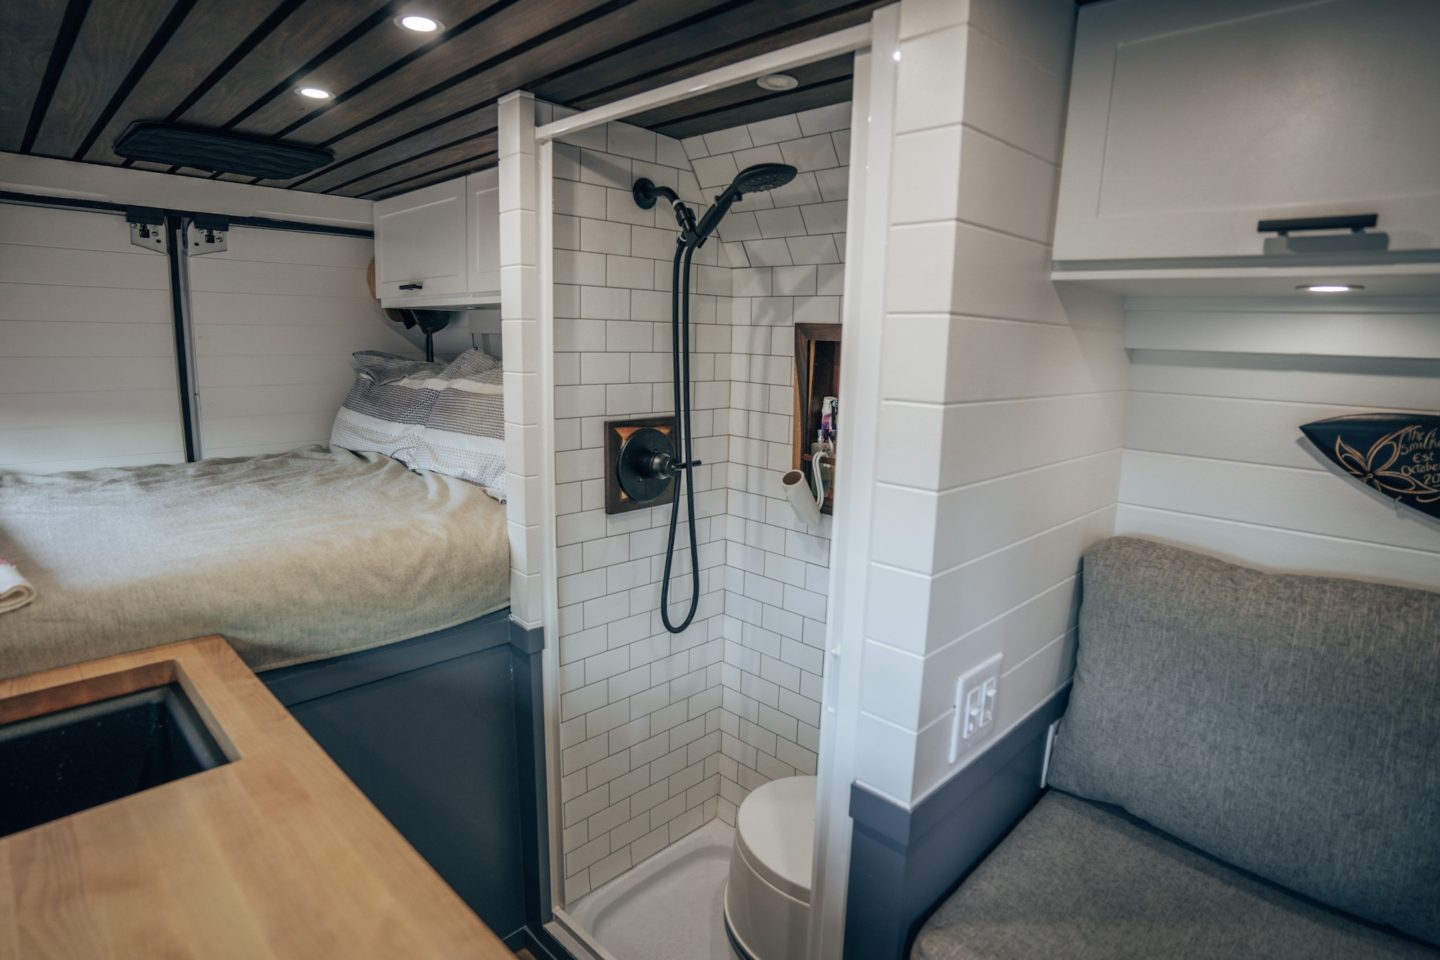
Having a shower in the van, is a definite luxury. It takes up a lot of space, and using it can use a lot of water. Something that is now limited to how much water is in your tank. So many people opt to forego having a built-in shower, and rely on outdoor showering, showering at YMCAs or Planet Fitnesses. But we knew from the start that we wanted a shower. It takes up a ton of space, but we knew we’d find ourselves in cooler climates from time to time, and would not want to shower outside. And we can’t rely on gyms and other places. Having a shower on hand for whenever we needed it, would come in handy. We weren’t wrong.
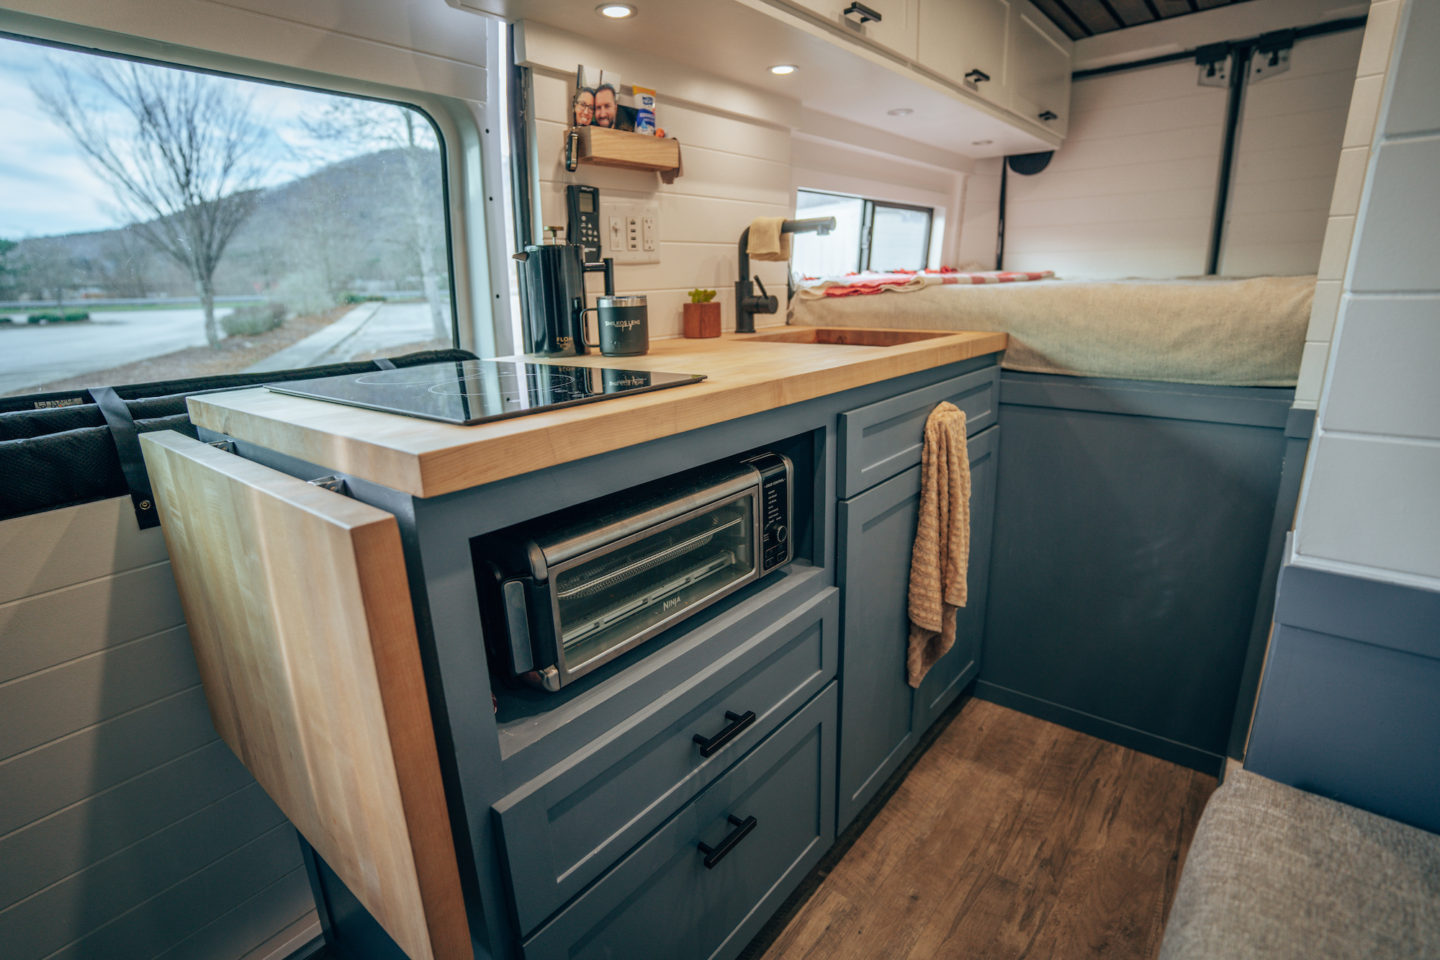
FRIDGE AND FREEZER
Depending on the type of fridge and freezer you want, will more or less dictate your design of your kitchen area. You have the option of getting something like a dorm room fridge, which stands upright and opens from the front. Or you can get something more like a cooler-style that has lids that open from the top. We opted for the Dometic CFX3 75DZ, due to its dual-zone fridge and freezer compartments. This fridge and freezer allows you adjust both the fridge and freezer compartments independently, and from your phone via bluetooth. And we built a couch seating area around the cooler compartment. Thus far we’ve been very pleased with it!
Without getting in to the technicalities of electrical systems too much, the upright dorm room style fridges run off of AC which uses a normal household outlet and plug. In order to run this type of appliance, you need to have an inverter installed in your electrical system that is on 100% of the time since you’ll need your fridge and freezer on 100% of the time. This can be a MASSIVE drain on your electrical system. We didn’t want to worry about or deal with this major power drain. The cooler style fridges can run off of AC as well, or they can run off of DC, which you can think of the cigarette lighter type charging. This does not require a big inverter to convert the energy from DC to AC like the dorm room style fridges, and thus is much more power efficient on the electrical system.
We don’t plan on doing a big electrical system walkthrough or guide, but if you have any questions about this, feel free to ask in the comments below! We’re happy to answer any questions you have.
WHAT AMENITIES DID WE INCLUDE IN OUR BUILD?
Depending on what type of lifestyle you plan to live in your campervan or vehicle, will determine in many cases what types of amenities you’ll want. Here are some of the many options:
- Bed
- Windows
- Fans
- Air conditioning
- Heating
- Fridge
- Freezer
- Stovetop
- Oven/toaster
- Shower
- Toilet
- Sink
- Coffee machine
- Separate seating
- Table
- Awning
- Solar power
For weekend warriors, many of the above amenities may not be necessary. A platform of some sort for sleeping, and external battery power like a GoalZero or Jackery to charge devices like a phone, tablet or laptop can go a long way. But for permanent living, most of the above amenities are necessary in some way shape or form. So it then boils down to what type of these one would want. The only ones we did not opt for in our van, were separate air conditioning and heating. We’ve chosen to follow the temperate seasons and avoid the extremes.
WHAT WERE SOME NON-NEGOTIABLES?
This may be somewhat redundant, but pretty much the entire list above was non-negotiable for us. Given that we would be living full-time in the van, we wanted to make sure it was comfortable and homey. The only item that we found ourselves not needing as much, was a coffee machine. We’ve since moved to using a french press. But what we will say, is as we mentioned above, the shower is one amenity that people tend to be strongly for or against. Knowing that we’d be in warmer climates, and would be spending time at beaches etc, we wanted to have a shower on-hand so that we could avoid having to go to bed all sweaty or covered in sun screen. Yuck!
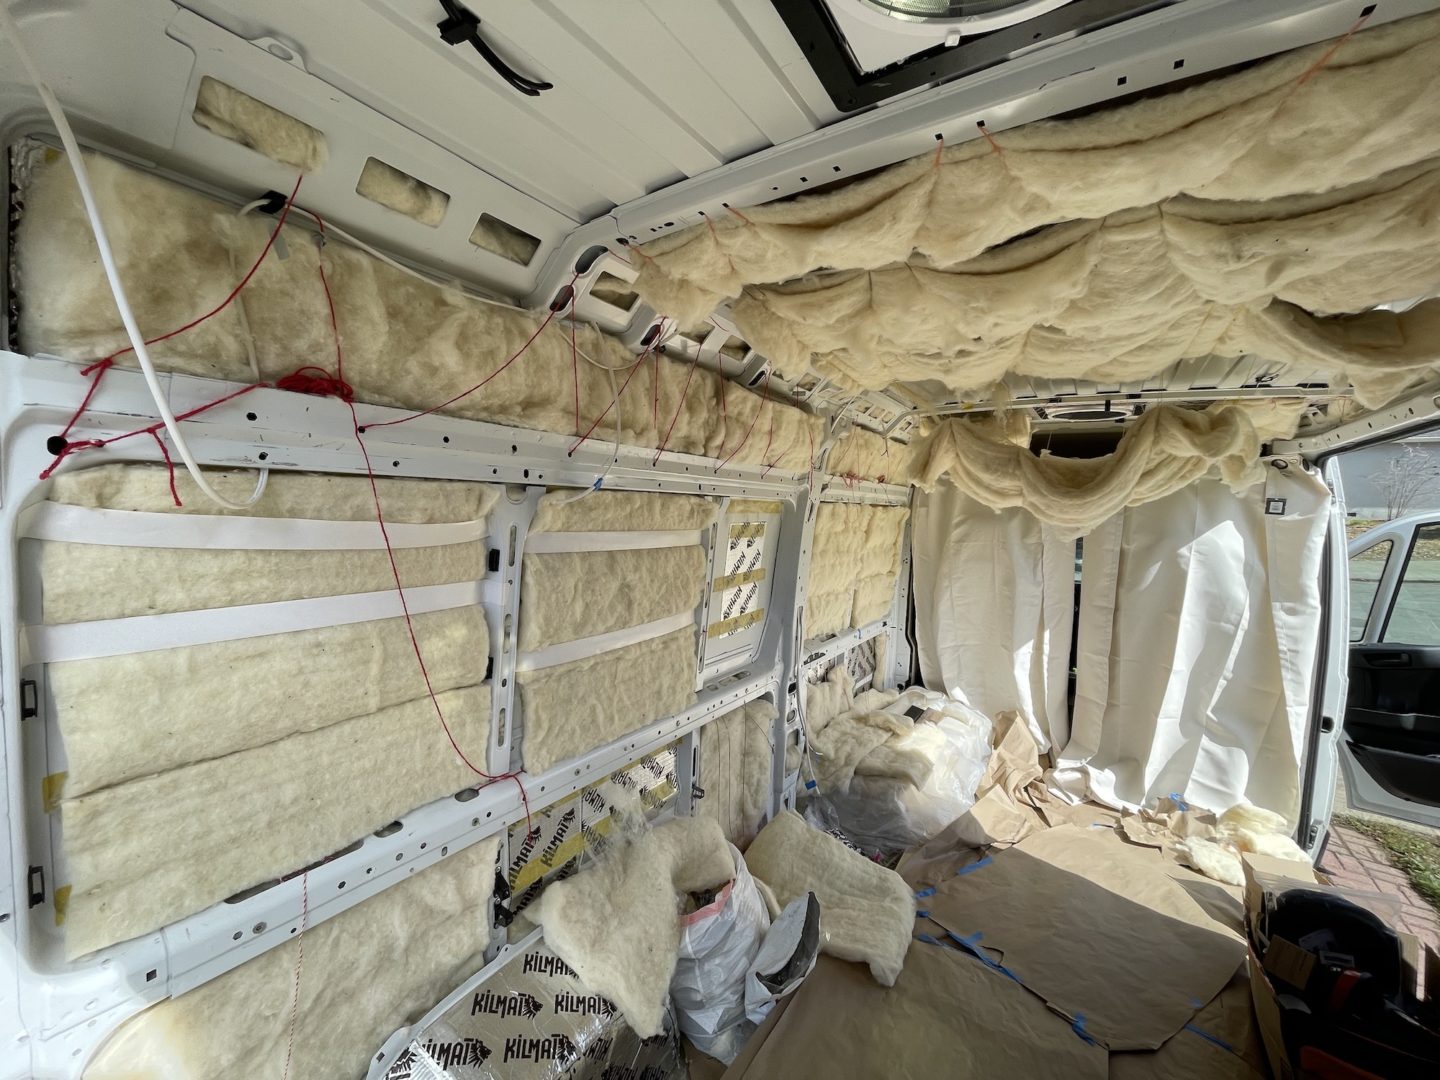
DID WE BUILD THE CAMPERVAN OURSELVES?
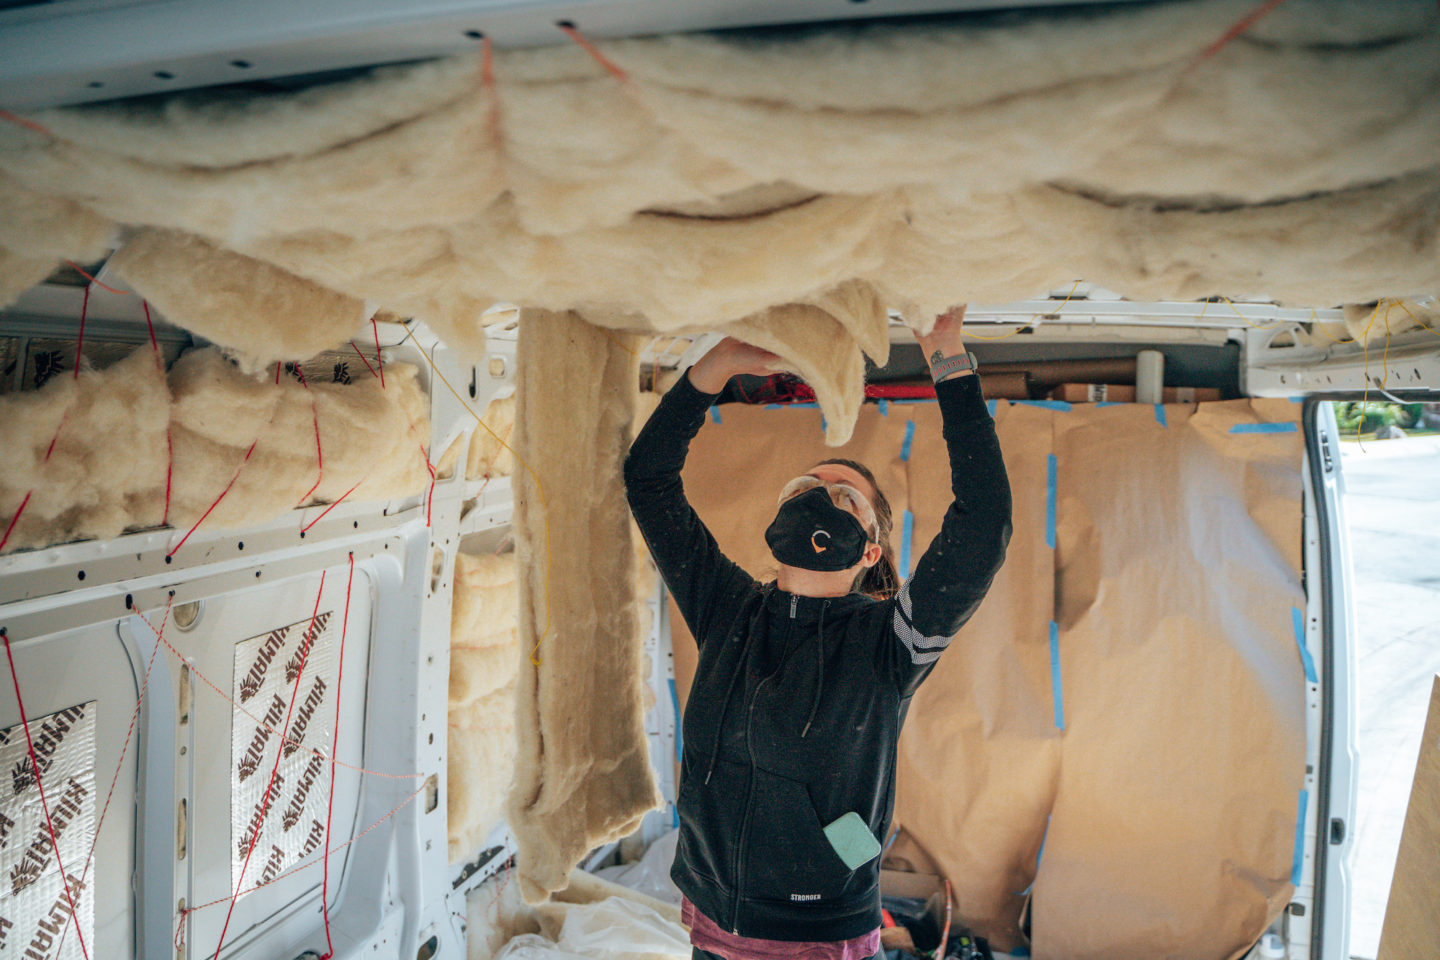
We sure did! And we are so happy and thankful we did! One obvious downfall to building yourself is that you have to put in the time and resources for the build. This means either you have to have the skillsets to do this, or you have to learn real quick! We are thankful that we had Katy’s father to help us with the build, who is a carpenter by trade and had all the tools needed to help us with the build. Doing the work ourselves on weekends meant we could save between $30k – $50k in builders fees. But this also meant that it would take a LONG TIME to build. But we were ok with that.
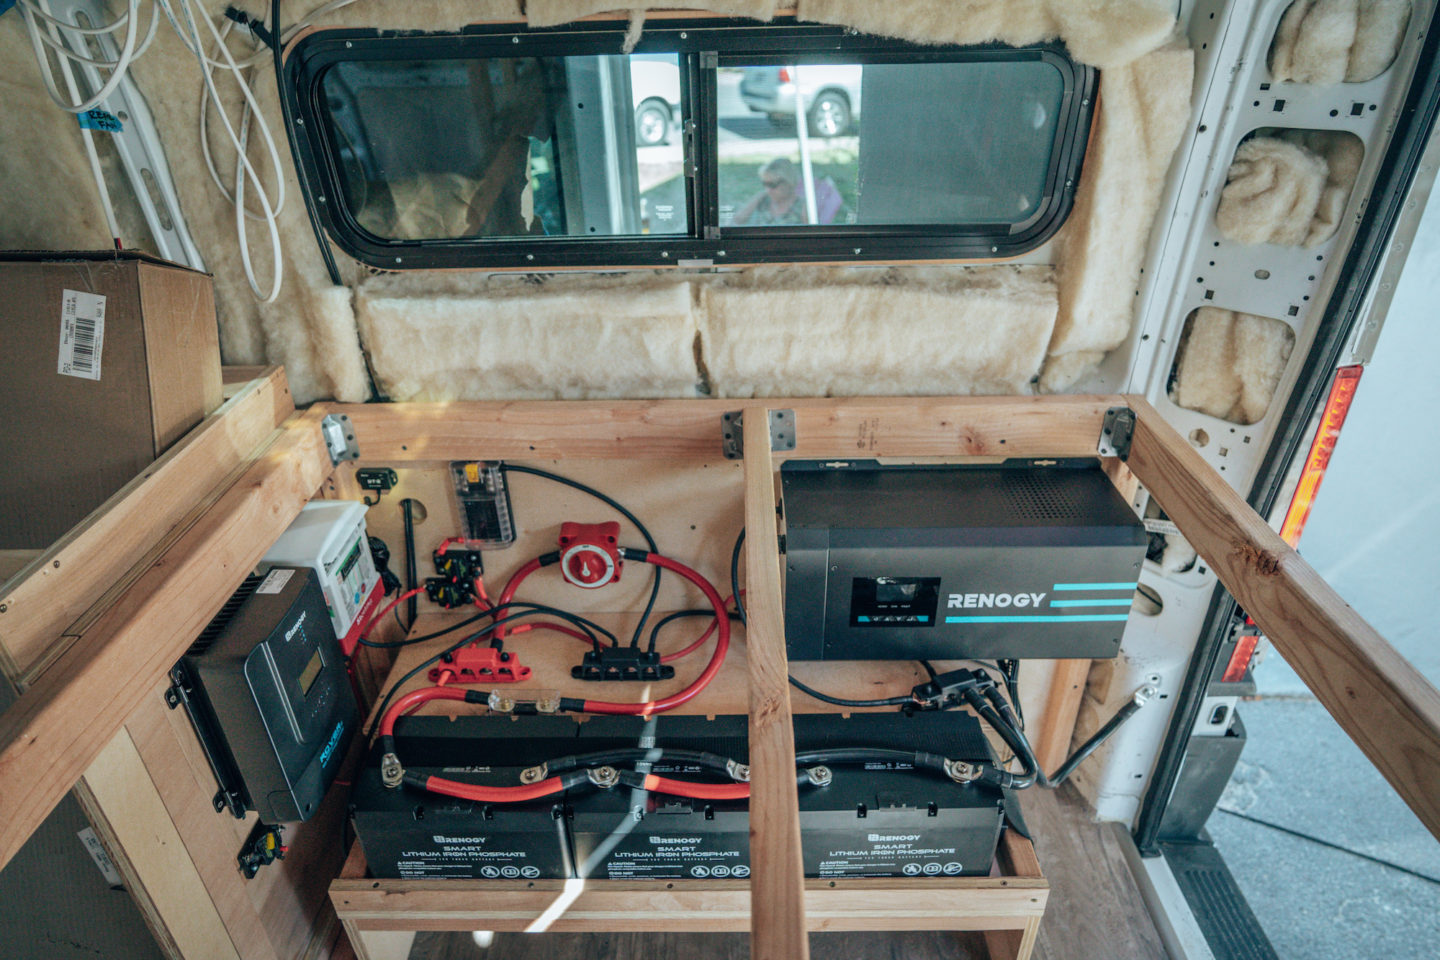
While Katy’s father had all the knowledge and expertise for the carpentry, none of us had experience with the plumbing or electrical. So these were things we had to learn all on our own. We. Watched. So. Many. YouTube. Tutorials… And read SO many blogs, guides and walkthroughs. But we did it! If you’re looking to build your own, here are a few resources we’d recommend checking out:
- Explorist – Electrical & solar
- Far Out Ride – Full guide & walkthrough
- VanSpace – 3D modeling & design
- Vanlife Sagas – Interior design inspiration
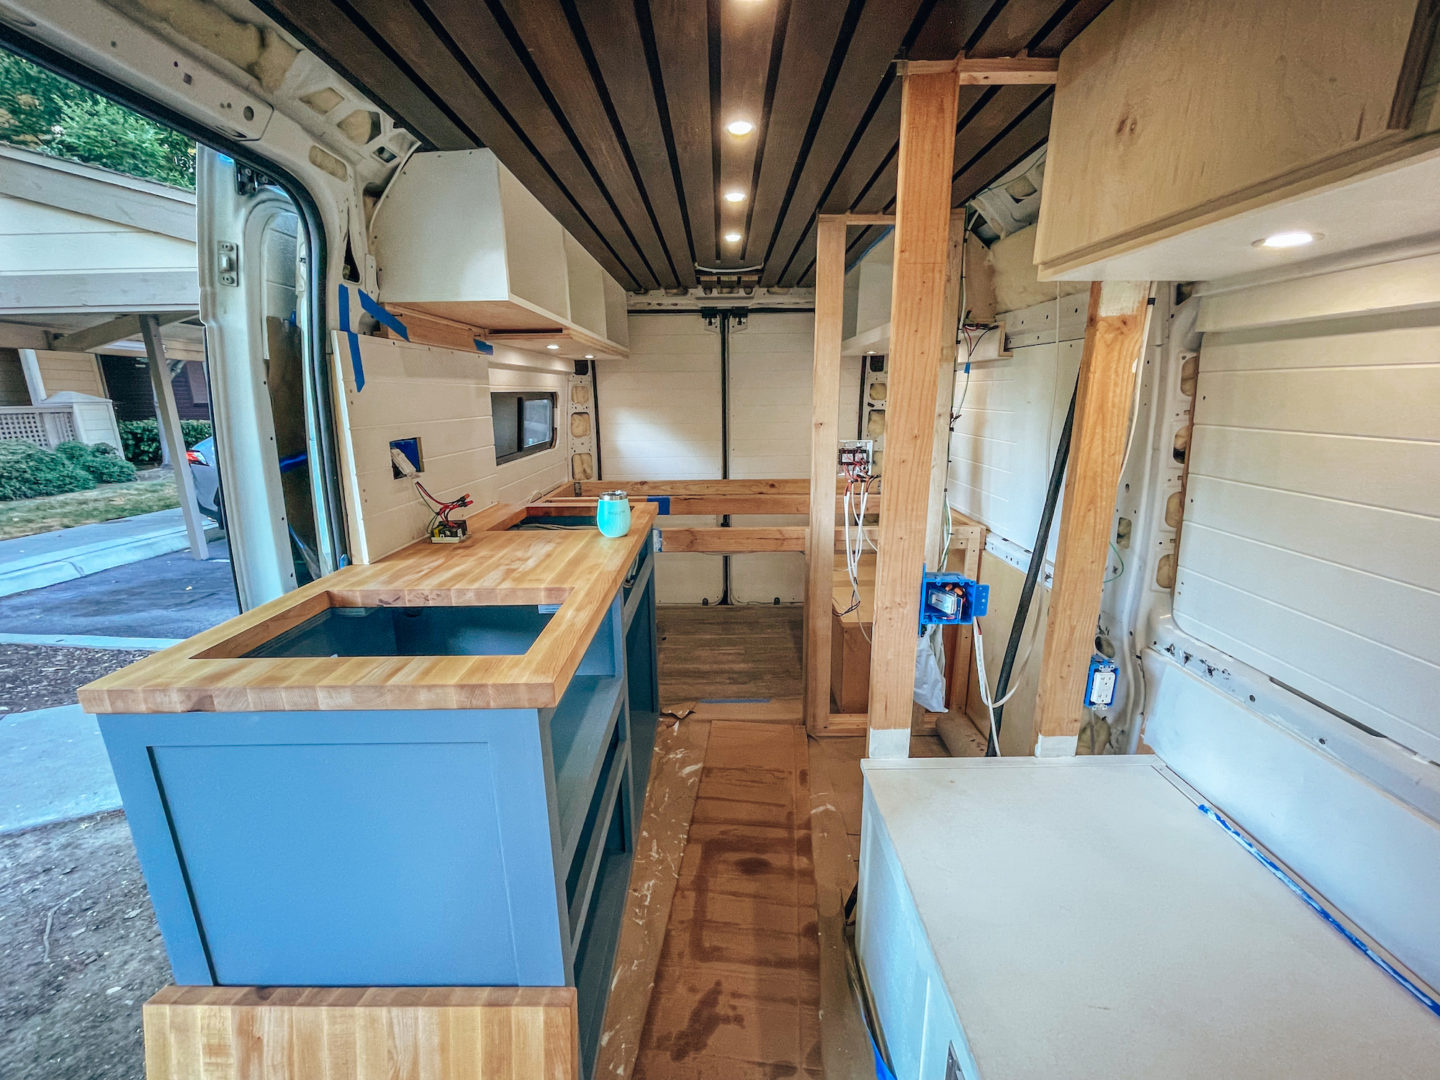
HOW LONG DID IT TAKE TO BUILD OUR VAN?
We mentioned this briefly above, but the build took us 15 months in total. Unfortunately we waited too long to start the build, and while one might think temperatures in California are always 75ºF and sunny, that is not the case. In Northern California, the temps can get as low as 28ºF during the winter over night. This meant doing certain activities like installing the flooring would have to wait until warmer months. Additionally, since we both had full-time office jobs, we could only do work on the weekends. It was long. It was exhausting. But we did it!
WHAT TOOLS AND SKILLSETS WERE NEEDED?
Assuming you plan on doing the build yourself, you will need to have some basic understandings of a few things, or you’ll have to learn them very quickly, or bring in outside sources to assist. And much of this will also be dictated by your design and amenity choices. We could probably write a whole blog article just on this alone, so for now, we’ll just give you a broad list:
SKILLSETS
- Layout & design
- Carpentry & woodworking
- Sanding & painting
- Electrical & solar power
- Plumbing & water
TOOLS
- Screwdrivers
- Power drills
- Impact driver
- Hand saw
- Circular saw
- Miter saw
- Jigsaw
- Portable circular saw
- Oscillating saw
- Track saw
- Compact router
- Belt sander
- Orbital sander
- Caulking gun
HOW MUCH DID IT COST?
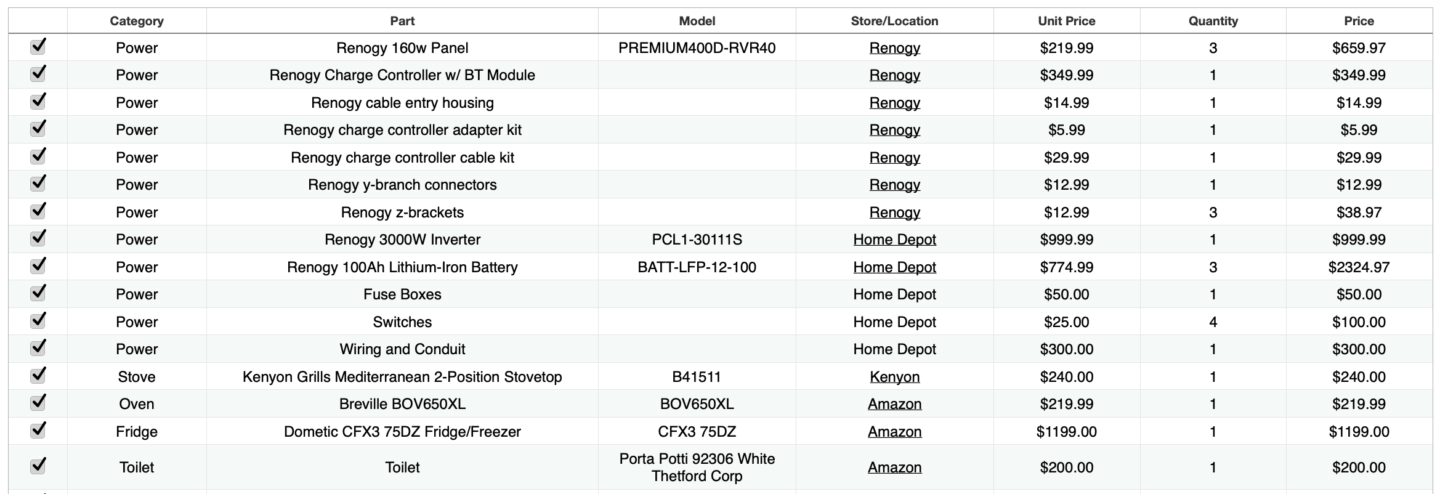
The million dollar question, how much did it cost?! We were seeing custom build vans running for $80k to $100k and up. We wanted to build ours for significantly less while not for skimping on quality or amenities, which was one of the reasons we opted to build ourselves. Full transparency, we bought the van used with a 140k miles on it for roughly $17k. This was one of the cheapest we’d found, but had to fly to Oklahoma City in order to get it. Our budget for the build, which had some flexibility in it, was roughly $20k which would mean the finished product would cost less than $40k total. And we are happy to say that we were able to stick to that budget! While we didn’t calculate and track every penny we spent, we know we came in around $37k.
WOULD WE DO IT AGAIN?
We’ll be honest, we have no interest in doing another campervan build. 15 months was just WAY too long and exhausting. For those 15 months, we had almost no free weekends or vacations. But if we were, we would likely do the build ourselves again, and just be more efficient with our time and get started immediately to hopefully reduce the build time from 15 months to just a few months. For now, we hope to spend as much time and as many years in our van until we’re ready for a new chapter and journey.
WHAT’S NEXT?
So what’s next? Hopefully you’ve read our WHY WE’RE BUILDING A CAMPER VAN article, which explains why we did this in the first place. And we hope this article helped answer some questions about campervan builds and the build process. We’ll soon be writing an article that dives deeper in to van life essentials and some of the specific appliances and items we used in our build, like what type of mattress did we get, what type of stovetop and toaster oven, etc.
And if you aren’t following us on Instagram, go check us out there as this will be the best place to follow our van life journey and adventure!
Thanks for stopping by!